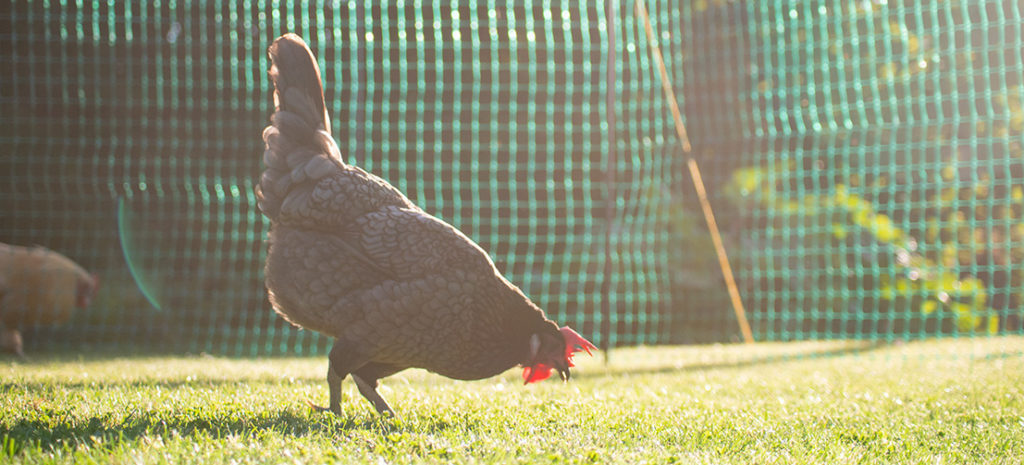
Did you know that over 60% of chicken keepers aren’t getting enough sleep?! Omlet has the solution as they launch the New Automatic Chicken Coop Door.
In the last decade chicken keeping has become a hit with families wanting a slice of the good life, propelling hens into the top ten list of pets. The reasons are clear: a supply of fresh eggs that’s the envy of your friends as well as teaching children important lessons of where their food comes from suggests that chickens really are the ultimate pet.
However, a recent survey found that over 60% of chicken keepers wish they could spend longer in bed in the mornings with many admitting they would be willing to pay up to $400 for a solution that could prolong their lazy mornings in bed! 1 in 6 couples even admitted to regularly arguing about who should let the chickens out. What will save the country’s chicken keepers from tiredness and possibly even divorce?
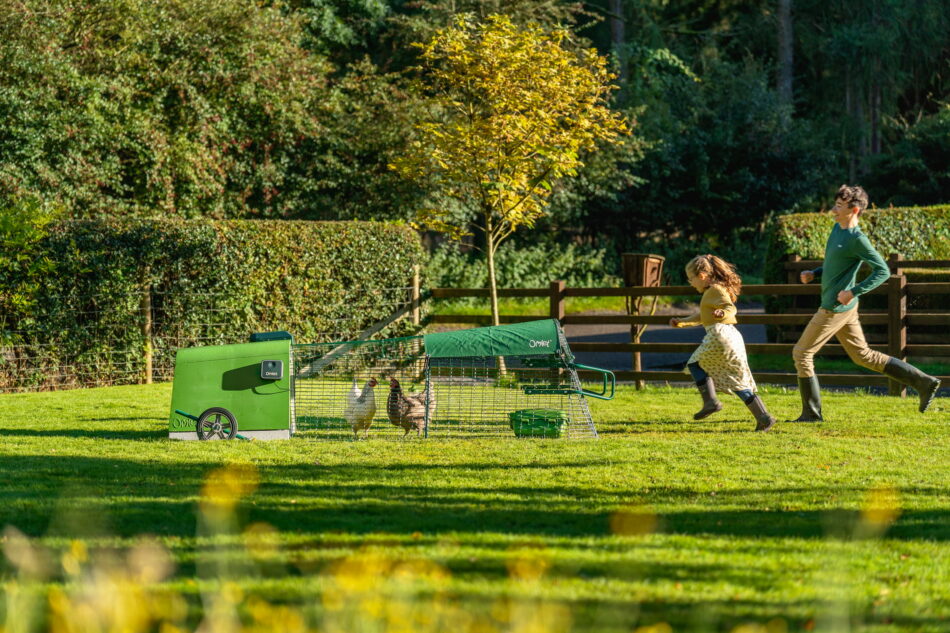
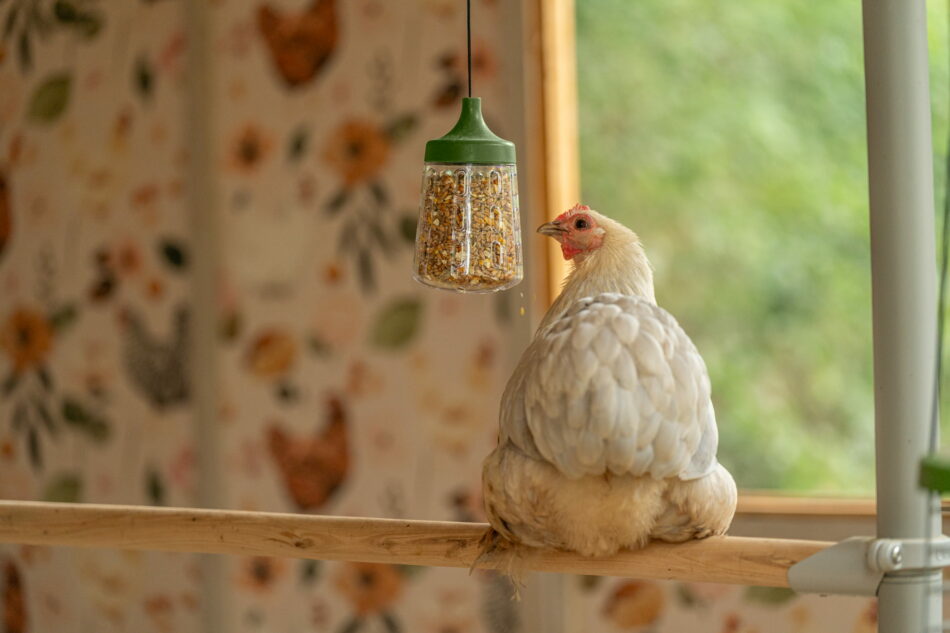
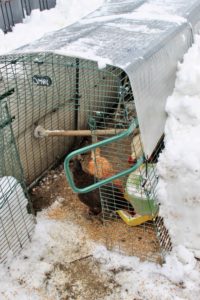
Introducing the brilliant new Automatic Chicken Coop door opener from Omlet. Designed to work with the best-selling Eglu Cube as well as any wooden chicken coop. Omlet’s Automatic Chicken Coop Door Opener is battery powered and combines both a timer and a light sensor, giving you the ultimate flexibility and control.
Omlet’s Head of Product Design, Simon Nicholls, said: “We know our customers love their chickens and always want the best for them, that’s why we designed the Autodoor so that the hens could get up when they want, which can be quite early in the summer. It was also important to ensure that it works as well at closing the coop at night and in all weather conditions too, so we carried out extensive testing in several different countries over 2 years to perfect the design.”
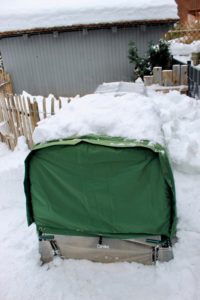
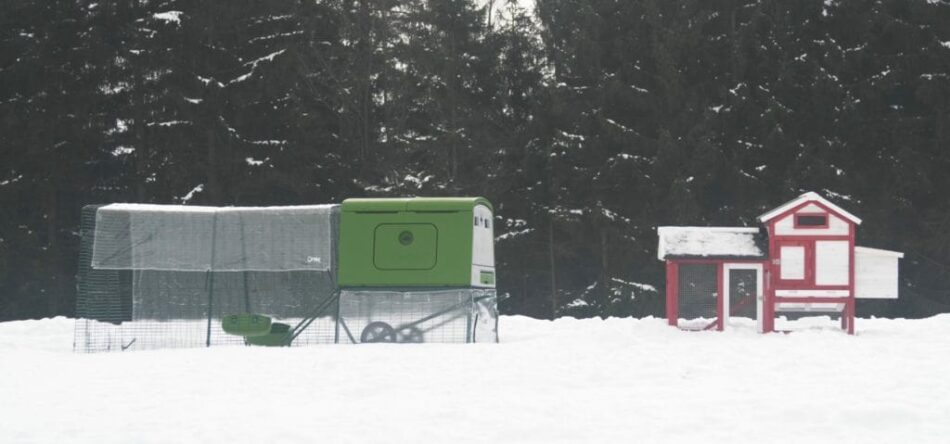
The unique integrated frame and door design comes with everything you need to attach it to your chicken house or run and has been tested to work down to -20 deg C. Like a personal chicken coop concierge, the Autodoor will always make sure your chicken’s coop is securely closed at night even when you’re running late.
Sharon Burton, who has kept hens for 4 years in Oxford, believes the Autodoor has even saved her marriage! “There’s nothing I wouldn’t do for my chickens. I buy them the best food, I sprinkle dried flowers in their nest box to keep it fresh, but I always felt guilty if I didn’t hop straight out of bed at the crack of dawn to let them out and whenever I asked my husband Paul to do it he would pretend to be asleep! When Omlet asked me to test the Autodoor I was delighted, it’s saved my marriage!”
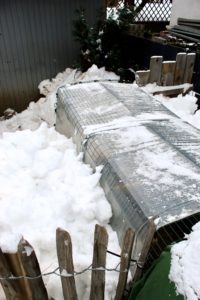
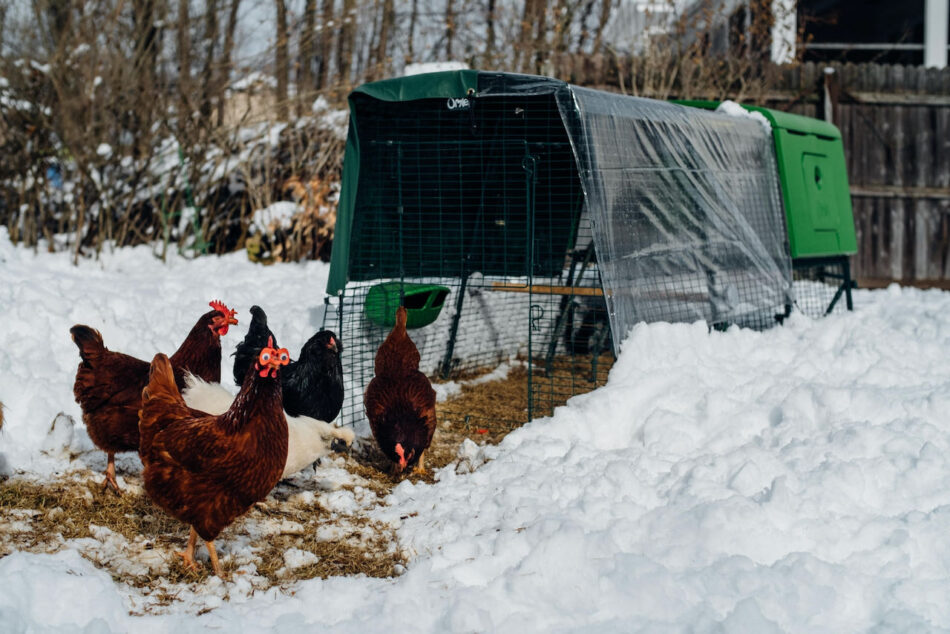
Cold weather can be a worry for chicken keepers but there are ways to prepare your chicken coop for winter. Preparations such as:
Moving you coop closer to your house
Upgrading to a plastic coop
Installing an automatic chicken coop door
Adding a chicken run cover
Adding an extreme temperature jacket
Get your chickens’ coop ready for the colder months and rest easy knowing that your girls are warm and healthy throughout winter.
Take a look at some of our top tips for getting your chicken coop winter-ready.
Move your coop closer to the house
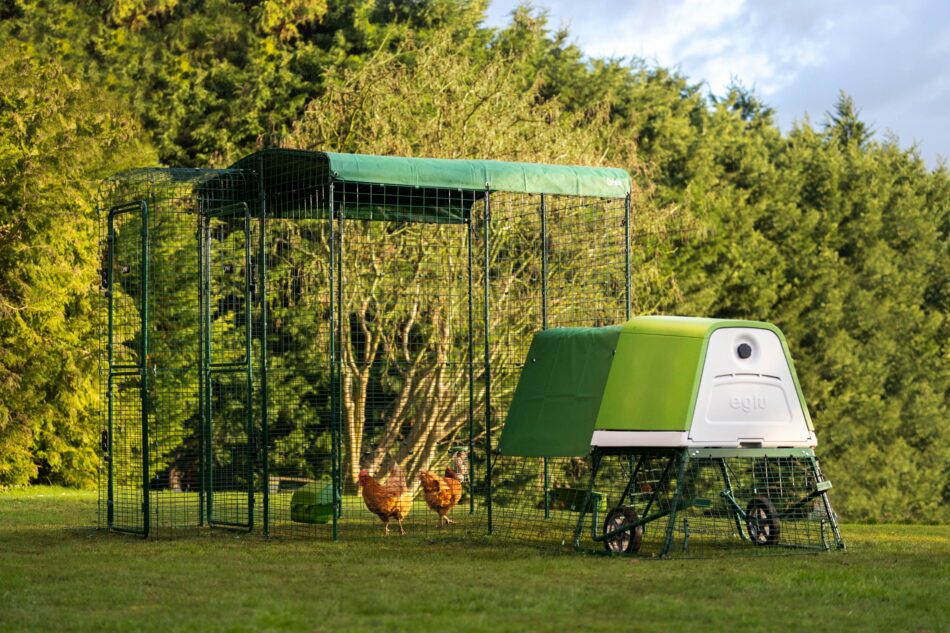
Moving your chicken coop closer to the house is a simple step for making it easier for you to look after your girls and give them their daily health checks, which are even more important in the colder months. Choose a lightweight coop with wheels, like the Eglu, to make it even easier to move it around your yard.
Upgrade your wooden coop to a plastic chicken coop
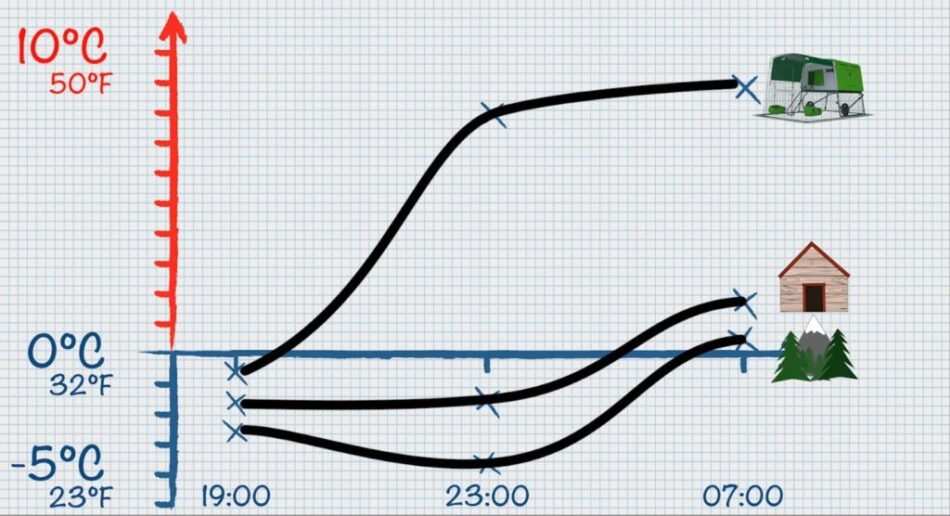
Upgrading your wooden chicken coop to a plastic coop has many benefits. The main benefit of a plastic Eglu Cube Chicken Coop for chicken keepers in winter is the twin wall insulation found in the design of the plastic house. This works in a similar way to double glazing, by creating a barrier between the cold air outside the coop, and the air inside. The air between the two walls conducts poorly, which means inside the house stays at a consistent and warm temperature throughout winter, whatever the weather is doing outside. Chickens are very efficient at keeping themselves warm, all you will need to do is make sure the coop door is shut at nighttime.
Install an automatic chicken coop door
Installing an Automatic Chicken Coop Door is a convenient solution for plastic or wooden chicken coops. You can set the Autodoor to close at a specific time or light percentage to suit when all your girls have gone up to bed and the sun has set. The Autodoor runs off batteries and has been tested to work down to -10 degrees celcius so there is no worry, however cold it gets outside!
The other benefit to the Autodoor is that it will open again at dawn so you can head off to work early before the sun rises and your girls need to be let out, or you can stay in bed for even longer at the weekends without going out in the freezing cold to let your chickens out of their coop!
“The nights are drawing in and I couldn’t be happier knowing that my girls are safely tucked up in bed with their Omlet Autodoor closed behind them. The Autodoor has given me peace of mind, flexibility and a well needed lie in! Couldn’t recommend it enough!” – Hayley’s Lottie Haven
Add a chicken run cover
Chickens are very good at coping in cold temperatures, but don’t like getting wet. Adding a run cover allows them to be protected from the elements when outside in their run. Available in a variety of sizes to suit your run length, the clear run covers protect your girls from wind and rain so they can continue to play whatever the weather, whilst still allowing light into the run.
Add an extreme temperature jacket
When the temperature drops below freezing for multiple days in a row during the very depths of winter, it might be wise to give your chickens extra warmth with an extreme temperature jacket. Filled with a heat trapping recycled material that is breathable, the jackets keep your pets warm and protected from the worst that the weather can throw at them. Preparing your chicken coop for the winter will definitely benefit poorly or older chickens.
Provide Hentertainment
Prevent chickens getting bored when rain stops play with a variety of fun and interactive toys that can keep them entertained in all weathers. The Chicken Perch provides an easy outdoor perch which can be installed in their run (and protected by the run covers) for when your chickens can’t perch in their usual spots around your yard. The Chicken Swing provides hours of fun and again, can be easily installed in any run. While the Peck Toys and Caddi Treat Holder offer enriching entertainment as well as a rewarding flow of treats.
Water Heaters & Chicken Treats
Prevent your chickens’ water from freezing with a water heater to ensure they have access to flowing water at all times. It is also recommended to provide extra layers pellets and treats during winter, as chickens will need more energy to keep themselves warm and lay their eggs in the colder months.
No one wants rats hanging around — much less around areas that you frequent. One of the most common questions we receive from people who are thinking about getting chickens is: will keeping chickens attract rats? The short answer is most likely, yes. But thankfully there are several things you can do to prevent unwanted visitors in the form of rodents – here’s our best tips on how to keep rats away from your chickens.
Risks that rats pose
You don’t have to have musophobia (the fear of mice and rats) to want to avoid seeing them. Wild rats aren’t a fun surprise to happen upon anywhere, but especially not when they can wreak havoc on your flock and their belongings. In addition to being generally unappealing and startling for both you and your flock, rats can:
Carry diseases
Gnaw their way through wood and plastic
Raid nesting boxes for eggs
Rats will even go after young chicks for an easy meal. But, it’s important to note that rats aren’t attracted to your chickens — it’s their feed they’re really after. With this is in mind, here’s how to prevent attracting the attention of these ravenous rodents.
Store and dispense feed properly
Keeping your flock’s feed in airtight containers is the first step in preventing rats. Rats are clever and have an excellent sense of smell, so it’s vital that any feed containers have a good seal and made from thick material. They’re also patient and can learn routines quickly, so if you have rats that monitor your daily activity with your flock, they may learn where the feed is stored. Metal containers prevent rats from gnawing through to the feed they may have observed being stored there.
When you feed your chickens, make sure that your chicken feeders are elevated and deep enough that your hens don’t make a mess when they eat. Feeders with leftover food should be removed from the run each night to prevent opportunistic midnight snackers. Sweep or scoop up any dropped feed from the run floor, and store feeders in airtight containers.
Take care with treats
When you treat your chickens with scratch or other offerings, only toss what you’re confident they will eat by sundown. To avoid waste, feed scratch grains in chicken peck toys, and kitchen scraps in a Caddi Chicken Treat Holder. These can be removed easily at the end of the day, and help keep food from being scratched into the ground. Plus, eating treats this way provides an interesting and engaging angle for snack time that your hens will appreciate.
Collect eggs daily
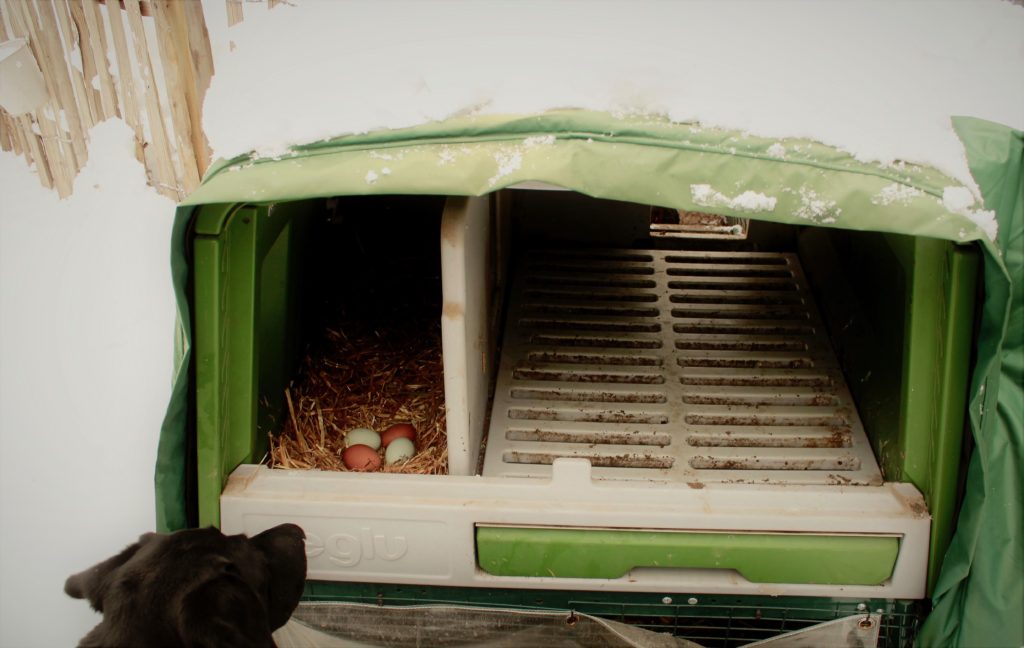
Eggs are a tempting meal for rats, and if they aren’t collected regularly, they can draw rodents in. To prevent piquing rats’ interest, you’ll need to collect eggs every day. This is a good practice to maintain for several reasons, but if you’re worried about rats it’s a necessity. If for some reason you can’t collect eggs for the day, outfit your chicken coop with an automatic chicken coop door that will close at night when rats are the most active.
Employ deterrents
There are a few other things you can do to keep rats away from your chickens. Along with collecting their feed and eggs daily, you can take external measures to deter rodents. From other animals to 90s nostalgia, here are some recommendations for keeping rats at bay:
Keep an outdoor cat around your chickens’ set up
Hang reflective tape or CDs from strings around the run to catch the light and deter rats and other predators
Wrap ¼ inch hardware cloth around the bottom of your chickens’ run, and bury it a couple of inches below the ground
Set motion lights at ground level to be triggered by overnight rat raids
What not to do
When trying to avoid rats in the chicken run, there are a few things to avoid. Some of these measures can pose a risk to your flock, so be sure to never use these around your hens:
Rat poison
Sprays meant to deter rodents
Mouse or rat traps (even humane traps)
Electric fencing can be placed around the perimeter of your chickens’ area to deter rats and other predators, but extreme caution should be exercised so that your chickens, other pets, or children don’t come into contact with it.
Omlet and your flock
Keeping chickens doesn’t have to come along with the potential for rodents. By keeping your flock in a strong hen house with an Autodoor, you’ll prevent rats from being tempted to infiltrate their coop. And, by serving treats in elevated chicken treat holders, you’ll reduce waste in the run for rats to feast on later. With these measures in place, you can enjoy tending to your flock without fear of rodents laying in wait.
So, you’ve decided keeping chickens is a good fit for your lifestyle, but have you decided on what kind of chickens to keep? Chickens come in a variety of sizes and colors, with different breeds offering unique traits. Dive into the world of chickens, and discover how to choose the right chickens for you.
Which chickens are best for me?
Different breeds of chickens offer different advantages, so choosing the right chickens for you depends largely on your family and lifestyle, along with your climate and amount of space available. There’s not a one-size-fits-all option, but many types of chickens can be kept by anyone just about anywhere. And, no matter which type of chickens you choose, remember that all flocks need a weather-proof chicken coop and a space to call their own – whether it be in a chicken run, chicken fencing, or safe area to free-range.
Best breeds for children
Some breeds of chickens are known for their sweet and docile dispositions, which make them a favorite among children. Each chicken’s personality isn’t guaranteed no matter their breed, but some are known to be easier to tame and handle than others. Here are the most common chicken breeds for children:
Size may be of concern for some people, but some chickens are found in miniature form. The breeds listed are “true bantams”, meaning they don’t have a full-size counterpart, but some full-size breeds have bantam versions. These compact breeds are perfect for smaller spaces, but still have big personalities to share with their keepers:
Some chickens are more voracious foragers than others. These breeds can do well in a large chicken run, but they need plenty of space to satisfy their wanderlust. They’re also large and nimble enough to evade several chicken predators, making these a good choice for open spaces:
Good egg laying breeds can produce upwards of 250 eggs per year. These breeds are known to produce eggs year round, and well into their older years. If you’re looking to supply your family with fresh eggs, look no further than these egg-laying superstars:
All hens lay eggs, but some can diversify your egg basket in beautiful ways. White and brown eggs are still beautiful, but if you’re looking for pops of color, you may be interested in adding a breed that lays pigmented eggs. From blue and green, to shades of cream and pink, here are the breeds that lay colorful eggs.
Not all chickens can withstand the heat. In fact, most breeds fare better in the cold than in the heat, but some have natural traits that help them cope with scorching summers better than others. Large combs and light body weights are characteristics that help hens in the hot weather, which are standard features in these breeds:
Most chickens fare just fine in the cold, but just as some breeds are better equipped to handle the heat, some are more cold-hardy. Small combs aren’t as subject to frostbite, heavier builds add insulation, and feathered legs offer extra protection from the cold air. These are some breeds that are built for the cold:
Generally speaking, chickens are easy to take care of. They won’t overeat, so their feed can be left out at all times, and as long as they have access to fresh water, they’ll slake their thirst when the need arises. But some breeds may require a little extra attention than others.
Ornamental chickens have feathers that can get muddy or caked in debris. These breeds include:
The feathering of these breeds can also make them more susceptible to extreme temperatures, which is especially true for Frizzles and Silkies. This is because their fluffy feathers don’t help them regulate their body temperature as well as their sleek-feathered friends. If you live in a climate that experiences extreme temperatures, or if your property has a tendency to get extremely muddy, you might want to consider other breeds.
Omlet and your chickens
No matter which chickens you choose, they’ll be fortunate to have an owner that puts in the research to give them the best possible home. By housing your hens in safe chicken coops, spacious chicken runs, and providing them with one-of-a-kind chicken toys and accessories, you’ll be your flock’s favorite person. By providing for their basic needs, and then some, you’ll build a bond with your birds that will span a lifetime.
Ever heard the expression ‘cooped up’? It means being stuck indoors with nothing to do, resulting in frustration and boredom. We tend to lock hens in a chicken coop, and that’s where the saying comes from.
A hen kept in a shed with nothing to do will soon start to show all the signs of boredom, just like a human. She may start pecking at her neighbors or plucking out her own feathers. If blood is drawn, the other hens will often join in the beak-attack, and hens can actually be killed in a frustrated frenzy of pecking.
With nothing better to peck and scratch at, chickens may also start to eat their own and other hens’ eggs. Once a chicken becomes an egg-eater, it’s very hard to make her kick the habit.
Bored birds will also tend to sit in the egg box all day, and may become weak through lack of exercise. Boredom also causes stress, and stress can bring egg production to a temporary halt.
Bidding Bye-Bye to Bantam Boredom
As usual, prevention is the best cure, and there are many ways of stopping boredom from becoming a problem in the chicken run. The general rule is simple enough – don’t keep hens cooped up!
Room to Roam – Give your chickens as much outdoor space as possible. If they have a garden or meadow to peck and scratch in, that’s ideal. You don’t have to worry about rounding the birds up in the evening – as soon as the sun dips in the west, hens instinctively head for the safety and security of the coop. All you have to do is close the door behind them.
Weather the Storm – A day spent indoors is a day of boredom for a chicken. They should only be confined to the coop if the weather is particularly bad. A bit of rain, snow and wind will not harm them, no matter how unpleasantly muddy the run may look to you.
Fowl Play – Chickens need stimulation, like most animals. Provide plenty of perches for roosting and resting, along with ladders, and a few pots, tree stumps or ornaments of different heights for them to clamber on and off. Many hens enjoy a chicken swing, too, as if they were parrots in a previous life.
Treats to Eat – Concealing a few tasty treats in the undergrowth or on ledges is a great way to keep hens entertained. Pack tasty titbits into a wicker ball, place it on the ground, and watch your hens enjoy a game of football as they eat. Alternatively, hang greens or a veg-filled Caddi just out of reach, so that the birds have to jump to get a beakful. Shop-bought or homemade suet-and-seed pecking blocks keep them coming back for more, too. The treats should not be overdone, though, as healthy diet is an essential part of good chicken care.
Making Hay – A pile of hay, straw, leaves or garden compost will give your hens something to scratch and rummage through, and they will find probably a few tasty worms and beetles to eat during the fun. Piles of vegetation will be leveled in no time at all – chickens remove piles, you could say!
Novelty Value – Chickens will be fascinated by anything new in their runs, even something as simple as a box or tray of straw, or an old brush. They are also fascinated by their own reflections, so an old mirror can be a good distraction. An old alarm clock or large watch with a reflective glass surface and a loud tick will intrigue them, too.
Dust to Dust – A dust bath goes down a treat at any time of year, not just in the hot summer months. If the weather is wet, you could provide a dry earth bath in a sheltered part of the run or coop.
Quality Time – Don’t underestimate the importance of interaction with your hens. Once they come to trust you they will relish your company, like any other friendly pet. Admittedly this can sometimes get a little out of hand, when hens start to flap onto the garden table to see what you’re eating, drinking or reading!
Boredom really doesn’t have to be a problem in the chicken run. As long as your hens can satisfy their strong scratching and perching instincts, and have a little fun along the way, they will remain healthy and happy.
Most flocks of chickens have a routine that their keepers can expect each day. Morning rise and shine, maybe a quick breakfast and romp around the yard, and back to the coop to lay eggs in the nesting box. But what happens when you suddenly don’t find eggs in the nesting box around or after their usual time? Or worse – several days go by with fewer eggs where they should be? There are many reasons why chickens hide their eggs, but we’ll show you how to stop them from doing it.
Why do chickens hide their eggs?
There may be an obvious reason your hens are hiding their eggs, or it may be a combination of external factors. Usually, it’s a problem with the chickens’ nesting box. If conditions are not favorable, hens will seek out alternative locations that may make them feel more comfortable – leading you on an egg hunt each day. Here are the most common qualms hens have about their nesting areas that may cause your chickens to hide their eggs.
Short on space
Each flock is different, but the safest nesting box-to-hen ratio is 1:4. Some hens may be happy to share the same nesting space as 6 or 7 other chickens though, so keep an eye on your numbers. If you notice your hens avoiding the nesting area shortly after adding new flockmates to the mix, it’s probably time for an additional nesting box.
Feeling vulnerable
Nesting areas should be quiet, secluded, and comfortable. If there’s too much commotion around the coop, your hens are more likely to go off in search of a more private area to deposit their eggs. Elevated coops with secluded nesting areas are ideal for making hens feel safe and at ease.
Unfavorable bedding
Bedding that hens can manipulate into a nest shape is a favorite among flocks. Thin straw, shavings, or wood fiber make great nesting box bedding. Hens will shift the bedding around to make a donut shape to keep a clutch of eggs safely contained. Stiff substrates like rubber pads, thick straw with little to give to it, or artificial turf are not ideal for creating a welcoming nesting area.
Broody hens
If you have a broody hen in the coop, it’s likely to affect all of your layers. A broody hen will fiercely protect their nesting area and the eggs they’re sitting on, which will deter any other chickens from laying there. And, if a broody hen is occupying the sole nesting box for the flock, other hens will be forced to seek alternative options. Breaking a broody hen is essential to getting the entire flock back into their regular routine.
New layers
Pullets (young hens under a year old) that are new to laying might not catch on right away that the nesting box is where they should lay their eggs. It’s not uncommon for young hens to lay their first few eggs in random locations – in fact, the urge to lay an egg might sneak up on a pullet so quickly that they’ll simply lay an egg wherever they are and continue on with whatever they were doing.
Mites
They may not be visible to the naked eye, but if all of the other conditions are right and your hens are still avoiding the nesting box, it may be due to mites. Mites irritate chickens that come into contact with them, causing intense itching and discomfort. Make sure that your nesting boxes are made of materials that are not favorable to mites and can be cleaned thoroughly. Plastic chicken coops and nesting boxes are the easiest to thoroughly clean, and do a great job of preventing mites in the first place.
Ways to get your hens laying in their nest box
Once you’ve identified and corrected any issues with the nesting box, it’s time to redirect your hens back to their designated laying area. You’ll need to seek out where they’ve been laying their eggs in the meantime. Under the chicken coop, in or under other structures like barns or sheds, between hay bales, and in areas with thick grass or bushes are common places hens will use as alternative nesting spots. If your flock free ranges, you’ll want to keep them inside of their run for a few days to reacquaint them with their new and recently improved nesting box.
Clean the nesting area out at least once a week
Keeping the nesting area clean will help encourage hens to continue laying eggs there. If you have an Omlet chicken coop, simply slide out the droppings tray and pressure wash or wipe it clean, and refresh the bedding for a clean coop in seconds. However, it’s not normal to find droppings in the nesting area itself unless hens are roosting there overnight. If you find droppings in the nesting box regularly, it’s time to add more roosting space.
Decoy eggs
Wooden or rubber eggs can be placed in the nesting box for pullets to get an idea of where to lay their eggs. It can also serve as a reminder to more seasoned hens that the nesting box is where eggs should be laid. You can also place a fresh egg that your flock previously laid in the nesting box to serve as a decoy. Be sure to only use one decoy egg, as a full nest can serve as a deterrent to hens rather than motivation.
Collect eggs regularly
While fresh eggs can be left in the coop for several days and still be edible, it’s good practice to collect eggs every day or two, depending on your flock’s laying frequency. Too many eggs lead to a crowded nesting area, which can deter hens from laying there. Gathering eggs regularly helps reduce the chance of them getting stepped on and broken by other chickens, decreases interest from predators, and ensures optimum freshness.
Your hens and Omlet
Keeping your hens on task with their nesting routine doesn’t have to be difficult. With our large, innovative Eglu Cube Chicken Coop, your flock will have plenty of room to roost without encroaching on the nesting area, an elevated station to feel more protected, and privacy while laying thanks to a dividing partition. Our chicken products foster the natural urges and patterns that drive hens to lay their eggs – taking all the guesswork out of keeping your flock healthy and happy.
Red mites are a sure way to put a damper on your flock’s coop life. Learning how to protect your chickens from red mites is essential for their overall health and happiness. While pesky and persistent, red mites can be prevented and treated – especially when you have the right setup.
What are red mites?
Red mites, or Dermanyssus gallinae, are small, red parasites that lie in wait in your chickens’ coop, ready to strike during the nighttime hours. Often known as one of a chicken keeper’s worst foes, these tricky little bugs can prove challenging to locate and eradicate. Being nocturnal, they hide in the nooks and crannies of wooden chicken coops and roosting bars, and sneak their meals of chicken blood while your flock sleeps.
How do I know if it’s red mites?
Red mites are most active in the warmer spring and summer months. The first symptoms of red mites infiltrating your flock will be distressed or lethargic behavior. Bites from red mites are itchy and uncomfortable, and since they prefer to feed through midnight snacks, your hens won’t be getting their required beauty rest. Your flock may appear sleepy, or display scratching or excessive preening behaviors.
As the infestation progresses, your hens can become anemic through losing too much blood to the parasites. Their combs and wattles may appear pale rather than red. You may also notice a reluctance to go to roost at night, as they will have come to associate roost-time with painful bites.
How to remove red mites from your coop
If you’ve come to the conclusion that your flock’s coop is under attack from red mites, you’ll need to take quick, aggressive action against them. Clean the coop thoroughly, removing all bedding, nesting material, and all detachable components like roosts or racks. Scrub the coop thoroughly with warm water, and clean any feeders or waterers. If possible, use a pressure washer to clean the coop and its components.
Once the coop is cleaned, leave it to air out in a well ventilated, sunny area. If you see mites making their escape, wait 10-15 minutes before pressure washing again. After any repeated washings, allow the coop to dry fully, and then treat it with a red mite product that is safe for chickens. There are powders or concentrates to mix with water and spray onto affected areas, so choose which you’re most comfortable working with. Diatomaceous Earth (DE) is also an excellent choice for preventing and treating red mite infestations, and it’s perfectly safe for your flock. You can add this ingredient to your chickens’ dust baths, or sprinkle it directly into their feathers.
How to treat chickens for red mites
If your flock has been infested with red mites, you’ll need to treat any affected chickens along with their coop. DE will kill the existing red mites, but your chickens’ skin will likely be raw and sore from the bites. There are other homemade remedies like garlic or other herbal sprays that will kill mites, just be sure that all of the ingredients are safe for chickens. Apple cider vinegar and electrolytes in your flock’s water will help boost their energy and healing, as well as promote healthy feather growth. If your flock appears to be anemic, ask your veterinarian for advice on any other supplements that might be beneficial. Treat bare areas where feathers have been preened out with anti-peck and healing topicals for chickens.
Preventing red mites
It’s far easier to prevent red mites than it is to treat them. Choosing a plastic chicken coop eliminates the fine cracks and crevices that wood allows for red mites to hide in, and they can be pressure washed and cleaned in mere minutes with little dry-time afterward. Wooden chicken coops have far too many opportune hiding spots for red mites, making them hotspots for the offending parasites.
In addition to having a plastic chicken coop instead of a wooden chicken coop, you can treat the inside of the coop and the ground around the coop with DE to act as a natural deterrent for red mites. Regular cleanings will help keep parasites of all varieties at bay, and will ensure that your flock stays comfortable during peak-pest season. And, unlike wooden coops, plastic chicken coops don’t need to be treated with sprayed insecticides to prevent red mites.
Omlet and your flock
The smooth surfaces of Omlet’s plastic chicken coops prevents red mites from setting up shop, and will keep your flock comfortable all summer long. Worried about outside of the coop? Our chicken toys and perches are all made from mite-resistant materials to ensure that your flock can have their fun without the threat of parasites. Combined with a walk in chicken run for plenty of outdoor space, your chickens’ setup will be perfect and parasite-free for the summer, laying the groundwork for those leisurely days together.
As an Omlet Ambassador I’ve heard that line hundreds of times at trade shows and expo halls all across the United States. However, as a former DIY luxury chicken coop builder and longtime Omlet Coop owner I would like to set the record straight and explain why on Omlet Coop is the best purchase a backyard chicken tender can make.
This was my pride and joy:
A luxury coop that is Pinterest worthy and constructed of the best materials I could get my hands on. It has a radiant barrier roof that I shingled! It has a skylight in the middle that is UV blocking and tinted so as to only protect against the harsh and hot Texas sun. We used metal bracing on every corner to make sure we were squared up and secure. There are hundreds of screws holding up the double layer of hardware cloth. Literally, hundreds of screws. I used pressure treated wood that was rated for ground contact and further sealed with deck sealant. I used fiber cement siding that was rated to withstand hail impact and wind thrown objects. No expense was spared in building the Fort Knox of chicken coops that I thought would last a lifetime. I even ordered special chicken shaped handles for the coop doors:
Why is an Omlet Coop a better buy than building a DIY coop?
Experience should not be underestimated when lives are on the line
Omlet was founded in 2003 and has been innovating since. That is over 16 years of experience in building chicken coops. That is 16 years of predicting and preventing predators from getting chicken dinners. The average DIY’er that I meet at trade shows or talk to on forums such as BackYardChickens.com is a first-time chicken owner who hasn’t witnessed the creativity and determination of predator animals such as raccoons, foxes, and even neighborhood dogs.
Included in the price of each and every Omlet coop is 16 years of research and development to give us chicken tenders the best possible home for our flocks. That is 16 years of perfecting the Omlet Coops that get delivered to front doors all across the World. I cannot emphasize this enough because it is the most important factor in why I chose Omlet over DIY’ing another coop. It is not 16 years of making the same old coop over and over again like you’ll find at Tractor Supply or the local hardware/feed store. It is 16 years of constant innovation and stalwart dedication to making the safest coop on the market. While you read the rest of this please ask yourself whether you think a few google searches, a Facebook group, or in my case a Pinterest post can compete with 16 years of on the ground experience with thousands of models sold and tested across not just the US but the world at large. Think about the chickens you will soon be bringing home to live in the coop. Do you trust their lives to a weekend DIY project? Also, if you have kids and they are involved with the chickens then please consider the trauma of them waking up some day to find that a raccoon has turned their favorite hens into a recreation of a CSI episode with a headless hen as the victim. The cost may be steeper up front, but I can personally assure you that it will be more than worth it in the end for the peace of mind, the portability, the cleanliness, and so many other reasons.
DIY may seem like the cheaper route but I can assure you that the first time you wake up to find your favorite hens dismembered by a racoon or de-feathered and half eaten by a fox the last thing on your mind will be how you saved a couple bucks here and there. Why go through the heartbreak of losing hens and then spend the next couple days having to drain your wallet to renovate and repair the coop? Also, once a predator gets into your coop once they will keep coming back for more. They will poke, pull, and attempt to gain access in any way possible since they now know that an all you can eat chicken dinner is just inside. Why not stop them the first time so they never even consider coming back?
Materials
The most commonly encountered coops on the internet are constructed of wood. Wood can either be treated or untreated. Treated wood is wood that has been infused with copper products under extreme pressure in order to give it a few extra years of protection against Mother Nature.
However, treated wood does not protect against the ammonia rich droppings left behind by fluffy chicken butts. Chickens do not urinate and defecate separately like us humans do. Instead they combine the two acts and their droppings are highly concentrated and highly corrosive to many materials. This results in an accelerated rate of decay and decomposition of any and all wooden components of a DIY coop. This is a hugely important point to consider because decaying wood is similar to rotten wood in that it is incredibly fragile, and fragility is not something any chicken owner wants when it comes to their coop. The only way to circumvent this is to be diligent in replacing decaying panels as soon as you notice the first signs of decay. Mind you, this requires purchasing more materials, expending more of your time performing the labor to remove the decaying parts and reinstalling the new parts, and adds undue stress to your flock as you tinker with their home.
Of note, there are various sealants and paints that can be used on both treated and untreated wood, but my firsthand experience showed that these only served to prolong the inevitable as they too decayed. Furthermore, I would caution against their use as they can become a health hazard for your flock. Chickens will eat just about anything they can fit into their beaks so as the paint and sealant begin to crack, chip, and flake off the chickens will pick at the cracking paint or sealant and will quickly eat any flakes they can knock off or catch on the ground. I am not a veterinarian, but it certainly doesn’t take one to warn against the well-known dangers of ingesting paint.
Omlet coops are made out of a high-density plastic polymers that are non-porous and designed to be durable against both Mother Nature and any mother hen. The corrosive droppings from your chickens do not affect the durability of the Omlet coop and will not cause it to degrade or deteriorate with wood. It will stay strong for decades or more without any need to repair, replace or renovate.
Chicken wire, I would like to just say to stay as far away from this as possible because every week I hear from people who used chicken wire only to discover their coops broken into and flock decimated. Chicken wire is good at containing chickens but is absolutely worthless for keeping predators out. Raccoons can reach their hands through it and can pull it apart in under an hour. Coyotes, foxes and neighborhood dogs can easily bite and pull it apart. Snakes slither right on in without trouble.
The other wire that people commonly use is hardware cloth. This is what I used when I first built my own coop and it does work for a while. However, over time it will sag, and it is not meant to bear weight well. It can prevent predators most predators for a while but it is far from impenetrable and without proper installation and constant checks it can easily fail and need replacing.
The run components are made from welded steel panels. I could go further into detail about these, but I think the picture below is worth a thousand words:
Portability
It was a sad day when I had to leave behind the Pinterest quality barn-inspired coop because we sold the house and couldn’t haul off the coop without hiring a forklift and crew to load it onto a flatbed.
Thankfully, that will never happen with Omlet Coops. They are portable when fully assembled and they are also so easy to disassemble and flat pack that I can now fit our multiple coops and run attachments into the bed of my pickup truck with ease. In fact, I had to do just that when we moved from Tulsa, Oklahoma to Austin, Texas.
Modular and Expandable with ease
One of the hardest parts about designing and building a DIY coop is that you have to know how many chickens you want from the start. That may seem like an innocuous task but there is a phenomenon known to chicken owners as “chicken math.” It is something I have encountered first hand and been a victim of. In what started with 3 chickens has now since expanded to 31 chickens and counting. Our barn inspired chicken coop was meant to house 5-6 hens at a time and any sort of expansion would be extremely costly and require cutting into, and compromising the structural integrity of the original coop to attach any expansions on it.
Our Omlet coop expanded with us and we are already saving up for another full-size WALK-IN-RUN to add. Attaching any sort of expansion or add on is literally a 10-minute job. Due to the modular structure of the Coop and the Walk-in-Run all that has to be done is clip on the new expansions to the existing ones.
Cost
The total cost of the Pinterest coop that I build was around $1600. It fit 5 chickens comfortably and held up for just short of 2 years before we started to have to replace parts and deal with decay.
Chicken coops from Tractor Supply range from $250 to over $1,000. However, most of these have wooden components that will break down and need replacing so you will have to throw money at it regularly to keep it functional.
There are a handful of plastic polymer options at TSC but none of them allow for attaching a run, or any sort of modular upgrades that will allow you to grow your flock or custom tailor your coop to your yard. Therefore, you will end up spending well over the cost of an Omlet coop for something that is not designed to fit together and is not as adaptable and flexible as a product from Omlet’s ecosystem.
Peace of mind knowing all of the “What if’s” have been accounted for.
As stated above, Omlet has more experience in this field than any DIY’er. They have answered all of the if, and, buts, and what ifs with first hand experience. The peace of mind that comes with being able to purchase an all in one coop that will last for decades, keep the flock safe, and be adaptable to your future needs is worth more than saving a few bucks by risking all of that.
It’s a lovely summer day – the sun is out, the colorful flowers in your backyard are in full bloom. The bees are buzzing, the vegetables are thriving, and raspberries are just waiting for you to pick and eat them straight from the bush. A nice, refreshing breeze blows lightly through the rustling leaves – and carries a different kind of sound with it.
Cluck, cluck.
Years ago almost everyone knew this noise from their own backyard.
Cluck.
Nowadays, a lot of people have only heard it in movies or maybe at the petting zoo.
Cluck, cluck.
This time though, the clucking is the most relaxing noise you could imagine, turning this beautiful day into perfection. Your little flock of backyard chickens, happily clucking away in your beautiful yard, supplying you with fresh, tasty eggs every day.
Does this picturesque scene sound somewhat too good to be true? A beautiful backyard with flowers, vegetables and berries that are not completely pecked and ruined by the chickens living with them? Is that even possible?
Yes, it is! And we will tell you how to chicken-proof your yard so that you can make your dream of keeping chickens and still having a beautiful yard a reality.
A secure chicken run
The easiest way to keep your yard in a pristine condition is to keep your chickens in an enclosed area. With a spacious chicken run, you’re able to keep the chickens in that space so that they won’t dig up your precious vegetables.
This might not be an option for everyone due to the garden’s shape, size or sloped areas. If this is the case, consider a mobile chicken coop. These coops allow you to move your entire flock quickly and easily in order to give them access to different areas of your yard or garden.
Yard size
The most important thing to consider is how much room you have in your garden that you would like to offer to the chickens. That determines how many chickens you can keep – without overgrazing your yard.
The more space you can offer your hens, the less damage they will cause. Their scratching will not be limited to a small area, but instead, they will be able to forage across your yard. Chickens will happily weed-eat for you, as well as rid your lawn of pests like slugs, snails and caterpillars. With enough space, your flock won’t destroy the lawn but will actually help keep it healthy.
Chicken breeds
Another important factor to consider is the breeds of chickens you choose.
Hybrid breeds usually cause the most damage, as they are constantly looking for food as an energy supply due to the demand of producing an egg almost every day. Hybrids are generally hardy birds that are easy for first-time chicken keepers. However, a better choice for a beautiful backyard are purebred chickens.
Depending on what you look for in a chicken, and if the eggs are not the most important part of your chicken parenting journey, bantam (miniature) or ornamental breeds are generally easy birds to keep in the garden. Their small size and lower energy requirements often prevent them from doing too much damage. Some popular breeds to keep in a garden are:
These chickens make beautiful, friendly pets and are known to be gentle with your garden. Their eggs are generally very small, and laying is infrequent (2-3 eggs per week).
Securing flower beds and veggie plots
An easy way to keep plants safe is a homemade hoop house covered in plastic or netting to keep your hens from sneaking a taste.
If that’s not an option, you could install raised beds in your yard. Most chickens aren’t interested in foraging for food above their head level, so they tend to leave plants in raised planters alone. And, raised garden beds make for easy, back-friendly, and more enjoyable gardening.
If you don’t have raised beds or want hoops around your plants, we’d recommend a mobile fencing option to allow your chickens to roam freely, yet not show off their landscaping skills on your veggie plot. Mobile Chicken Fencing from Omlet is ideal to keep chickens out of certain areas. Our fencing blends into your garden and is available in 39, 69, 105 & 138 ft rolls. This movable chicken fencing is much easier to install than chicken wire and features many benefits such as tangle-proof netting, adjustable poles and reflective badges to help you find the gate at night.
Omlet’s flexible chicken fencing comes with an inbuilt gate which features a strong catch that is comfortable to use. You can also set the width of the gate opening to your preferred size, making it easy to get in and out to feed your chickens. The gate can be positioned wherever you want within the layout you have chosen. You can put it at either end, the middle, or anywhere else.
Taller than most chicken fencing, Omlet’s chicken fence has an overall height of 4 ft. With that height, you can be confident that even the most determined of your feathered friends will be prevented from making a great escape. The poles of the fence are adjustable to ensure that the netting remains tight and secure at all times.
Offer a “chicken spa” area
Chickens love to dig up dry soil under bushes to enjoy a dust bath in the sheltered, shady area. Allow them to find their favorite spot, or plant some chicken-friendly bushes in an area you are happy to devote to your chickens, and they will most likely not think about any other plants. A chicken spa like that will not only keep your hens’ feathers in beautiful condition, but will also keep them in good spirits and health.
Keep an eye on your chickens
The best and safest time for your chickens to free range is usually when you are with them and can keep an eye on them. This allows you to keep them from causing too much mischief, and from getting into plants they shouldn’t. Throwing a handful of tasty corn in an area as far away as possible from flowers and veggies will quickly distract your flock from your flora.
There may be plants you want to keep your flock away from to keep them producing and looking their best, but there are some plants that are downright dangerous to chickens. Plants that are toxic to chickens include:
Daffodils
Azaleas
Rhododendron
Raw beans
Ferns
Rhubarb
Raw potatoes or onions
Tulips
This is not an exhaustive list, so be sure to check all of your plants that your hens may come in contact with to verify whether or not they’re safe.
Many other garden plants are perfectly safe for chickens, and even nutritious for them. Plants that your flock can safely snack on include:
Herbs such as oregano, parsley, or rosemary
Dandelions
Clover
Sunflowers
Pansies
Nasturtium
Lavender
Marigolds
Squash blossoms
Omlet and your garden flock
At Omlet, we want you to enjoy your chickens as a valued part of your family. And as part of your family, we want them to be able to enjoy your garden along with you. With eye-catching accessories like the Freestanding Chicken Perch or Chicken Swing, you can incorporate fun for your flock into your garden decor. With Omlet, your chickens can cohabitate with your garden in ways that were never possible before.
How do chickens lay eggs? Chicken keepers and egg eaters alike often ask this question. This fascinating process is complex, but occurs daily within laying hens. Take an in-depth look at the egg-laying process from start to finish – it’ll make you give your laying hens a round of applause.
Ovulation takes place every 24-36 hours for most laying breeds of chickens. This results in an egg being laid roughly every day and a half. Some laying breeds can lay an egg every day or more. The world record number of chicken eggs laid in a year is 371 eggs in 364 days, set by a White Leghorn hen in 1979.
The process of laying an egg
Chickens ovulate like other animals, but instead of eggs the size of small cells being released, hens lay the nutritious, tangible orbs that we enjoy for breakfast. The process of laying an egg takes around 24 hours, and hens as young as 18 weeks old can begin laying. We’ll break down each step of the egg-producing process.
Step 1: it starts with light
Egg laying actually starts with your chickens’ eyes. Sunlight enters through a hen’s eye and activates a photosensitive receptor called the pineal gland – located behind the eye. Once the pineal gland is stimulated, it triggers a string of events that releases an egg, or oocyte, from the hen’s ovary. This light sensitivity is one of the reasons chickens lay fewer eggs in the winter.
Step 2: formation of the yolk
Hens are born with two ovaries, but the right ovary becomes dormant after a female chick hatches. The left ovary is the one that will produce eggs throughout a hen’s lifetime and contains thousands of ovum, which will become future eggs.
If you were to look inside a chicken, these undeveloped ova can be seen at the start of the spine. When the chicken is old enough to start laying, some of these ova begin to mature into what will later become the yolk. At this stage, the ova are separated and contained within their own follicles, but when one is ready to move on it releases its follicle and moves out of the ovary and down the reproductive tract, the oviduct.
This process, called ovulation, occurs approximately every 25 hours, and normally starts again about an hour after the previous egg has been laid.
Step 3: egg white surrounds the yolk
Up until this point in ovulation, all chicken eggs are unfertilized. Hens can lay eggs with or without the presence of a rooster, but they can be fertilized if you keep a rooster in your flock. Fertilized eggs are edible, as long as you collect the eggs daily.
Via the infundibulum, the yolk enters the oviduct, and it is here that the egg is fertilized if a rooster has courted your hen. You might have noticed that egg yolks have a small, white spot on them. This is the blastodisc, the single female cell that together with the sperm will develop into an embryo through cell division.
The journey of the egg is, however, the same regardless of whether it’s been fertilized or not. The yolk travels through the magnum and isthmus parts of the oviduct, and this is where the egg white (also called the albumen) is created. It works as a thin membrane around the yolk that holds everything together. The chalazae, two spiral bands of tissue, make sure that the yolk is evenly positioned within the albumen, and the whole thing starts looking like an egg – without its hard covering.
Step 4: the shell is formed around the egg
The egg receives its shell in the uterus, through the shell gland. It takes roughly 20 hours to produce the shell, and is the most time-consuming part of the process. Before the egg moves on for the last time, the outermost layer, known as the bloom or cuticle, is formed to create an antimicrobial layer around the shell. When the egg is ready, the shell gland pushes the egg out of the oviduct and into the cloaca or vent, the part where the reproductive and excretory tracts meet. Hens excrete all eliminations through the vent, but the hen’s uterine lining actually wraps around the egg until it is completely free from the hen’s body – keeping it nice and clean.
Egg laying the Omlet way
And there you have it – the amazing journey an egg makes before being laid by a hen. Our chicken coops offer your hens a safe and comfortable place to deposit the fruits of their labor. And to store those labors of love, try our Egg Skelter, which will proudly display your hens’ amazing, natural works of edible art.
Using a steam cleaner to clean any Eglu can be a very effective way. It will not affect the plastic, whereas all surfaces are cleaned, disinfected, and all killed mites, insects and dust are blown away by the power of the steam. As a bonus the surfaces will be dry in no time, because the plastic is warmed up.
Deep-cleaning an Eglu Go once or twice a year is extra easy if one follows these steps:
1. Take of the top panel (lid)
2. Unscrew both side panels and bumpers, and take these off as well. For a complete cleaning you may want to disconnect the run as well.
3. You now have access to all inner and outer surfaces. Clean them thoroughly with the steam cleaner, if required using an old dish brush as well.
4. Clean the bumpers, panels and top lid in the same way.
5. Re-assemble the run and the coop.
This cleaning method has been used for several years now by our Dutch team-member and is guaranteed to keep your Eglu in top condition, without damaging any parts!
Nathalie is the owner of the Instagram account My Backyard Paradise. Together with her husband and their three teenage daughters she runs her own ‘mini backyard farm’ in Belgium. The beautiful pictures she shares with her Instagram followers show that this truly is a backyard paradise. In June 2018 Nathalie decided to extend her mini farm with three ex-battery hens. Follow their journey to recovery in the two-part photo diary she kept for us. You can find part one here.
Week 3
The chickens are still eating an Alfamix mixture, a very rich grain blend with pellets and amphipods, and layers pellets. It’s time to further reduce the layers pellets (this was the only feed they had before we rescued them). For one month we will only give them Alfamix, then they will get the same food as our other chickens. Our chickens also always have access to a large meadow where they can find lots of extra food.
It’s also time to do something about their nails. Usually it’s better not to cut chicken nails, they just have to wear down. But the manure stuck under their nails needs to go. We soak their feet in lukewarm water and wash off the manure. This takes more than half an hour per chicken. In the meanwhile our ducks decide to help us and bathe in the water! As a reward we give the chickens a treat afterwards. It’s strawberry season, so I cut some strawberries into small pieces. My husband says the chickens are still ignorant, they are not used to anything and do not know how to eat a whole strawberry. But they do like the small pieces, they finish them in no time. Slowly we introduce more variation into their diet. Our chickens always get a decent amount of fruits and vegetables, kitchen scraps, leftovers from our children’s lunch boxes etc. We’d rather give it to our chickens than putting it on the compost heap.
We are down to two eggs per day. One chicken stopped laying completely, but we don’t blame her. It’s nature and we have to respect it.
This week it rained for the first time in a long time. Fortunately, I have a very caring daughter who wants to make sure the chickens look for shelter. When she checks on them she finds them in their run, not moving and soaking wet. When she comes back in she’s also soaking wet. She tells me she put the chickens in their Eglu and closed the door “because otherwise they will never learn, mum!”. Our children are really interested in our new chickens and they think it’s terrible how laying hens are treated by the industry. They tell me that next time we have to save 50 chickens! But I don’t think our neighbors would agree with that. It’s important our children learn that nature has a rhythm, and that chickens lay fewer eggs during winter. But this doesn’t mean they have to die! We will just eat less eggs and have to remember to store eggs in the freezer so we can use them for cakes later on. We certainly will not buy any eggs this winter!
Week 4
Our chickens really start to get to know us and they know when we will bring them treats. It’s now time to introduce them to the rest of our chicken family. Our chickens have not been allowed to free-range since the new chickens arrived. The risk that they would transmit parasites was just too high. But now they are allowed to run free again. And they are very curious to meet these three brown newcomers! The new ladies on the contrary are not too sure about this and stay close together in the middle of their run. We will spend this week introducing them to each other. Eventually we want to keep them all in the same large chicken coop. In no time they are used to the other chickens and don’t even seem to notice anymore when ten other hens scratch around their run.
Since they are now part of our extended chicken family we have to come up with names for the ladies. This is something we always decide as a family. We decide to go with names of the Belgian Royal Family. Overall, they will be our best laying hens, so they deserve some respect. We name them Louise, Elisabeth and Mathilde. They are not scared anymore and eat from our hands. It helps when you talk to them softly, as they start to recognize your voice and associate it with food. Besides vegetables we now also feed them scraps like rice and pasta, which they really seem to enjoy. And they still give us two eggs every day!
Second month
It’s finally time. We move the Eglu to the orchard, our chickens’ playground. We open the door of the chicken run. Our ladies stay inside, but our greedy Faverolle cannot wait to taste their feed and unsuspectingly enters the run. Immediately the three chickens attack. My children are shocked, they did not see this coming! I don’t worry too much since I know they’ll soon sort themselves out and are now strong enough to defend themselves. We just have to give them a few days to get used to each other.
They then take off to discover the orchard, but stay together all the time, and the other chickens don’t come near them. But it is time for them to sleep in the big chicken coop with the other chickens. At night, when it’s already dark, we take them out of their Eglu and put them on a perch in the big coop. The best time to do this is at night when it’s dark, so they won’t start fighting. This way the chickens will also all have the same smell in the morning. We keep the automatic chicken door closed for 2 days. This will enable them to sort out the pecking order and it will give them time to get used to their new home.
The transition actually goes really well. But they don’t let the rooster come near them! They are clearly higher in the pecking order than him! After two days we open the door of the chicken coop and allow everyone outside. The three ladies are slightly hesitant but eventually decide to have a look outside to see what the other chickens are up to. The only problem with the three chickens is that they like to stay out late, after the door of the automatic coop has already closed. My husband takes a flashlight to look for the chickens and puts them in the coop with the other chickens. But we can’t do this every night… We’re going on holiday soon and we want the chickens to go inside the coop by themselves. Instead of putting them in the coop we just manually open the door again when they want to get in. After a few days they enter the coop before the door closes. We can now go on holiday and don’t have to worry anymore!
I notice that since they’ve decided to sleep inside the coop, they’ve really found their place in the group. They even sleep on the highest perch. We notice the amount of eggs has really decreased. We just find one egg per day, which is strange since we hear two chickens clucking. Our youngest daughter decides to keep a close eye on the chickens. After spending half the day in the orchard, our daughter proudly tells us she found out where one of the hens is laying her eggs. There is a hidden nest! A true treasure with seven eggs in it! After removing the eggs and twigs, this hen also decides to lay her eggs in the chicken coop.
Three months later
We split our holiday in two so we can check on our chickens and collect their eggs. There is a fox in the neighborhood, so we are scared every time we come back home. But they’re all still there! We have an automatic poultry drinker, they have plenty of food in their feed bucket, and with all the plums, peaches and apples falling from the trees there’s also more than enough variation! There’s nothing better than a bunch of happy chickens and a bucket filled with colorful eggs. Now all of our chickens are allowed to free range in the garden when we are home. The three ladies are now the most adventurous. Our other chickens never noticed the compost heap but the three ladies have already found it (and they help mixing it a little bit). The only chickens that sometimes enter the kitchen are these three. And when we have dinner outside, one of them will sometimes just jump on the table. They surely provide entertainment!
We are really relieved and also proud the three hens have adjusted so well. It was a difficult summer for the animals. It was really warm and there was no rain to cool them down. But with the right care and some extra attention it all went really well.
The three hens are proud chickens now, and are definitely are part of our chicken family. They are very tame, and they are always the first to come to us so we can pick them up and cuddle them. They are very curious and love colorful shoe laces. Their egg production has stopped because they need all their energy to renew their feathers. We give them protein muffins to help them with this.
Just a few weeks from now they will have beautiful shiny feathers and the only thing that will remind us of their past will be their trimmed beak!
Wondering how to convince your partner to let you get chickens? You aren’t alone. There are many misconceptions about chickens and their care that cause many people to baulk at the idea of owning them. But, like most reservations, most of these concerns are unfounded. Here is our best advice on how to get others on board with the idea of getting chickens. Bust common myths and put care concerns to rest – and you’ll soon have your entire household clamouring to keep chickens.
6 myths about keeping chickens
Debunking some common myths about keeping a flock will be your first step in convincing your family to let you get chickens. While this is not an exhaustive list, these are the main concerns raised when families consider keeping chickens.
Myth #1: Chickens smell bad
While it’s true that hens’ droppings smell, hens themselves have no odour. If their coops are kept clean there will be virtually no stench from your chickens’ setup. Our easy-to-clean chicken coops ensure that your hens’ home stays fresh and clean from just minutes of cleaning each day.
Your hens will keep themselves clean by preening their feathers and taking chicken dust baths. Choose odour-absorbing material like pine pellets, sand, or finely crushed rock for the base of your chickens’ run to eliminate any outdoor odours. Finally, use a pressure washer or soap and water on the interior surfaces of your chicken coop once a week, and you should experience little to no odour from your garden flock.
Myth #2: Chickens take up a lot of space
Depending on the breeds of chickens you keep, most of them don’t require much space. Of course, your flock will be happiest with the most space possible, but there are options that will make the best use of the space available. Mobile chicken coops allow you to move your hens’ home to the most convenient spot, or relocate them whenever you need to. Your flock can help you mow your grass, control the bug population, or enjoy shady areas through the use of a mobile chicken coop.
Don’t want your flock to have access to the entire garden? Chicken fencing or a walk in chicken run enables you to customize your flock’s area within the space available in your garden.
Myth #3: Chickens are noisy
Most of the time, when people think of noisy chickens they conjure up the image of a crowing cockerel. While cockerels are in fact quite loud, hens make quiet noises that are not likely to disrupt the neighbourhood, and most people find quite sweet and relaxing. Occasionally, hens may make louder sounds, but these are usually reserved as warning cries. When they “sound the alarm”, it’s usually because of a perceived threat.
Some breeds are more vocal than others, so if noise is a concern, it’s best to do some research beforehand. Faverolles, Polish, and Wyandottesare among some of the more boisterous breeds that you may want to avoid if noise is of concern. There are also some hens that will loudly proclaim that they have laid an egg. The ruckus is short-lived, but they will often get the entire flock going for a few minutes in a celebratory cheer. This behaviour is most common in young hens that are just beginning to lay.
Myth #4: Chickens will fall prey to predators
Chicken predatorsare a real threat, but the reality is that if you keep your flock in a predator-resistant setup, you can greatly mitigate the risk they pose. Heavy-duty wire weld chicken runs with anti-dig skirting will help protect your flock from the most common predators that would make a meal of your hens.
If you have dogs or cats that patrol your garden, your risks of dealing with chicken predators are greatly reduced. And, for those that would strike your chickens’ coop after dark, an automatic chicken coop door can be added to your hens’ house to help keep them safe from nocturnal intruders.
Myth #5: Chickens will prevent me from travelling
Chickens are surprisingly self-sufficient, especially compared to other types of pets. Their main needs are:
Safe housing
A secure run
Free-choice feed
Fresh water
An established roost-to-rise routine
Assuming these are met, you can safely leave your flock overnight. If you’re going to be gone longer than a day or two, it’s a good idea to get a chicken sitter. This is especially true if weather conditions are below freezing or uncomfortably hot to make sure your flock’s water remains palatable.
Daily chicken care doesn’t take all that long, and usually, chicken sitters are happy to be compensated in eggs for their time. A neighbour or local friend or family member are great resources when looking for someone to check in on your flock while you’re away.
Myth #6: Chickens need a cockerel in order to lay eggs
This is one of the most common misconceptions that exist about chickens. But to put this notion to bed: hens do not need a cockerel in order to lay eggs. Most hens ovulate every 24-36 hours, which means they can produce one egg roughly every day and a half – with or without a cockerel.
Winning your partner over
Next, it’s time to present all of the ways in which chickens benefit their owners. Many hens are social and bond with their owners – some even capable of learning tricks. But personalities aside, there are several other reasons to own chickens.
Fresh eggs
Probably the most obvious reason for keeping chickens is the prospect of providing fresh eggs for your family. The difference between store-bought eggs and fresh eggs is startling. Many families need only to see the difference between the two eggs to be fully convinced of the higher nutritional value of fresh eggs.
To show your family the difference between the two, simply crack a fresh egg into a bowl next to a store-bought egg. Eggs bought in a store are lighter and thinner in appearance, while fresh eggs have a deep, rich colour to their yolks and a thicker consistency.
Strategically placed chicken fencing or chicken runs can allow your chickens to prune overgrowth and provide weed control in your garden. And, mobile chicken coops let your flock graze different sections of your garden to help with mowing.
Chickens as family pets with Omlet
Like other pets, chickens require time and responsibility, and it’s right that you take owning them into careful consideration. But with quality chicken-keeping products from Omlet, you’ll be able to start out strong and enjoy keeping chickens for years to come. Our chicken coops, chicken toys, chicken runs and chicken Feeders and Drinkers are all designed to last a lifetime and bring joy to both flocks and their families. Let us know how you get on!
As long as your chickens are laying, you can hatch and incubate chicks all year round. However, traditionally the most popular time to breed your own chickens is in the spring. Hatching and rearing your own chicks from eggs is an incredibly exciting and rewarding process. There is nothing better than seeing your tiny chicks grow up in the knowledge that they are getting the best possible life from start to finish.The incubation period for chicken eggs is usually 21 days. The most reliable way to incubate your fertilised eggs and maximise the chance that they will hatch into healthy chicks is to use an artificial incubator. Here’s our step-by-step guide to hatching chicks:
1. Long Term Plan
Before the hatching starts, you will need to have a plan in place as to what you are going to do with the chickens once they hatch. It is a safe estimate that 25-50% of eggs will not hatch due to either not being fertilized or due to some mishaps during incubation. Among those which will hatch, approximately 50% will be cockerels and 50% will be hens. Everybody wants hens and hardly anyone needs cockerels, so there is a question of what to do with the latter. In many breeds, cockerels do not tolerate each other and they will fight vigorously unless they are completely separated.
2. Eggs
First of all, you need to be as sure as it is reasonably possible that the eggs are fertilized, so getting them from a good breeder / farmer is crucial. Eggs of some breeds are quite expensive, so every egg that will not hatch costs you money. A breeder can never give you a 100% guarantee that the egg is fertilized, but an experienced one can be quite confident they are.
The eggs should not have any deformations or bear any other visible defects. Any cracks in the eggshells are a no-go. Any defect of the eggshell might result in the chick having difficulty in hatching, being deformed, or not developing at all.
Once you have the eggs, it is a good practice to wash them with an egg disinfectant. Eggs are porous and the embryos get oxygen and water through their eggshells. If there are any toxins or bacteria on the eggshells, that might endanger the embryos.
3. Keep a Diary
It is a really good idea to keep a diary of hatching. This includes numbering the eggs and keeping a daily record of each eggs weight. A developing egg will gradually lose weight in its 21 days of incubation. It will lose about 10-15% of its original weight over time. When the egg in the incubator is not losing weight it usually means it is not developing.
4. Incubator
Turning
Choose your incubator carefully. Some incubators, such as the Brinsea Mini II Incubator have an Auto-turn mechanism built-in. Auto-turn saves you a lot of time and effort. Every egg during the incubation time needs to be turned every 90 minutes in order for the embryo to be positioned perfectly in the egg. A broody hen naturally turns all the eggs she is sitting on as she moves around the nest, so the turning simulates what naturally happens when a hen takes care after eggs. If the incubator does not have the Auto-turn option, you will need to turn the eggs manually. It is therefore a good practice to mark all eggs with a non-toxic marker just to be sure that every egg is being turned every time you visit them.
Temperature control
A good incubator will be able to keep a steady temperature within. One that we recommend is the Brinsea Mini II Incubator. The optimal temperature for hatching chicks is 37.5 degrees Celsius. A good incubator will set its alarm off if the temperature within drops below or rises above a certain threshold. Temperature in the room where the incubator is placed is crucial here, as it heavily influences the temperature in the incubator. You will be opening the incubator during routine controls of the eggs, so it is really important the eggs don’t get a temperature shock in the process – such a shock might kill the fetuses. We advise keeping a steady temperature of approx. 25 degrees Celsius in the room with the incubator. The room should also be draft free.
Humidity control
A good incubator will be able to provide a good humidity inside. Optimal humidity for the eggs during hatching is around 40-50% but needs to be increased on Day 19 in order to soften the eggshells and help the chicks to hatch out. With some Incubators such as the Brinsea II Mini Incubator, there are two water containers inside. Fill one up every day, and fill both of them from Day 19 onward. You can fill up the water container in the Brinsea without the need to open it which is very useful, since you generally don’t want to open the incubator too often. It is perfectly normal that some condensation starts to build up in the incubator after a few days due to high humidity.
5. Daily routine
Cooling
Day 7 is an important threshold. First of all, you need to start cooling the eggs for half an hour a day. It’s best to do this around the same time each day. A good incubator has a fan and you can set an automatic cooling time. If not, you need to cool the eggs down manually by taking them out of the incubator. The cooling temperature should not be shockingly different – a difference of 2 to 5 degrees Celsius will do.
Developing eggs keep their own temperature when exposed. That is how a hen tells the difference between a developing and a dead egg. When the hen gets off the nest to eat and drink, the dead eggs will go cold almost instantaneously. The hen will then get rid of the dead eggs from the nest.
Candling
You also need to start candling the eggs on Day 7 at the latest. Candling will show you which eggs are developing and which are not. If an egg does not show any signs of development on Day 7, it will not hatch. It is essential to take out any eggs which stop developing as they will start to decompose if left in the incubator. From Day 7 onward you should continue candling on a regular basis. It’s not necessary to do it every day, as you won’t see any significant progress on day-to-day basis, but it is a good practice to do it every third or fourth day. Weighing and candling combined are usually good indicators if the egg is developing or not.
From Day 7 up to Day 19 tasks should continue in a routine manner: daily cooling, weighing, and occasional candling.
6. Hatching
Day 19 marks the next important stage. You need to stop turning the eggs and cooling them, and lay out a hatching mat in the incubator (so the chicks won’t slip on the incubator’s surface on their first day of life). You also need to increase the humidity inside up to at least 65%. When using the Brinsea Mini II Incubator you can achieve this by filling up the second water container inside.
At some point during that period the eggs will start wiggling: the chicks will be moving around the egg to position themselves perfectly to hatch out. You might feel the temptation to check on the eggs often, but at this time it is best to leave them be and inspect the eggs every 6 hours or so.
Around Day 20 the chicks should peck out a small hole in their eggshells to catch their first breath of fresh air. It’s best to leave them be. Do not help them by making the hole bigger or breaking the shell apart. They will do it themselves in their own time. In that time they will also consume all the nutrients in their eggshells, so it is vital for them to stay inside for the time being.
Most of the chicken breeds hatch on Day 21 with only a handful of breeds hatching on Day 20 or 22. Do not help the chicks in hatching, they should be able to do it themselves – it’s their first test of strength. Only give a helping hand when a chick is really late (in comparison with its companions in the incubator) and/or the eggshell is really thick and the chick is evidently struggling to get out for a prolonged period of time.
Once the chicks hatch out, leave them in the incubator for another 24 hours. They should be well fed having eaten all the nutrients from their eggs. Apart from that, the incubator provides them with the optimal temperature and humidity.
Now watch our eggcellent egg hatching video to see how easy it is to hatch chicks!
On average backyard chickens live to an age of six to eight years, but there are of course exceptions. How old a chicken will become depends amongst other things on the breed and how a chicken is kept. Heavy layers exhaust themselves with a lifespan of just three years, others can live up to ten years. According to the Guinness World Records world’s oldest chicken is Matilda, a Red Pyle hen from Alabama that died at the age of sixteen (1990-2006). A hen is considered a senior around the age of five. If you are not sure about the age of a chicken, there are signs that will tell you your hen is getting older.
As a chicken gets older the texture of the comb will slightly change and she will likely have some scars from being pecked by other chickens. The feet and legs tend to thicken and if your hen has spurs, you know she’s not a youngster anymore (generally chickens grow spurs around three years of age). Arthritis may cause your older chicken to move stiffly, and you might notice she walks a bit slower and more carefully. And of course, the egg production of an older hen will decrease. The average chicken lays eggs for four to five years on a regular basis, with the peak of the egg production around 18-24 months. Already after two years, the egg production tends to drop. When you start seeing soft or thin-shelled and misshapen eggs, you know your hen is about to retire from egg laying altogether. But with most breeds living to age seven or beyond, you’ve got a few more years to enjoy the companionship of the hen that has served you and your family so well.
CARING FOR OLDER CHICKENS
Caring for older hens isn’t difficult and really isn’t much different than caring for them when they’re younger but there are a few things you can do for them to make sure they are healthy and comfortable.
Lower the perch in the run and/or coop Senior chickens can start having mobility problems due to arthritis or joint inflammation. By lowering the height of the perch to one or two feet of the ground its easier for your old hen to hop onto it, protecting her joint. Building a ramp up into the coop might be necessary.
Predator proof run Old chickens don’t move as fast as they used to. Providing them with a predator proof space is important to keep them safe. It’s best to supervise your chickens when they are free ranging. You may want to provide your older chickens with a separate coop and run to prevent younger, more aggressive hens from pecking them.
Accessible food and water Make sure food and water containers are easily accessible. This means the food and water containers must be on a easily accessible height. It can also be a good idea to have two sources of food and water: one in their run area and if they are free ranging one outside. Older chickens may not be able to range as far for food and water.
Feeding older hens If your entire flock is older and none of the hens is laying any longer, you can give the whole flock a chicken grower feed since they don’t need the additional calcium that a layer feed provides. If you are feeding different age groups together or ad new chicks to the flock, the entire flock can be fed the chicken grower feed from the time the new chickens are eight weeks old up until the laying age of 16 to 18 weeks old. After that the new layers will need a laying feed. The layer feed won’t hurt the older hens, as the calcium is good for their bones.
Nail clipping Older chickens may not be wearing down their nails with activity like foraging and scratching. If the claws are curling round then they will need trimming. Consider nail clipping as part of caring for old chickens if your chickens have long nails.
A good vet Try to find a vet near you who specialises in poultry. Do this and register in advance of having problems. Arthritis, egg failure, joint inflammation, gout, ascites, tumors, adenocarcinoma and salpingitis are issues that can come up with chickens of any age, but more so in old chickens.
BENEFITS OF OLDER HENS
In their own way, older hens contribute well past their productive egg laying years. Older hens still produce manure, which is a great fertilizer for your garden. Older hens still like to eat bugs. You’ll notice a reduction in the number of ticks and snails in your garden when you keep a flock of chickens. Furthermore, older hens are more likely to go broody and be available to raise the chicks you purchase or hatch.
Nathalie is the owner of the Instagram account My Backyard Paradise. Together with her husband and their three teenage daughters she runs her own ‘mini backyard farm’ in Belgium. The beautiful pictures she shares with her Instagram followers show that this truly is a backyard paradise. In June 2018 Nathalie decided to extend her mini farm with three ex-battery hens. Follow their journey to recovery in the two-part photo diary she kept for us.
A laying hen, one that can lay up to 300 eggs a year, is what we were missing. During autumn, our purebred chickens don’t lay any eggs for a long time. They instead take spend their time and energy renewing their plumage and waiting for the days to get longer again. Last year we didn’t have any eggs for over 3 months despite having more than ten hens! We decided that if we wanted fresh eggs during autumn, we had to buy laying hens.
We always buy our new chickens from a smaller trader or a hobby breeder, so we can actually see the chickens and know they have access to grass, clean water and decent housing. But we like the idea of rescuing a few laying hens destined for slaughter by giving them a good life in our garden. The life of battery hens ends after just sixteen months. Their bodies need time to recover and their egg production will stop. This means a loss for the industry. Besides that, after each moult the egg production will drop, and the industry does not accept that!
So that’s what we did. First thing to do was find a place where you can rescue commercial laying hens from slaughter. The first option we came across was www.redeenlegkip.be (‘Save a battery hen’), a Belgian website where you can buy or adopt a laying hen. If you decide to adopt a hen, you’ll pay a monthly contribution of €5 and get 24 egg per month in return. When you adopt or buy a chicken, the organization ensures the chickens are collected from the companies and given appropriate first aid. However, we wanted to experience this ourselves. After continuing my search, I came across another Belgian website www.lespoulesheureuses.org (recently also available in France). They give you the opportunity to collect the chickens yourself, so you’ll know the address and code (the one you can find on the egg) of the company.
We then had to wait for the right weather. The best time to save a laying hen is when you can give her the ideal conditions to recover. They often don’t have many feathers left and have probably never been outside their barn, where the temperature is always at least 18 degrees! They’ve never seen rain and you should also be careful with draught and wind. You don’t want them to get ill, they have experienced more than enough stress already.
Week 1
On June 16th 2018, it is finally happening. I reserved three Isa Brown chickens from a code 2 company. Code 2 means the eggs from this company are sold as free-range eggs. Sounds good, you might think…
Free-range eggs from the commercial industry come from chickens that only have access to barns. They have perches, nesting boxes and scratching areas with some straw on the floor. There is a maximum of nine chickens per square meter and debeaking is allowed. This is probably not what most of us have in mind when we think of free-range chickens…
My youngest nine-year-old daughter is joining me on my way to pick up the chickens. I tell her in advance that the chickens will be in a bad shape and will look nothing like the chickens we have at home, that she isn’t allowed to pick them up and cuddle them, and that we have to take care of them first. We are not the only ones here today to buy chickens. An older couple buys two chickens and there is someone with a trailer with 50 chicken cages. People keep on coming. We ask a staff member if we can have three chickens. He looks at my daughter first before turning around to get them for us. Of course, we are not allowed in the barns, we’re not even allowed to take a picture. The chickens we get are in a much better condition than the ones the older couple got, ours still have a lot of feathers. Maybe I shouldn’t have taken my daughter with me, to get a more honest impression of the condition of an average laying hen. The man probably had our daughter in mind when he chose our chickens. After paying €3 per chicken, the life these chickens deserve can finally begin. At home everything is ready for them. After driving 10 minutes, my daughter and I look at each other. It’s smelly in the car. And it’s a strange smell, not like normal chicken manure, but a chemical, unnatural smell. The chickens are quiet, I hope they will survive the one hour drive home…
When we get home, we inspect them carefully. They seem numb, or are they frozen with fear? They still have lots of feathers, but they are dull and not shiny like the feathers of a healthy chicken. Their feathers are tangled and the tail feathers don’t look good at all. Their gaze is blank and their comb is very pale. Their toenails are way too long and curly, and there is manure stuck under them. Clearly, they haven’t been able to scratch around that much. The beaks of our chickens have been trimmed. This means the top of the beak has been cut off when they were only ten days old. This is very painful and is done to prevent feather pecking. Chickens do this when they are stressed, for example due to limited foraging opportunities.
It’s time to treat them against parasites such as lice and worms. We use Diatom Earth, a natural product used against all kinds of parasites. They need to be quarantined first. For this, we give them a temporary home in our Eglu Classic from Omlet. It has a 2 meter run and we can easily move it around in the garden so they have access to fresh grass every day. It’s also very easy to clean. We lift the chickens out of their cage and watch carefully how their feet touch the grass for the very first time. They seem surprised and for a few minutes they just stand still, until one hen realizes she can, and is allowed to, move. Slowly but surely, they cautiously start to explore their run. While the children are watching the chickens, I add the first dose of medication to their drinking water. We use Avimite, a product against lice and mites. The first week they need this on a daily basis, then weekly for the next five weeks. They soon find their water and it looks like they haven’t had any for days. Usually we don’t feed our chickens layers pellets so I had to buy them, because this is the only thing our new chickens have ever had. In the evening we help the chickens into their Eglu where they can safely spend the night.
When I open the coop the next morning they don’t want to come out. After an hour we get them out of their coop and notice they have already laid three eggs, one in the nesting box and two on the roosting bars. Because of the medication, we cannot eat their eggs for the next few weeks. Sad, but we just don’t want to take any risk. We have to discard them.
The rest of the day the chickens sit outside. They eat clover and grass for the first time and seem to realize this is not bad at all. The second and third night we have to help them into their Eglu, but from then on they finally realize that this is their new home. In the morning they come outside when I open the door and after a few days they only use the nest box to lay their eggs. Their eyes are getting brighter and they start to establish the pecking order. They are more lively than the first few days, but still nothing compared to our other chickens. Although they aren’t afraid anymore when we come near, they don’t allow us to touch them. This is hard for the children who want to cuddle them to make them forget their past. But the chickens first have to get used to their new environment, to us, and to their new life.
Week 2
We only have to repeat the red mite treatment once a week now and we can start with the deworming. This treatment, which they need five days in a row, can also be added to their drinking water. The hens give us two to three eggs every day. It’s now time to gradually change their diet. They are used to their new home, they’re not scared anymore when we come near or when our dog wants to sniff at them. They clearly defined their pecking order. We want the very best for our animals, and this also includes a rich and varied diet. Our chickens get Garvo but our 3 laying hens need something extra, a mineral and vitamin boost. We give them Alfamix, a very rich grain mixture with pellets and amphipods. But when I mix this with their layer pellets, I notice that they only eat their pellets and not the new food. They do eat a lot of grass and clover. Slowly but surely their combs are getting redder.
During the weekend, our youngest daughter decides it is time for them to free range in the garden. They love it, and really enjoy the dust baths. But trying to get them back into their Eglu is less enjoyable. Finally they decide to go back into their home. Our daughter has learnt that they are not ready to discover the great outdoors just yet…
Come back in a couple of weeks time to read part two of the diary!
Thinking about keeping backyard chickens for the first time? You’re not alone. With so much information out there, it can feel overwhelming to know where to start. That’s why we’ve created this easy-to-follow chicken checklist, designed to help you confidently set up your flock. We’ll cover everything you need to know about choosing the right chicken coop, run, enrichment, weatherproofing, feed, bedding, and cleaning. Let’s make your chicken-keeping journey simple and enjoyable.
Chicken Coops for Beginners
Your chicken coop is the heart of your flock’s home. The right coop depends on how many chickens you plan to keep, but there are a few essentials every beginner should look for:
Easy to clean
Durable and weatherproof
Predator-resistant
Plastic chicken coops are a fantastic choice for beginners. They’re simple to clean, don’t harbor red mites like wooden coops, and offer excellent weather protection. Wooden coops, while traditional, require frequent maintenance, are not waterproof, and often become breeding grounds for mites.
If you’re just starting out, the Omlet Eglu is ideal. The Eglu Go and Eglu Go UP are perfect for 2 to 4 chickens, making them great for small flocks. These coops can be cleaned in just five minutes, keep your hens safe, warm, and dry, and require zero maintenance. If you think you might want to expand your flock in the future (and trust us, “chicken math” is real), consider the Eglu Cube, which houses up to 6 large hens, or the Eglu Pro, which can accommodate up to 10.
All Omlet coops come with pull-out droppings trays, nesting areas, roosting bars, and a back door for easy access. The Eglu Cube and Eglu Pro also feature separate Egg-port doors for even easier daily egg collection.
Chicken Coop Runs
A secure chicken run is just as important as the coop itself. Your run should be made from strong materials to keep predators out and provide enough space for your chickens to roam.
Omlet’s attachable coop runs are designed with anti-tunnel skirts to stop predators from digging in, and strong steel mesh that prevents break-ins. These runs are extendable, so you can add more space as your flock grows.
For even more room, consider a walk-in chicken run. These runs are tall enough for you to enter, making it easy to spend time with your chickens and clean the space. You can place your Eglu or a wooden coop inside, or attach your Eglu to the outside.
If you want your chickens to free-range but still keep them in a specific area, chicken fencing is a great solution. While not predator-proof, it helps protect your garden and keeps chickens where you want them. Use fencing when you’re at home to supervise your flock.
Chicken Enrichment
Chickens are curious and intelligent creatures that need enrichment to stay happy and healthy. Without stimulation, they can become bored or develop unwanted behaviors.
Here are some enrichment ideas for your flock:
Perches: Chickens love to roost and feel safe when elevated. Add perches at different heights in the run.
Peck toys: These toys slowly release treats as chickens peck, keeping them entertained and the run tidy.
PoleTree chicken perch: For larger runs, a PoleTree offers perches all the way up to the roof, creating a fun playground.
Hay bales: Toss a bale of hay into the run and watch your chickens forage for bugs and pick it apart.
Chicken swing: Give your flock a new perspective and a fun place to perch.
Enrichment not only keeps your chickens busy but also encourages natural behaviors and reduces stress.
How to Weatherproof a Chicken Coop
Protecting your chickens from the elements is essential for their health. Moisture inside the coop can lead to respiratory problems, so choosing a weatherproof coop like an Eglu is important. Wooden coops tend to absorb moisture and can start to leak over time.
To keep your chickens comfortable year-round:
Use run covers to shield your flock from snow, wind, and rain, allowing them to explore outside in any weather.
In spring and summer, provide shade by adding covers over the run to block the sun and keep your chickens cool.
What Chicken Feed Is Best?
Feeding your chickens the right diet is key to their health and egg production. Laying hens need layer pellets, which contain the protein and nutrients they require.
Offer about 120g of pellets per chicken per day.
Use a feeder with a viewing window so you can easily monitor feed levels and ensure your chickens always have access to food.
Chickens are messy eaters so use a no spill chicken feeder to keep your run clean and prevent waste.
Provide poultry grit to aid digestion, as chickens don’t have teeth.
Treats like corn are fine in moderation but are high in fat.
Offer fruit and green veggies sparingly so your chickens don’t fill up on these instead of pellets.
Water is essential. Each chicken should drink about a pint of water daily. Check and refill their waterer regularly. In winter, check for ice several times a day. In summer, make sure the water stays cool, or use an insulated waterer to keep water at the right temperature all year round.
What Is the Best Chicken Bedding?
Choosing the right bedding helps keep your chickens comfortable and healthy.
Dust-extracted pine wood shavings are popular for their absorbency and insulation.
Chopped straw is another comfortable option.
Avoid hay, as it can become moldy.
Avoid cedar shavings, which are toxic to chickens.
Steer clear of sawdust and fine wood dust, which can harm respiratory health.
Add extra bedding in winter to help your flock stay warm.
How Do You Clean a Chicken Coop?
Regular cleaning keeps your chickens healthy and your coop fresh.
Empty out droppings, spot clean the nesting area, and brush off roosting bars at least once a week.
Do a deep clean once a month: scrub and wipe down every surface, and let the coop dry completely before adding fresh bedding. Plastic coops wipe down and dry off much quicker than wooden coops, making them an attractive choice for ease and speed.
Use a natural cleaner like a white vinegar and water solution, or a chicken-safe disinfectant.
Scrub brushes are helpful for loosening stubborn dirt and droppings.
Clean feeders and waterers weekly or each time you refill them. Some waterers can fill with dirt quickly and need cleaning every day. Opt for a stay clean chicken waterer so you don’t have to worry.
Keeping up with cleaning not only benefits your chickens but also makes your chicken-keeping experience more enjoyable.
Use dust-extracted pine wood shavings or chopped straw for bedding.
Stock up on chicken-safe cleaning supplies to keep the coop fresh.
Omlet and Your Flock
At Omlet, we have everything you need to start your chicken-keeping journey, from coops and runs to enrichment toys and cleaning supplies. Our range of accessories will keep your chickens happy and healthy, and we’re here to support you at every stage of your chicken-keeping adventure.
A lot of chicken keepers are worried about their chickens during cold winter days. Chickens are usually well adapted to the cold and as long as their coop is dry on the inside, they feel happy and warm in the Eglu.
Of course there are a few things to look out for and prepare for during the winter, so we have spoken to Stefanie, who is going through her second winter with the chickens in their Eglu Cube this year. She tells us about the preparations and adaptations she makes for when the weather gets icy and how she and her chickens get through the season.
Omlet: How long have you been keeping chickens and how many have you got?
Stefanie: We have been keeping six chickens since February 2018.
Omlet: What is your favourite thing about keeping chickens?
Stefanie: I love that we have our own, freshly laid eggs every morning.
Omlet: You live in an area of Germany that usually gets very cold and snowy in winter. How cold can it get in winter and how much snow do you have at the moment?
Stefanie: We live in Lohberg, in the south of Germany. The temperatures are usually between -5 and -15 degrees centigrade in winter (5f), so it does get very cold here. We currently have around 50cm of snow, which is normal for this time of year.
Omlet: What changes did you make to the Eglu Cube to get it ready for winter?
Omlet: Do you change the daily food and water routine during the winter?
Stefanie: We make sure to feed them more regularly and keep an eye on them to make sure they definitely eat enough. They eat a lot of fresh lettuce, and I like to give them warm food to help them keep warm. Keeping an eye on the water is extremely important as it easily freezes.
Omlet: Do the chickens use the run more or less in the winter than they do the rest of the year and do your chickens like snow?
Stefanie: My chickens don’t like snow at all, so that’s why they mainly keep to the covered areas of their run, where it’s dry.
Omlet: Do your chickens lay eggs in the winter?
Stefanie: Our six girls don’t lay as much as they usually do during other times of the year, but even though we have a lot of snow, we still get around two to three eggs every day.
Omlet: Do you add a light source to your coop?
Stefanie: Yes, we do have a light in the coop as it gets dark very early these days.
Omlet: As chickens love scratching and foraging for food, do you give them some other entertainment when it’s snowy and icy?
Stefanie: Yes, we tend to spread some corn in the covered areas of their run. This keeps them entertained and offers them a chance to scratch naturally.
These are great ideas to keep your chickens happy and healthy during the winter. Have a look at our video of top tips for chicken keeping in winter:
On a cold winter’s day, when there’s a heavy frost or a thick blanket of snow do you ever wonder how your chickens manage without central heating and a mug of cocoa? It’s natural to worry if your hens will be comfortable when the temperature dips below freezing.
Unsurprisingly, chickens will look for shelter when the weather’s bad so the first thing you can do to keep your chickens cosy is make sure they have a winter proof chicken coop. In this respect choosing the right chicken coop is similar to choosing your own house. You wouldn’t want drafty windows and doors, a leaky roof, and paper thin walls – and neither do your chickens. Many coops that are bought are fine during the summer, but unfortunately when winter comes they can leave their occupants shivering. We set about testing two very different chicken coops over the course of 3 nights in the Bavarian Forest in Germany. A place that gets more than its fair share of snow and ice.
The first chicken coop was typical of the type sold all over the internet. On first impressions everything fits together well and it’s attractively painted, it comes with a roosting bar and a nesting box and a run. It appears that this is a perfectly good chicken coop. However, on closer inspection it’s worrying to find that large sections of the wooden panels are only 5mm thick. There’s no insulation and nothing in the instructions regarding the suitability of the coop for year round use.
The second coop was the Eglu Cube Chicken Coop by Omlet. This chicken coop is part of the Eglu range which all feature a twin walled construction providing an insulating layer all round the coop. Similar to the way ice chests are made, it feels extremely robust and heavy duty. You could say it’s agricultural quality in a hobby chicken coop. It looks the part – but would the Eglu keep the cold out and the warm in?
Identical digital thermometers were placed inside the Eglu and the wooden coop which would take readings both inside and outside the coops during the night. Cameras were also placed inside the coops to record the chickens. After the chickens went to bed the front doors were closed, in fact the Eglu Cube came complete with a rather fancy Automatic Chicken Coop Door which gently closed behind the last chicken.
As it got dark the outside temperature dropped to -3.8℃. While it was getting colder outside, it was getting warmer in the Eglu Cube Chicken Coop. Around an hour after the chickens had gone to roost the temperature inside the Eglu Cube was 8.3℃ and it stayed there all night. That’s a plus 12℃ temperature difference.
Unfortunately it was not as cosy in the wooden house. As the temperature outside dropped so too did the temperature inside the wooden coop. At 11pm it was -2℃ inside the coop. That’s only 1℃ warmer than the outside temperature. In fact the inside of the wooden coop stayed below zero for nearly the whole night, warming to just above zero by 7am.
If it was freezing inside you might be wondering how on earth the chickens survived. Chickens, as with all other warm blooded animals, have temperature-regulating mechanisms to keep their body temperature at a constant level (around 41-45℃ in a healthy adult hen), so they can cope with a certain amount of cold. Just like wild birds, chickens will fluff up their feathers when it gets cold; this traps a layer of air which insulates the chickens against the cold. This is why it’s so important that chickens don’t get wet during cold weather, as this prevents them from being able to fluff their feathers up. In addition a drafty coop will make it hard for them to trap this layer of warm air too.
They will also tuck their head under their wings and huddle together with their coop companions to keep themselves warm. On the in coop camera recording you could clearly see how the chickens select a roosting place, and then fluff up their feathers.
So if the chickens in the wooden coop were able to keep themselves warm even though it was freezing inside there’s nothing to worry about? Not quite, a coop that’s not insulated or draughty will place extra demands on your chickens because of the heat being lost. Chickens in a cold coop will have to increase their metabolism to turn food and fat reserves into heat at a faster rate than hens in a cosy coop. If the heat loss is extreme, or a chicken is not fully fit then over the course of several cold nights there is a risk that all the energy reserves are used up resulting in the chicken being unable to keep it’s body temperature high enough with potentially fatal consequences.
What this test shows is that properly insulated, winter ready chicken coop can make all the difference between a cosy night in the coop and one spent shivering to keep warm. As an added bonus hens that use up less energy keeping warm are more likely to keep laying.
By clicking "Accept All", you agree to the storing of cookies on your device to enhance site navigation, analyze site usage, and assist in our marketing efforts.
Privacy Preference Centre
When you visit any website, it may store or retrieve information on your browser, mostly in the form of cookies. This information might be about you, your preferences or your device and is mostly used to make the site work as you expect it to. The information does not usually directly identify you, but it can give you a more personalized web experience. Because we respect your right to privacy, you can choose not to allow some types of cookies. Click on the different category headings to find out more and change our default settings. However, blocking some types of cookies may impact your experience of the site and the services we are able to offer.
Manage Consent Preferences
Always Active
These cookies are necessary for the website to function and cannot be switched off in our systems. They are usually only set in response to actions made by you which amount to a request for services, such as setting your privacy preferences, logging in or filling in forms. You can set your browser to block or alert you about these cookies, but some parts of the site will not then work. These cookies do not store any personally identifiable information.
These cookies allow us to count visits and traffic sources so we can measure and improve the performance of our site. They help us to know which pages are the most and least popular and see how visitors move around the site. All information these cookies collect is aggregated and therefore anonymous. If you do not allow these cookies we will not know when you have visited our site, and will not be able to monitor its performance.
These cookies enable the website to provide enhanced functionality and personalisation. They may be set by us or by third party providers whose services we have added to our pages. If you do not allow these cookies then some or all of these services may not function properly.
These cookies may be set through our site by our advertising partners. They may be used by those companies to build a profile of your interests and show you relevant adverts on other sites. They do not store directly personal information, but are based on uniquely identifying your browser and internet device. If you do not allow these cookies, you will experience less targeted advertising.

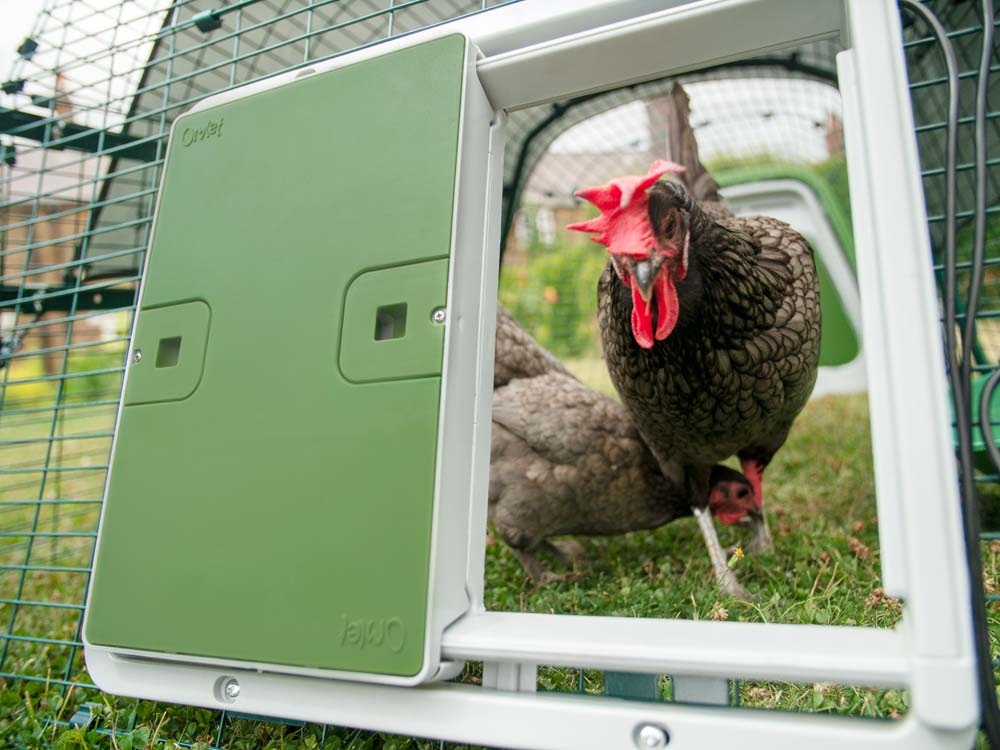
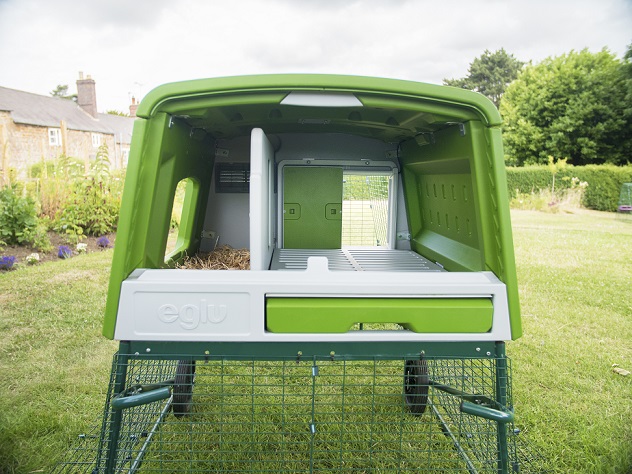
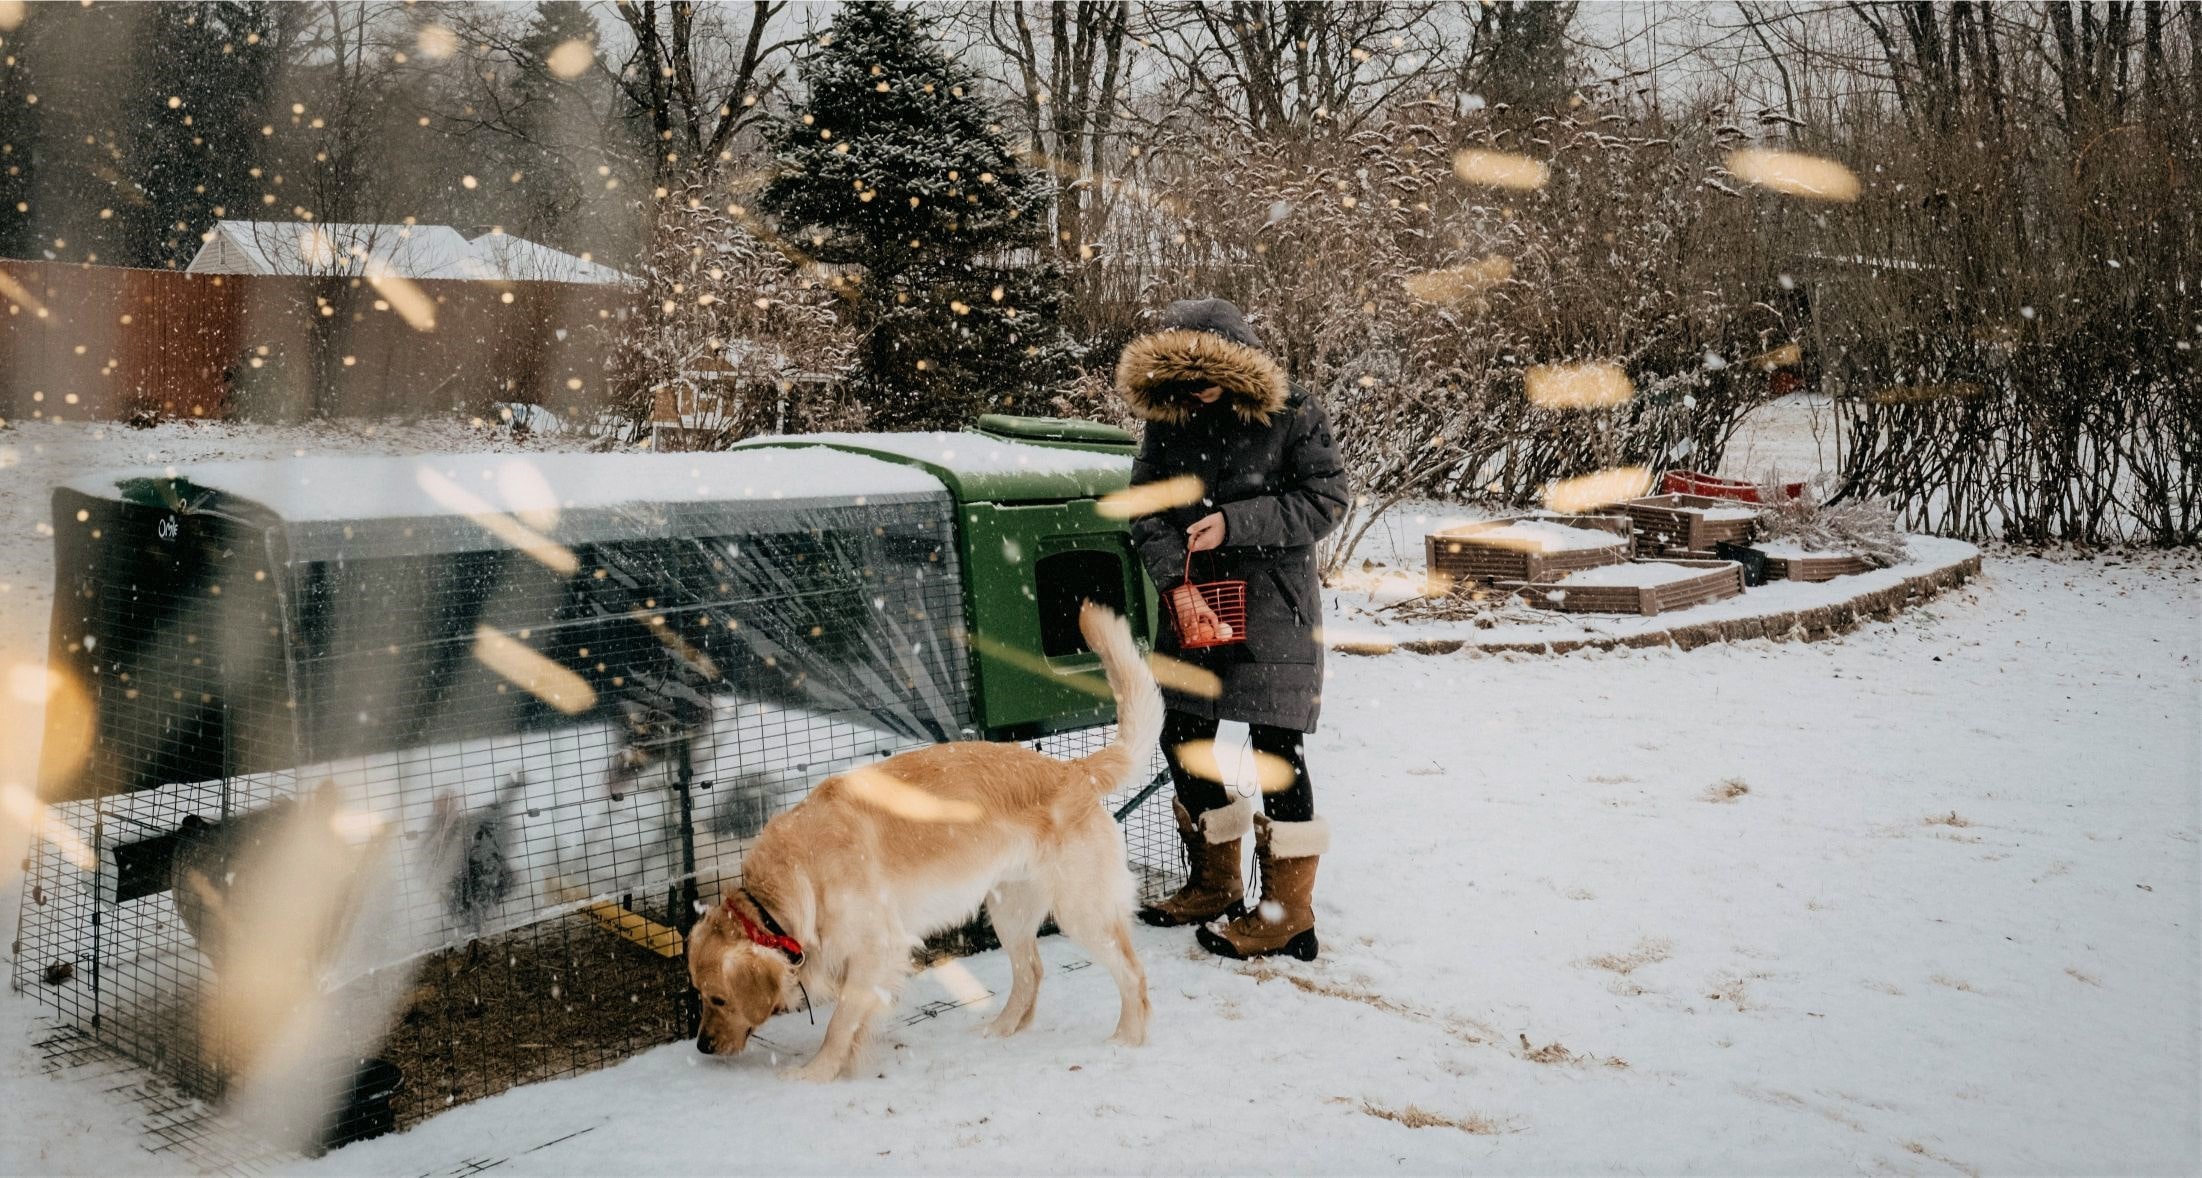
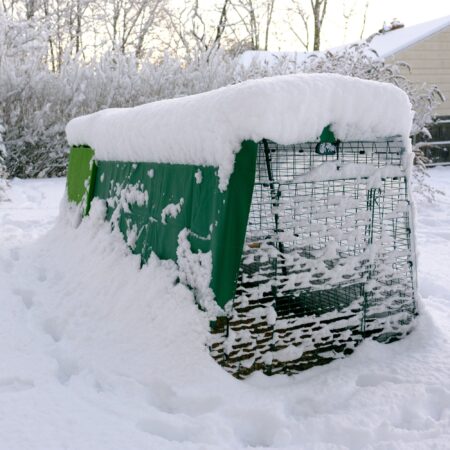
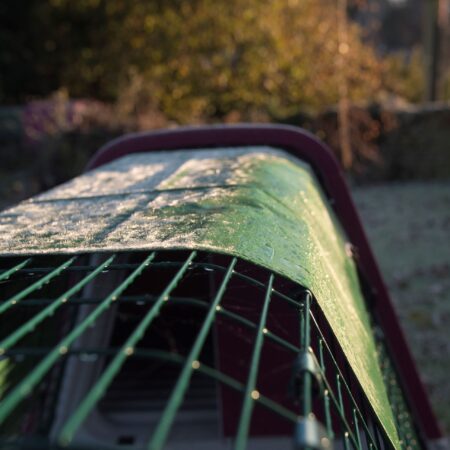


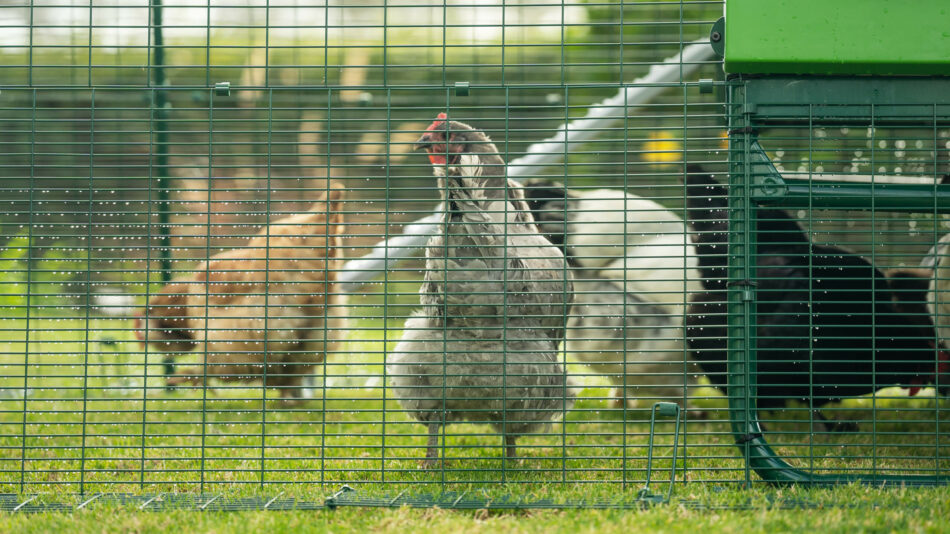
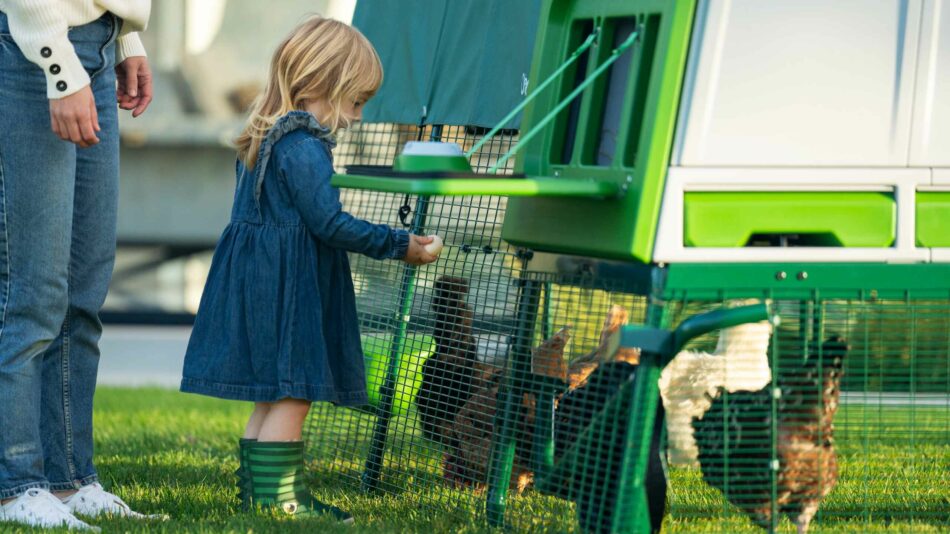
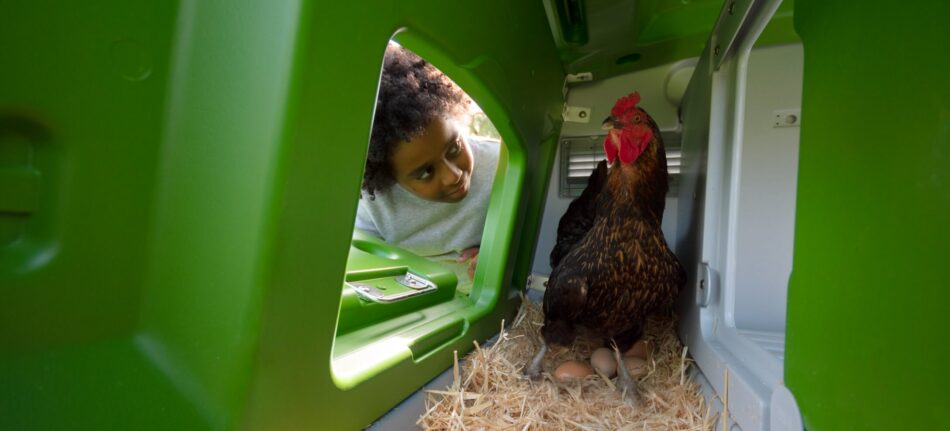
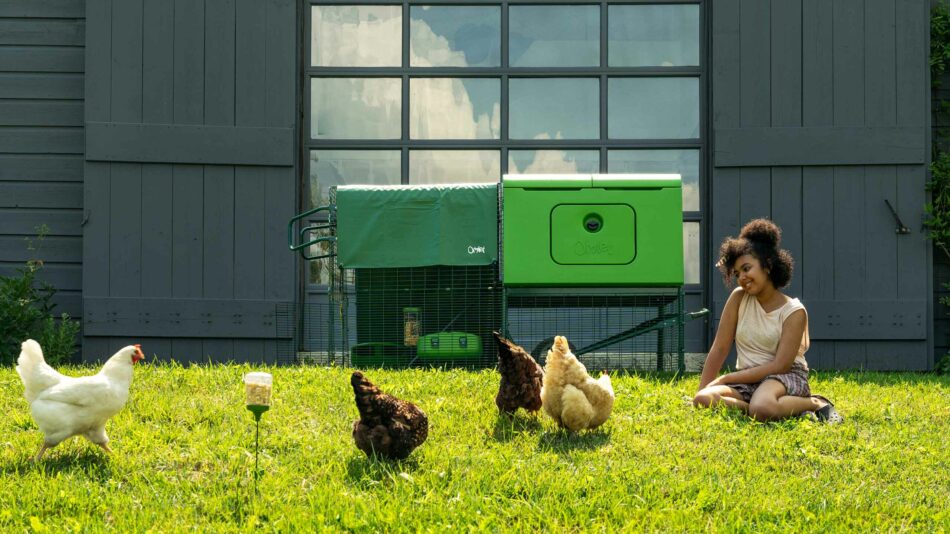
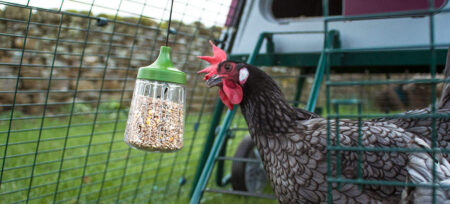 Ever heard the expression ‘cooped up’? It means being stuck indoors with nothing to do, resulting in frustration and boredom. We tend to lock hens in a chicken coop, and that’s where the saying comes from.
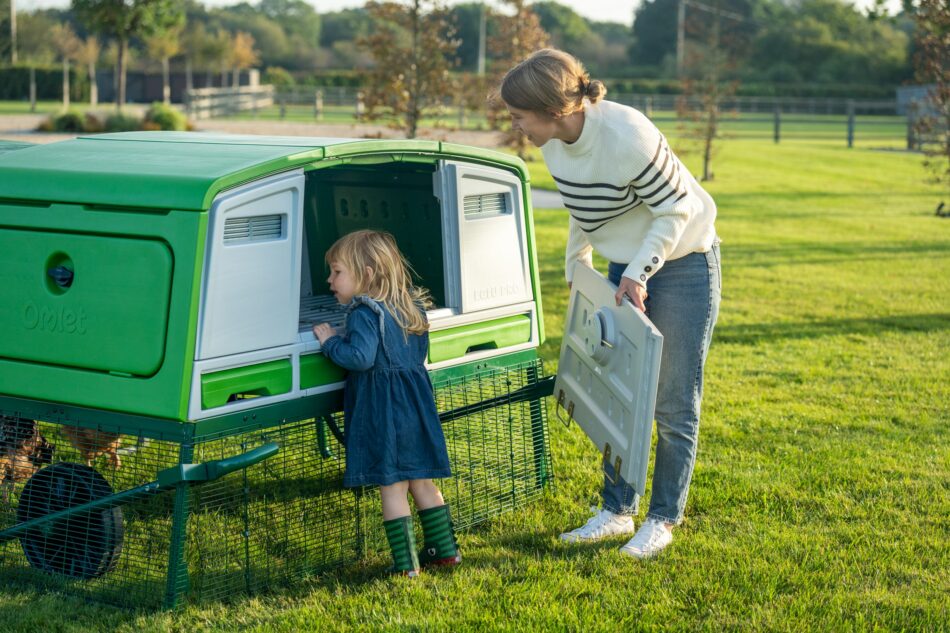
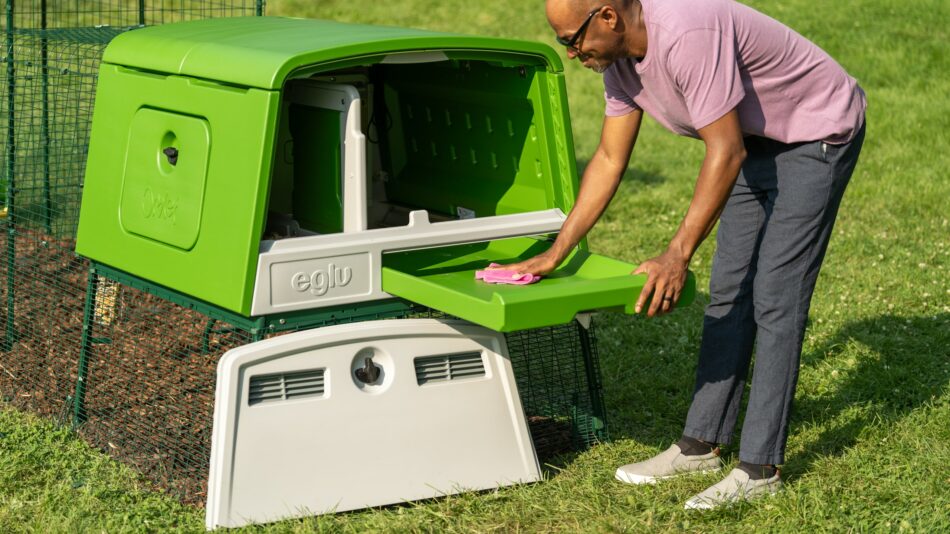

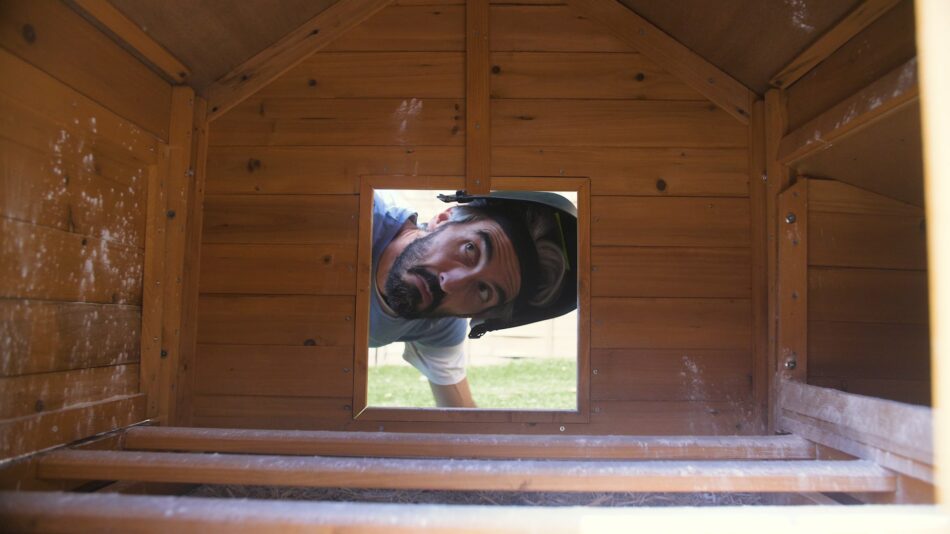

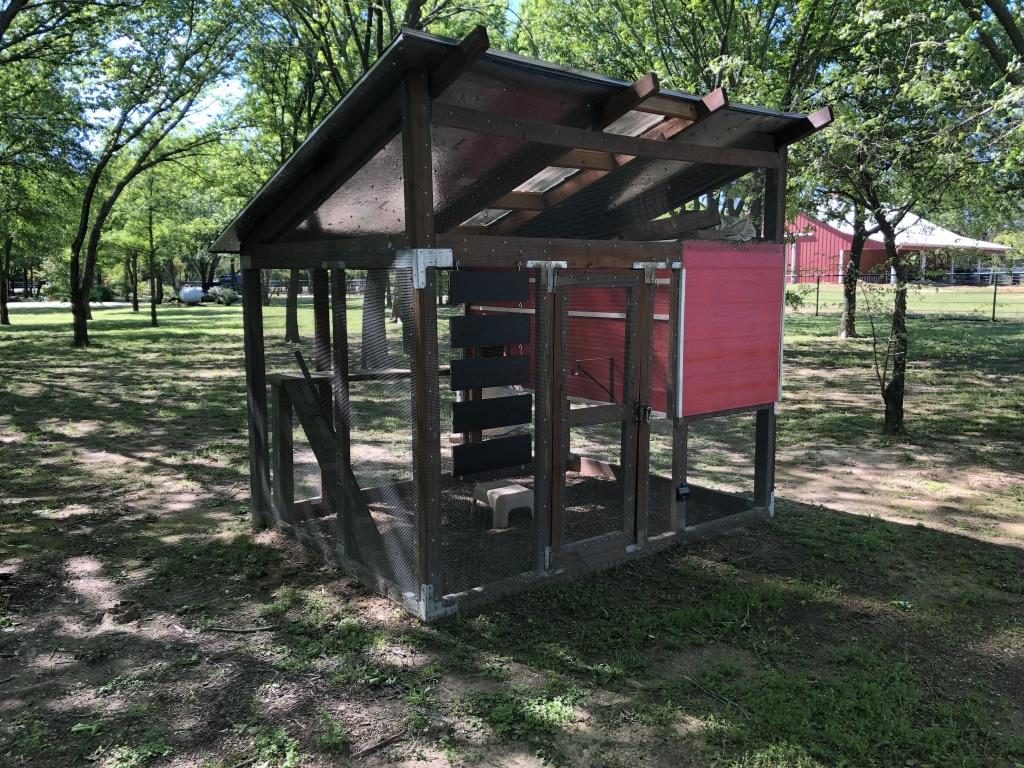
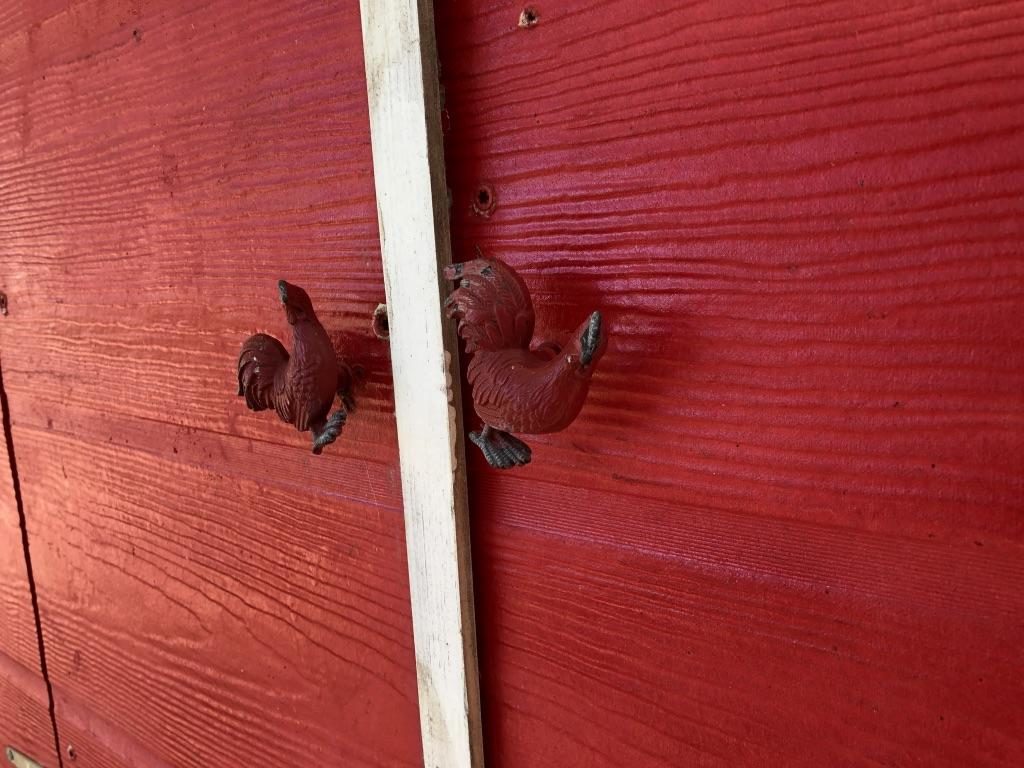
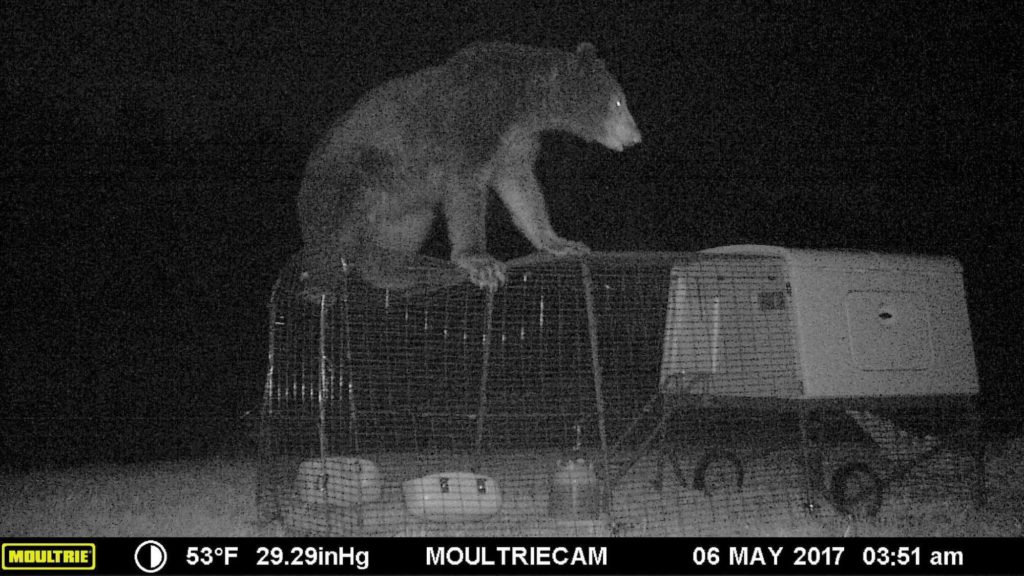
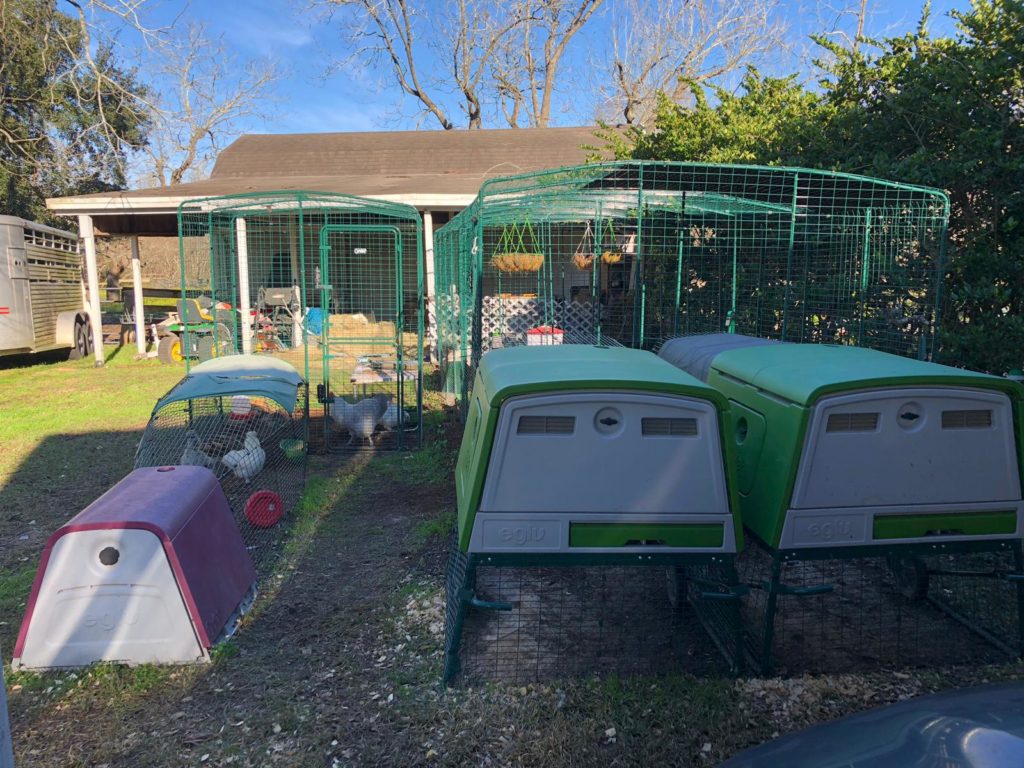
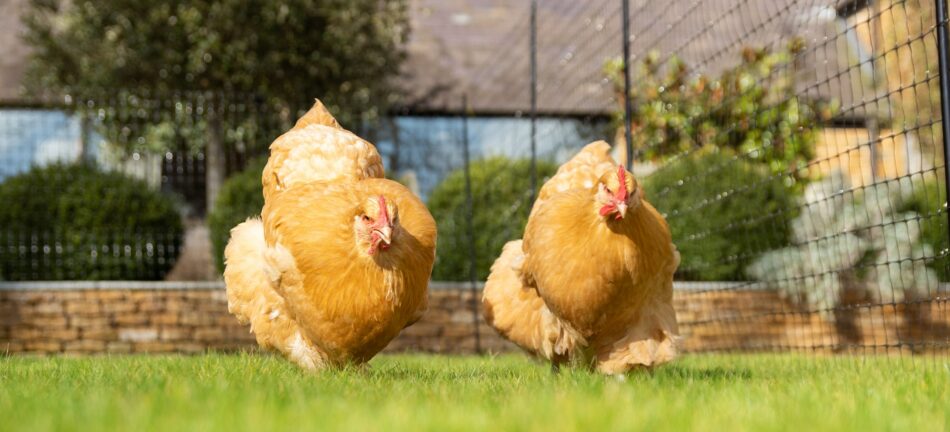
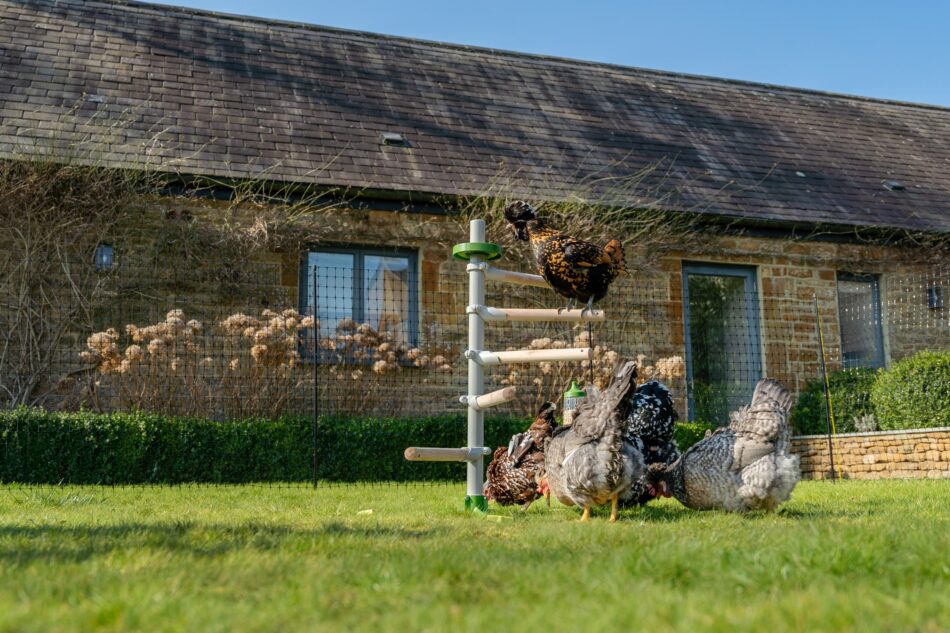
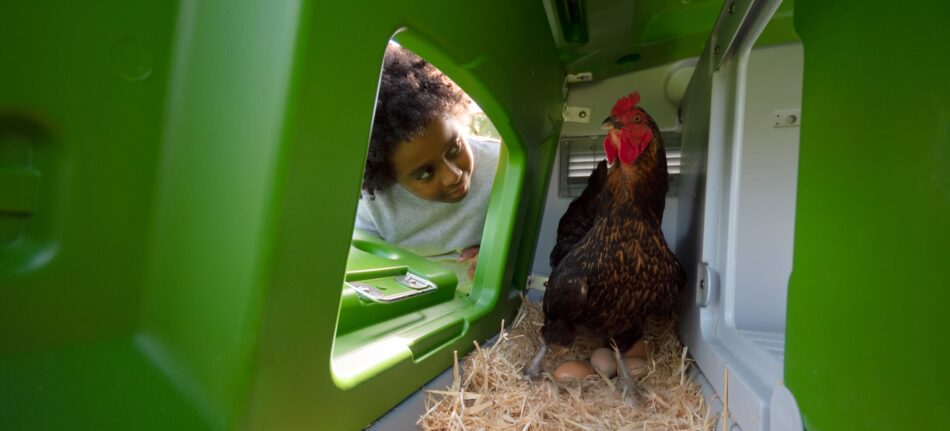
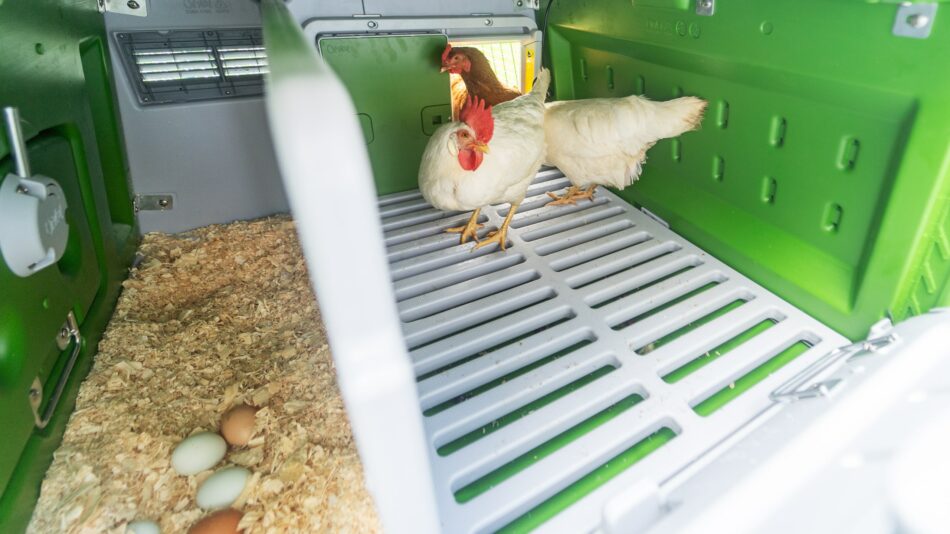
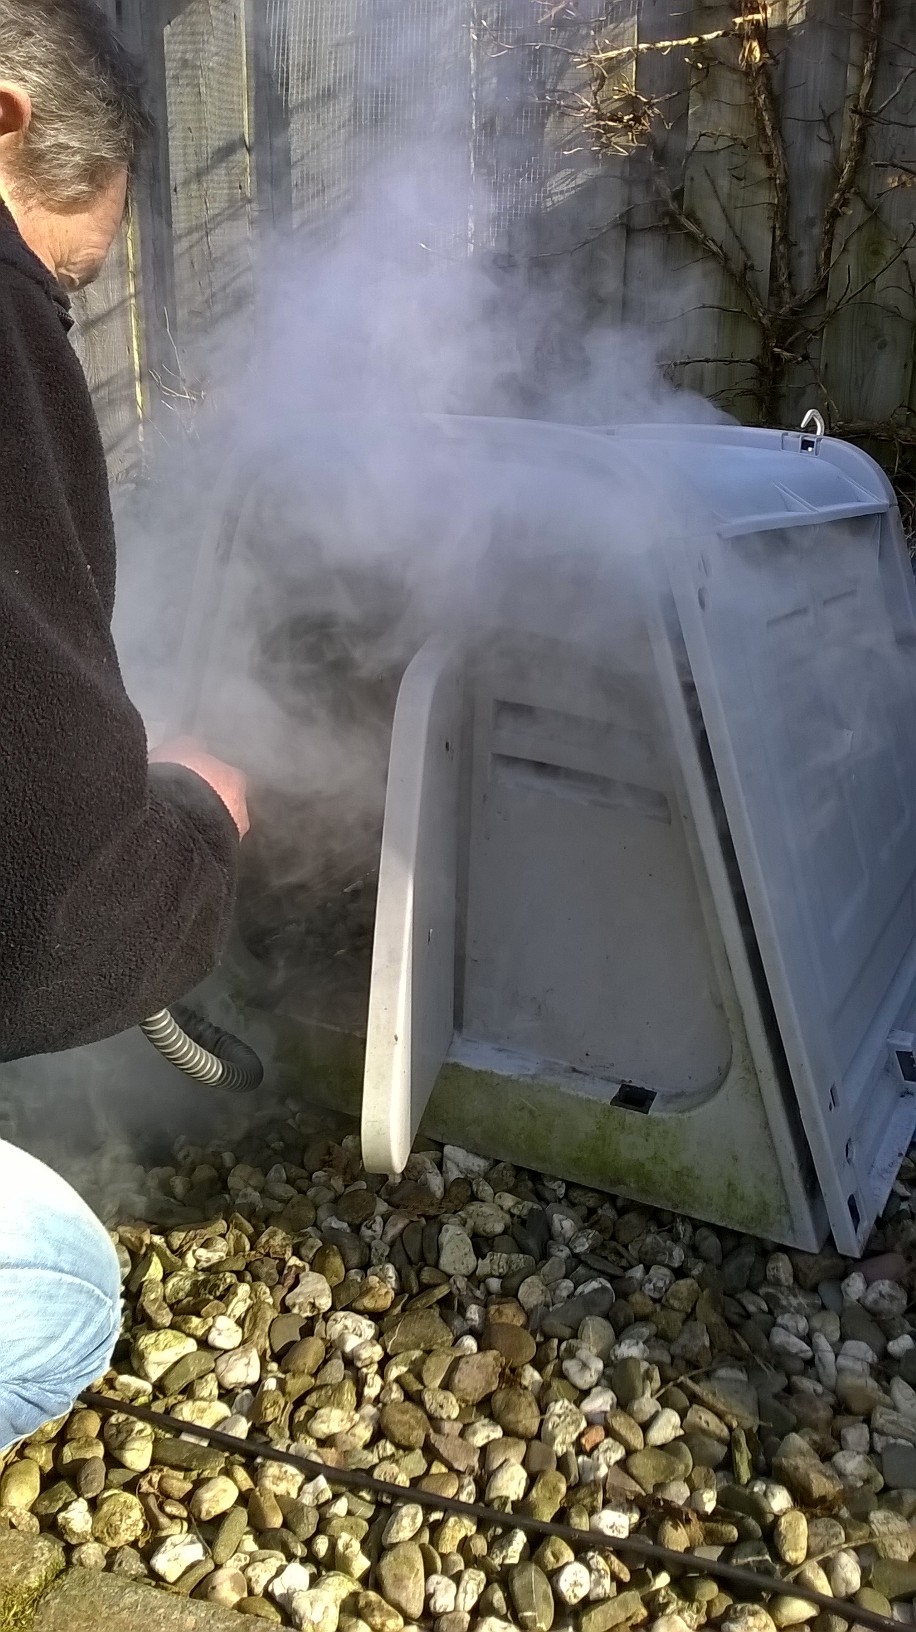
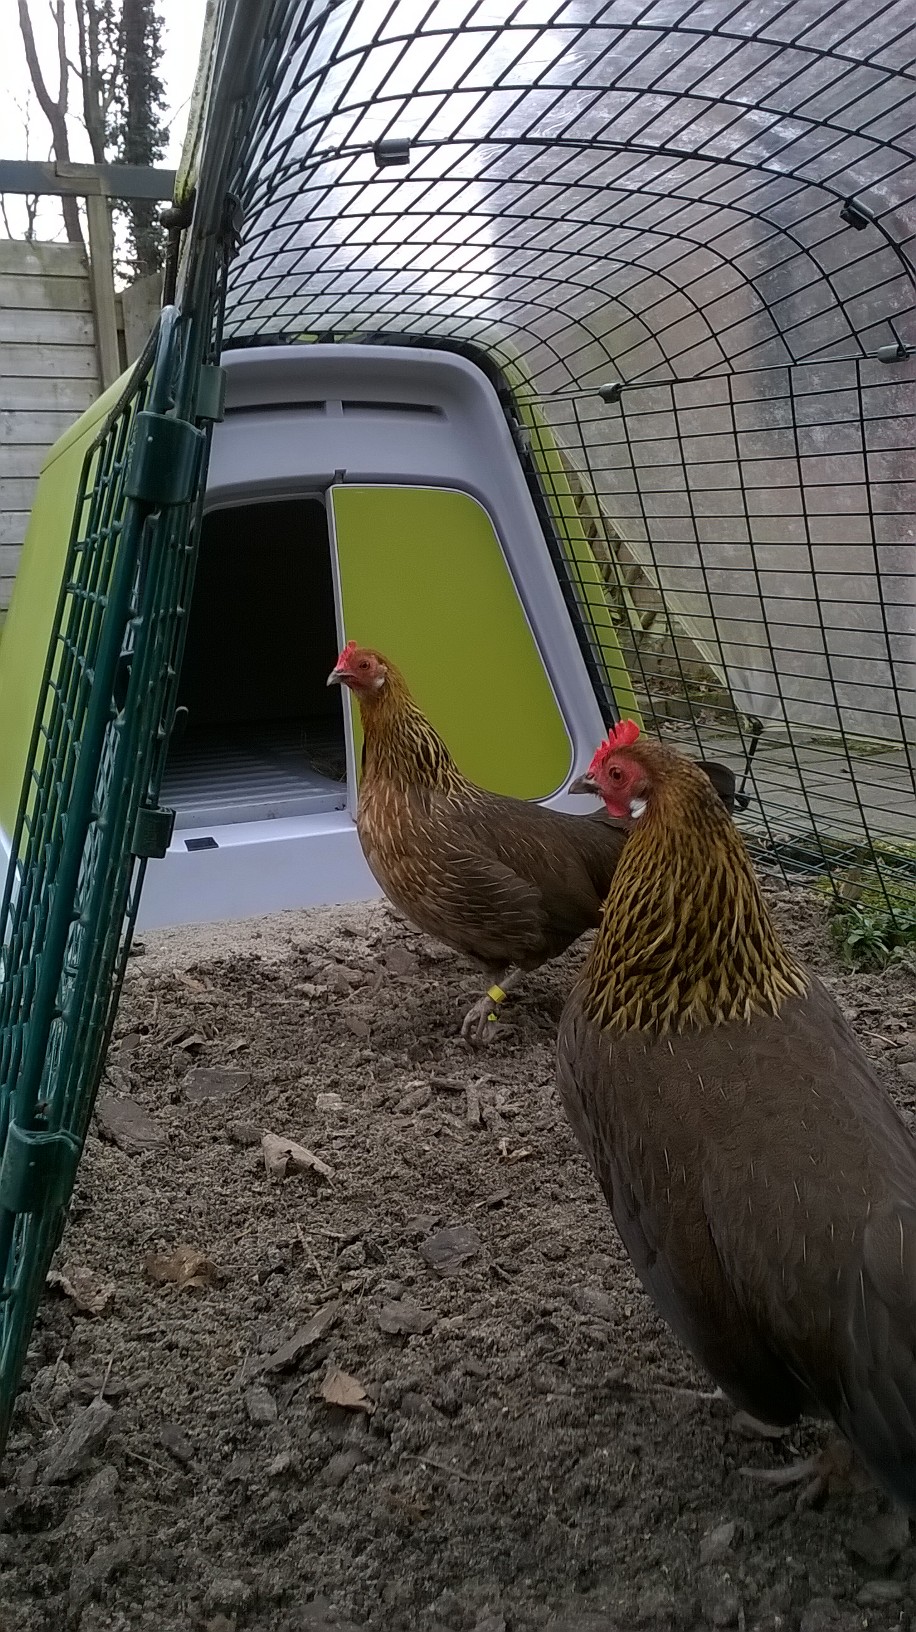
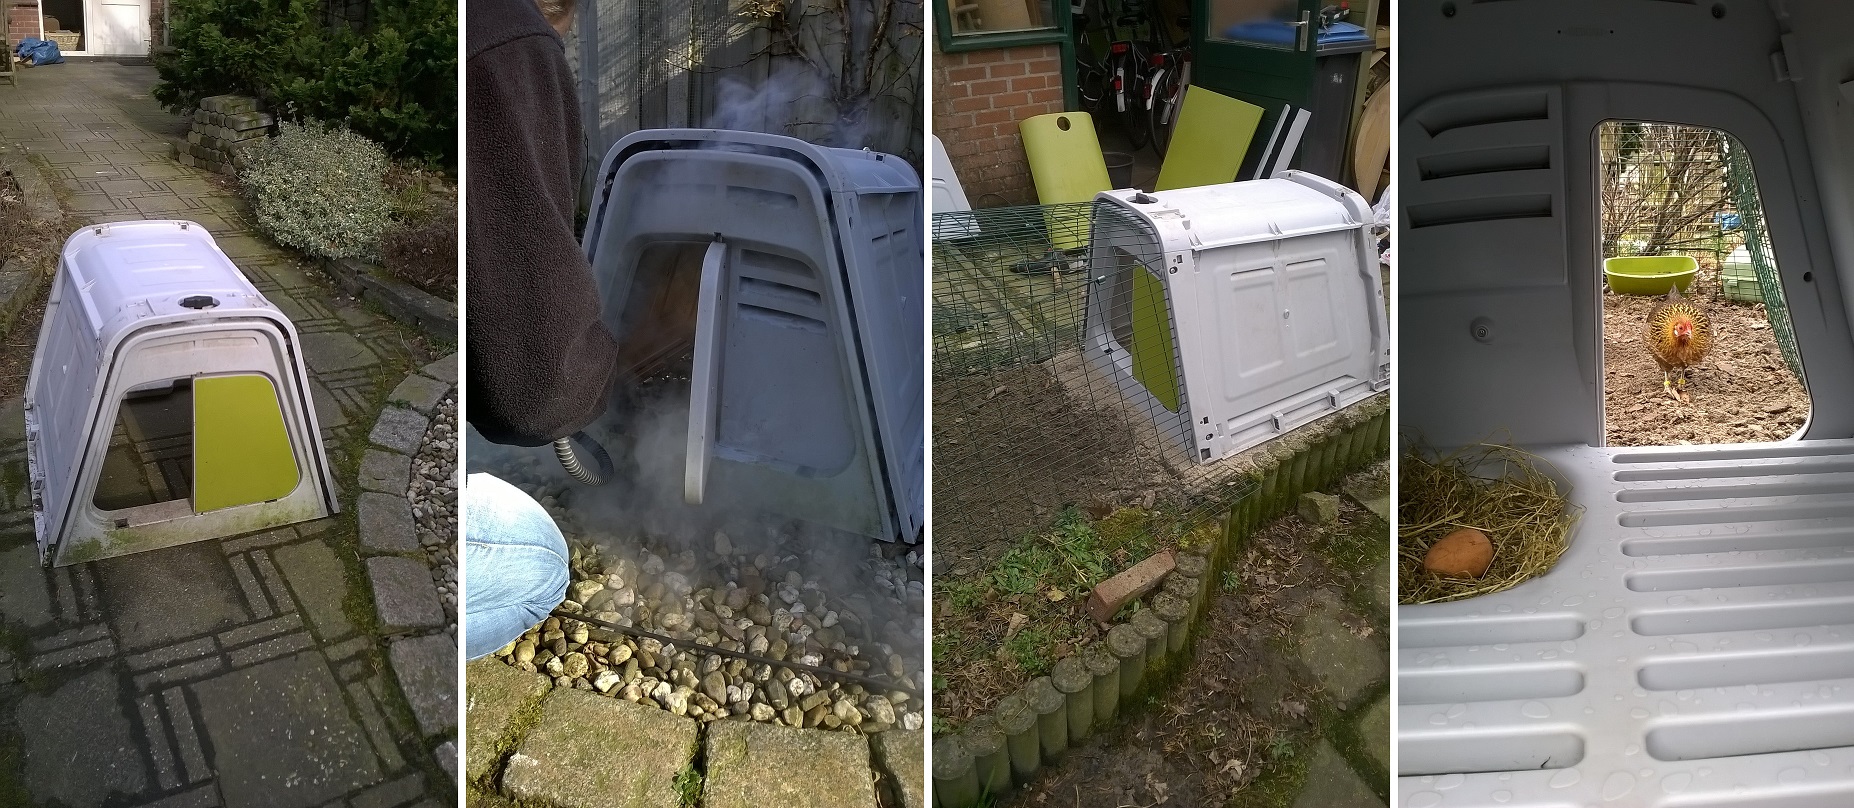
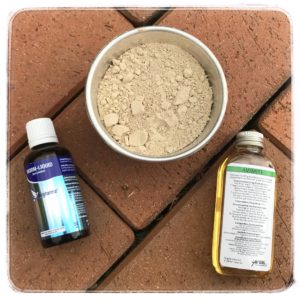
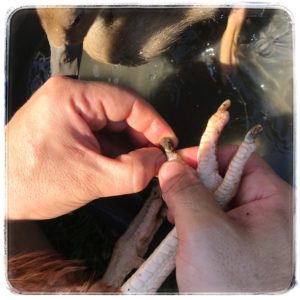
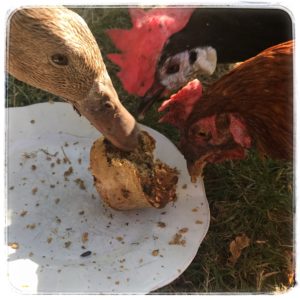
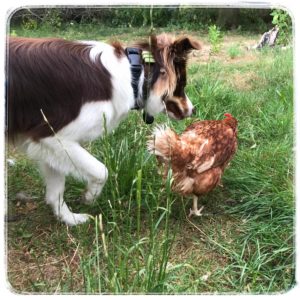
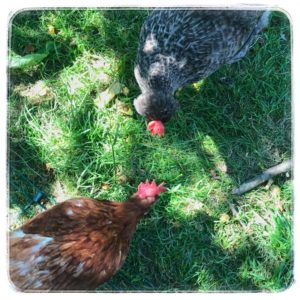
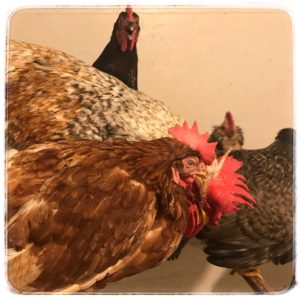
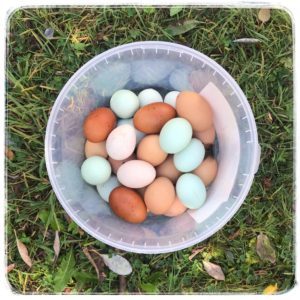
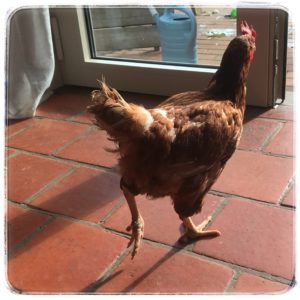
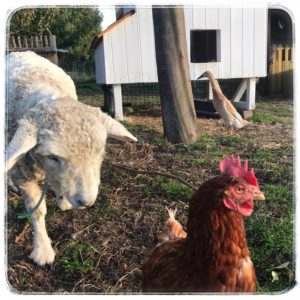
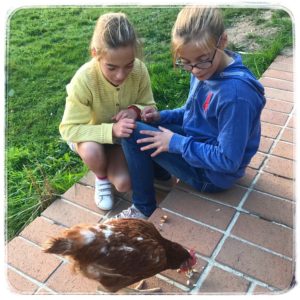
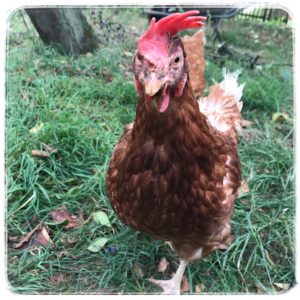
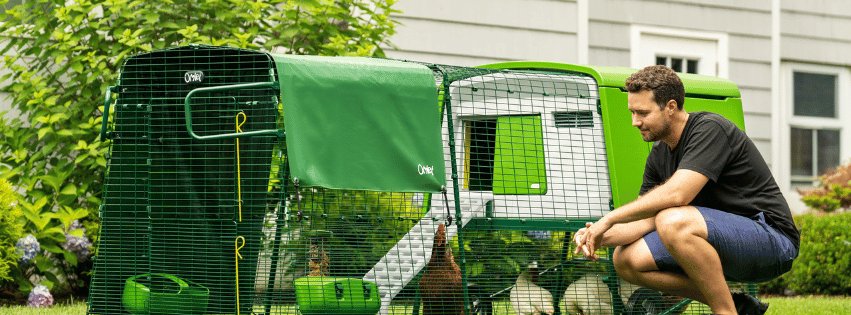
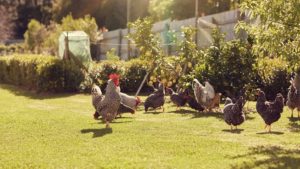
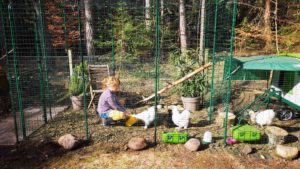
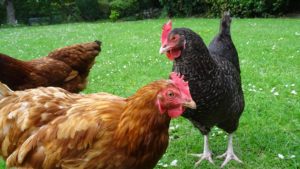
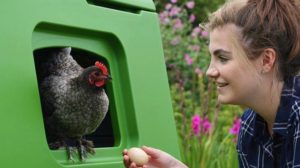
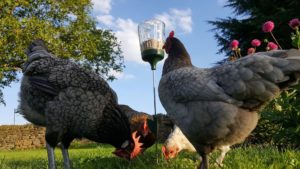
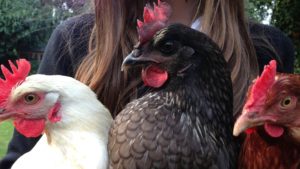
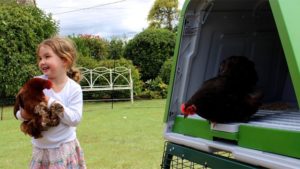
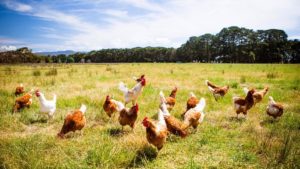
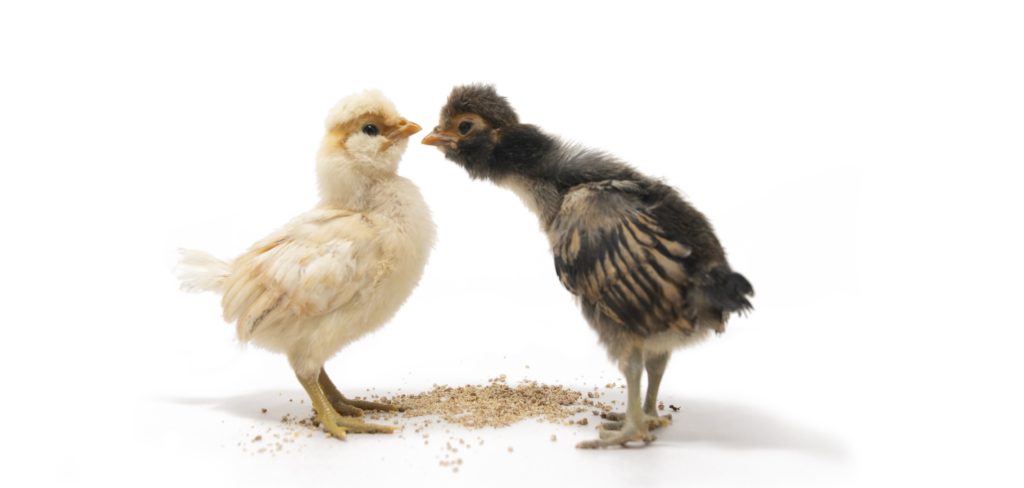
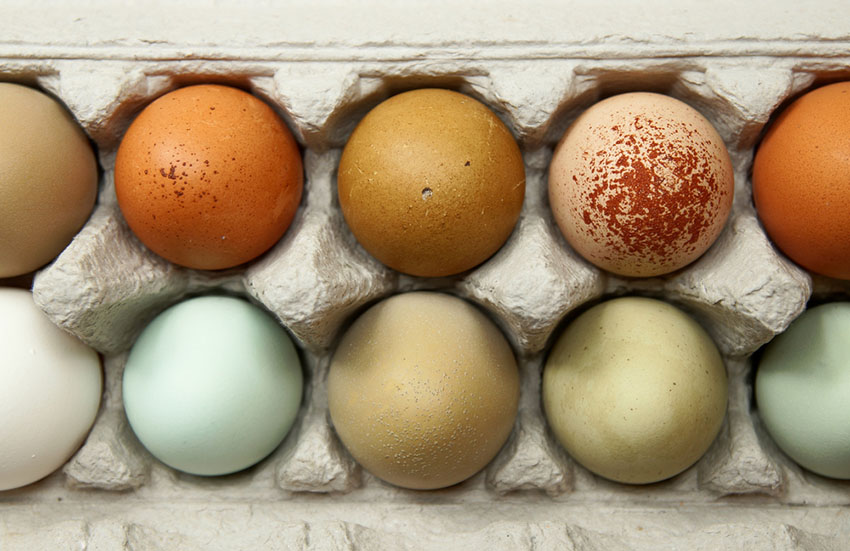
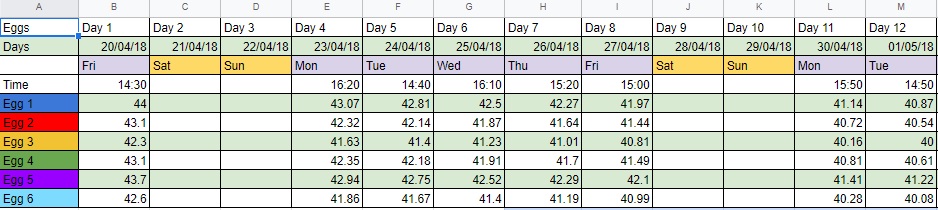
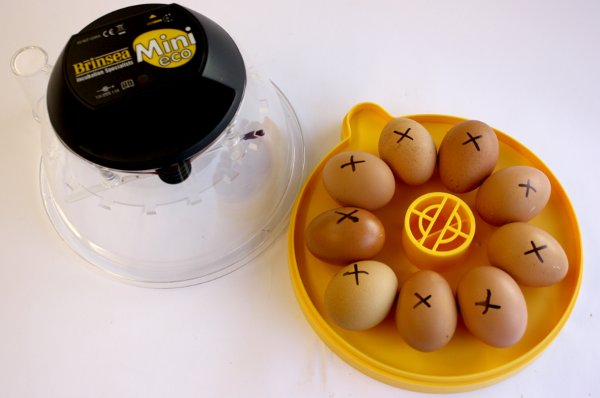
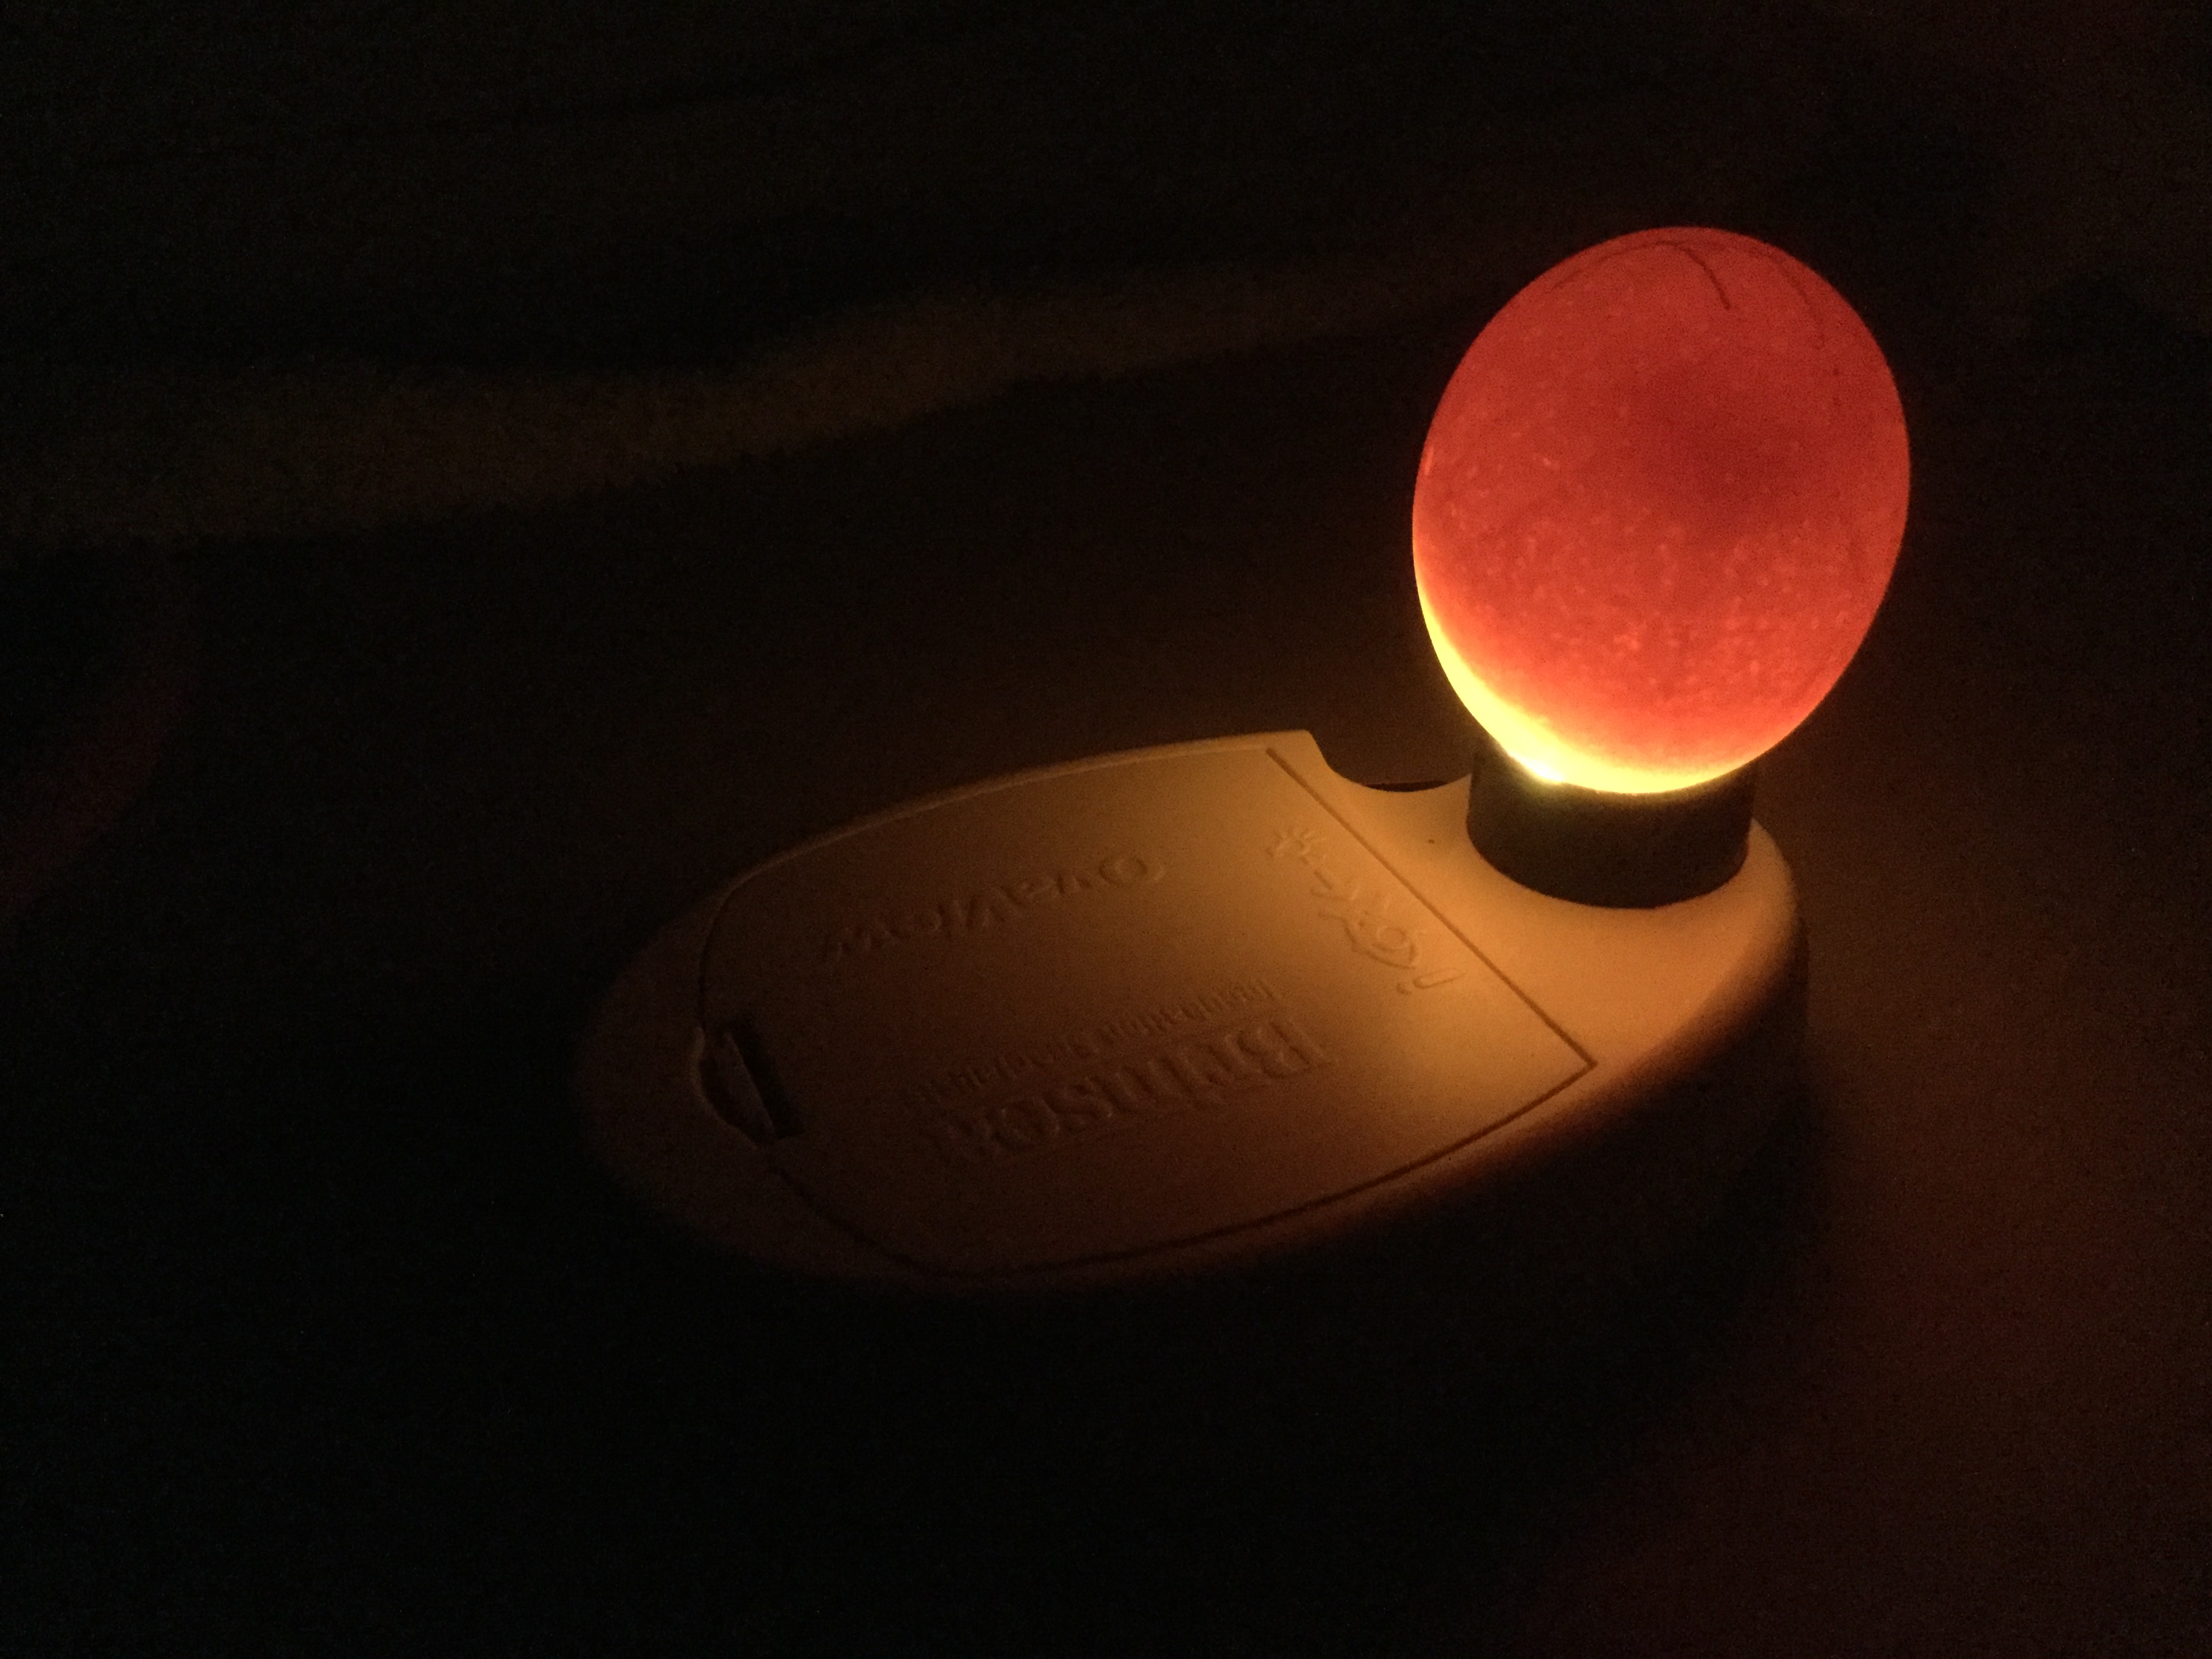
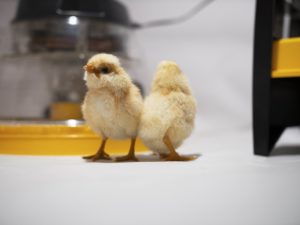
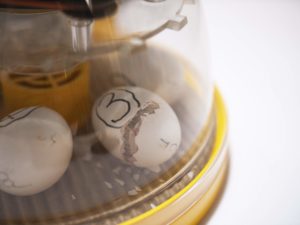
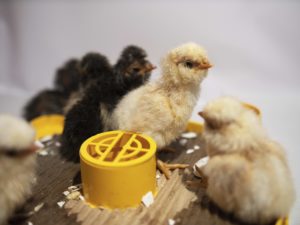
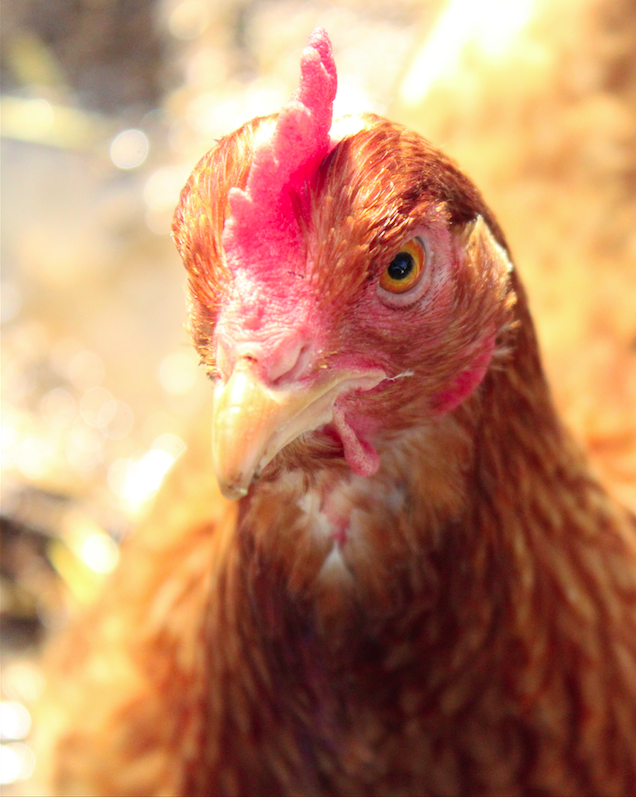 On average backyard chickens live to an age of six to eight years, but there are of course exceptions. How old a chicken will become depends amongst other things on the breed and how a chicken is kept. Heavy layers exhaust themselves with a lifespan of just three years, others can live up to ten years. According to the Guinness World Records world’s oldest chicken is Matilda, a Red Pyle hen from Alabama that died at the age of sixteen (1990-2006). A hen is considered a senior around the age of five. If you are not sure about the age of a chicken, there are signs that will tell you your hen is getting older.