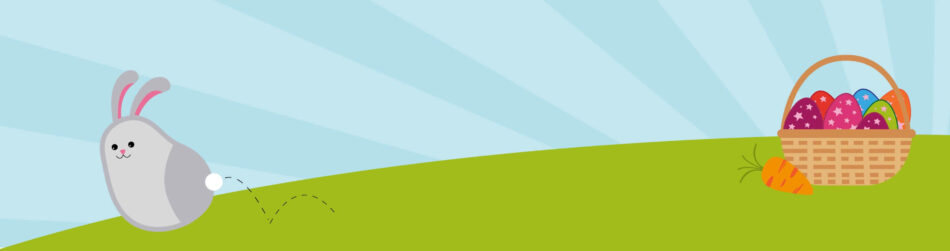
Are you looking for some fun activities for the whole family over the Easter holiday? We’ve gathered some fun games, creative craft activities and delicious recipes that will keep children (and adults) busy between the egg painting and the chocolate bunny breaks!
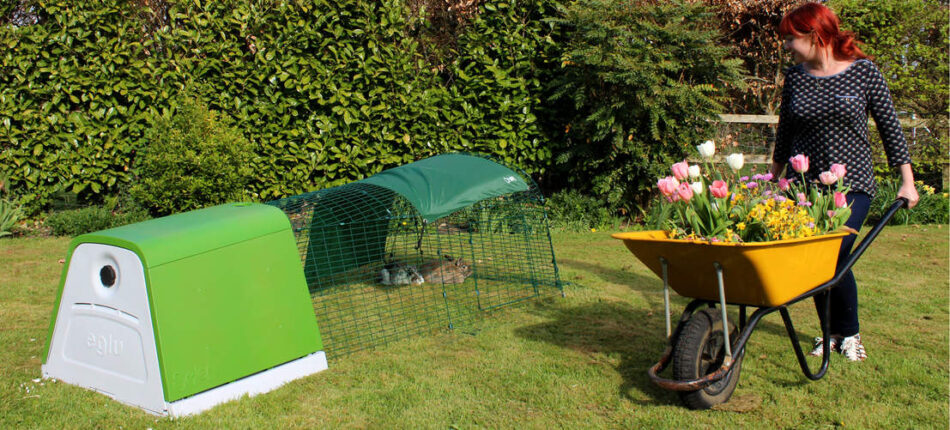
Are the pets also finding the holiday a bit long? Here are some great things that you and your children can do together with, or for, your pets.
Hopefully these tips will make the Easter holiday extra creative, fun and yummy for the whole family! Tag Omlet on social media to let us know what you think!
Does your cat get in the way when you’re wrapping presents at Christmas? Are you tired of hunching over badly wrapped socks with scotch tape stuck to your fingers? Is your dog snoring in the corner with one eye on the food gift sets?
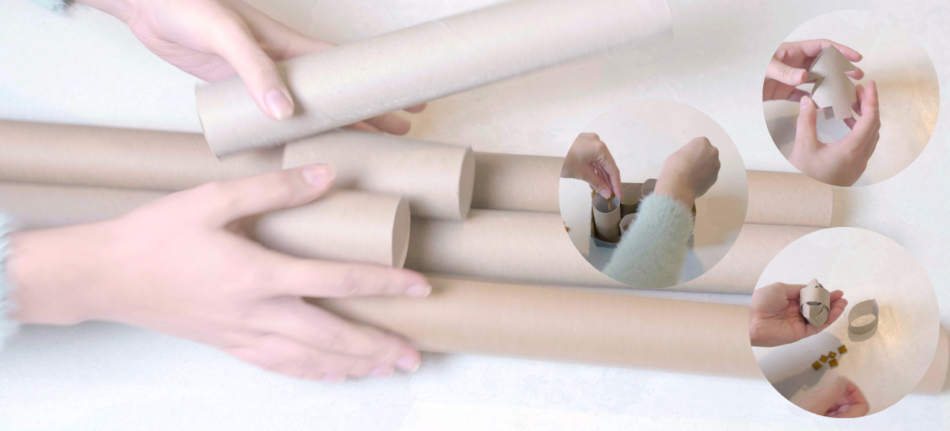
It’s time to take a break and make some fun DIY pet toys! These four simple toys can easily be made with used wrapping paper cardboard tubes, so you can make great use of the tubes, and keep your pets entertained.
Opting out of wrapping this year? Don’t worry, you can make all these toys with a toilet paper roll or paper towel rolls.
Safety note: Always supervise children with scissors and supervise your pets with these new toys. Give treats in moderation.
Treat dispenser
You will need:
Toilet roll cardboard tubes or a longer wrapping paper tube cut shorter
Your dog or cat’s favorite treats/kibbles
A pencil
Scissors
How to:
Cut into one end of the cardboard tubes, and repeat around the edge of the end of the tube, about 1cm between each cut, and up the tube by about 2cm
Fold the cut pieces into each other and hook together so they hold their position, push your thumb through so the ends point inwards into the tube
Repeat with the other end, but before closing up the tube and pushing inside, fill with your pet’s favorite treats or kibble
Use the pencil to poke holes into the tube, just about big enough for the kibble to fall out of
Give to your pet and encourage them to kick the tube around to release the treats!
Slow-release feeder
You will need:
Toilet paper roll cardboard tubes or a longer wrapping paper tube cut shorter
A small cardboard box
Your dog’s favorite kibble
How to:
If using a cardboard box, cut down the top flaps so it’s a completely open box
Stand up toilet paper roll cardboard tubes in the box. You can cut them into different heights to make it more interesting
Fill the box with your dog’s food
Place the box on the floor and watch as your dog sniffs out their kibble and nudges and removes the tubes to eat
Christmas tree chewer
You will need:
Toilet paper roll cardboard tubes or a longer wrapping paper tube cut shorter
Scissors
How to:
Fold a toilet paper roll tube in half by length (end to end)
Draw a Christmas tree shape on the toilet roll
It’s very important to leave a folded edge uncut by about half a centimeter either side – this will hold the tree together
Once the tree shape is cut, push in the sides so isn’t folded flat, and the tree should stand up
Place in your hamster’s cage or playpen and enjoy!
Treat ball
You will need:
Toilet roll cardboard tubes or cut up a longer wrapping paper tube
Scissors
Treats or kibble
How to:
Cut a toilet roll tube into 5 rings
Place one ring through the other, and a third ring through these 2
Place another ring through a gap, then pop some kibble into the center
Place the final ring through the tiny gap left so it holds its shape
Roll the treat ball on the floor for your cat or dog to kick around to release the treats!
Are you eggcited about Easter? Easter is the second biggest family gathering of the year, so let’s celebrate it with some extra “hoppy” Easter games! This year, Easter will be celebrated in a small circle, but this doesn’t mean you have to miss out on all the great fun. Here are 5 festive Easter games that will keep the whole family entertained!
1- Easter Tic-Tac-Toe
This is mostly played by young children but makes a great strategy game for adults too! To make this game extra “hoppy” for Easter, you could paint real or plastic eggs in different colours or decorate them to distinguish each player. Players then take it in turns placing their egg on the spaces in a 3◊3 grid. The player who succeeds in placing three of their eggs in a diagonal, horizontal, or vertical row is the winner!
2- Hula Hoop Aim
This is a great game for families or groups, where everyone will be entertained – and it’s super easy. Set up five hula hoops on the floor and assign a point value to each (example: the closest hoop is 10 points, the second closest 20,…, and the furthest hoop is 50 points). Give each player five plastic eggs. Have them toss the eggs into the hoops to see who can rack up the most points!
You can decorate the eggs together with your children by painting them in individual colors, so that each player has their own colored egg. Let the fun begin!
3- Bunny Hop Sack Race
Old but gold: the hoppiest game in our top picks! Since bunnies hop, having a good old-fashioned sack race is a great fit for Easter, your children will love racing you!
Set up each player with a burlap sack – decked out with a bunny tail – and have them race to the finish line. Make sure you’re on a soft ground. Just don’t forget to whip up some yummy Easter treats for the grand prize winner!
4- Pin Rabbit Tails
This game is for the whole family! Get pom poms and attach double-sided sticky tape to each of them. The players then have to stick the rabbit tails (pom poms) to one another…whoever ends up with most tails on them after 5 minutes of playing loses the game!
Once the game is finished, your children can get creative and do some Easter crafts. The possibilities are endless!
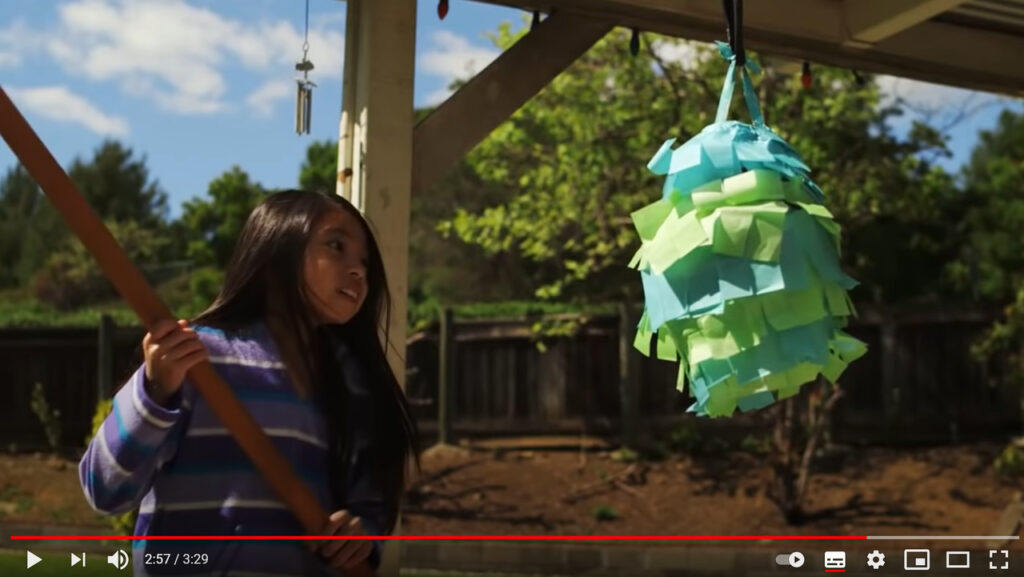
5- Easter Egg Piñata
Piñatas are great for any celebration but they’re also fun to make! Kids will have a blast making these as much as they will enjoy tearing them down.
You’ll need the following suppliers: balloons (small, middle and/or big)
craft glue
2 cups water
tissue paper and/or crepe paper streamers
1 cup flour
decoration
newspaper
craft knife
wire, string, ribbon or rope (to hang the piñata)
piñata bat (e.g. baseball bat)
Step 1: Blow up the balloon, tie it closed and tear or cut newspaper into strips.
Step 2: Mix water with flour to create paste. Dip the newspaper strips in the paste and apply the moistened strips to the balloon. Repeat this until the balloon is completely covered – three layers will help make the piñata strong. Make sure not to cover the knot. This is where you’re going to put the treats later. This part is messy but the kids will love getting their hands dirty. To hold the balloon in place while applying the newspaper strips, place it on top of a plastic container that will act as a stable base.
Step 3: Let the piñata dry for at least 24 hours, making sure to rotate it so all sides dry.
Step 4: After it’s completely dry, cut different colored tissue papers in strips and give the kids freedom to choose their colors and start adding stripes with craft glue to cover the base layer. Decorate as you wish. Now pop the knot with a craft knife and pull out the balloon. Punch two small holes around the main hole. Tie a string or ribbon to the holes to create a loop.
Step 5: Now fill your piñata with some delicious treats, like mini chocolate eggs, jelly beans, marshmallows or any other sweets… whatever you prefer!
Step 6: Glue down some crepe paper on top of the hole, or use masking tape. The goal is to prevent the filling of the piñata from falling out before you’ve actually hit it. Tie another piece of string, ribbon, or rope to the loop you’ve already made and use this to attach the piñata to whatever you’d like to hang it from.
Here is a video about how to make a piñata and who explains it better than kids itself?
BONUS
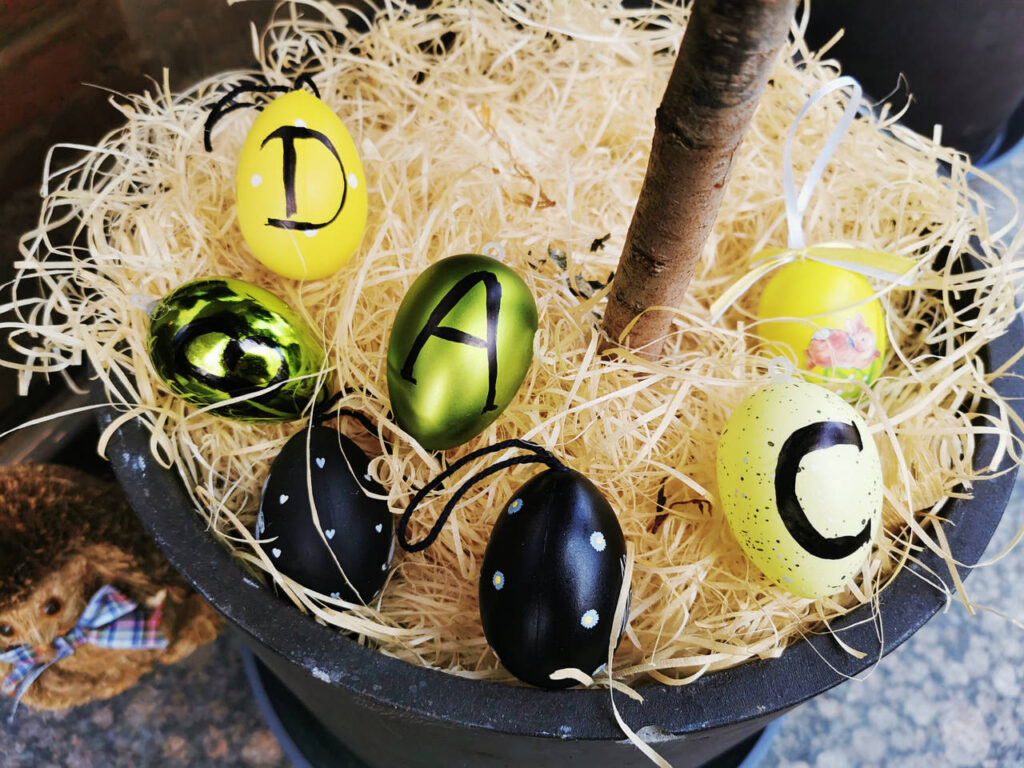
Here comes an eggstra game! Everything’s a bit more fun with a little mystery. Check out this super cool secret Easter egg hunt!
Let the children – and adults – hunt for the eggs but this time, write a letter on each egg. In the end, when all eggs are collected together, they have to decode the message and they’ll get the clue where the Easter gift is actually hidden. Example: if you hide the gift in the garage, place the letters “G”, “A”, “R”, “A”, “G”, “E” individually on each egg. If they put the letters together, they know where to go for a successful egg hunt! – You can also use Kinder eggs and put individual messages inside.
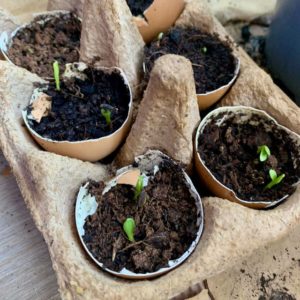
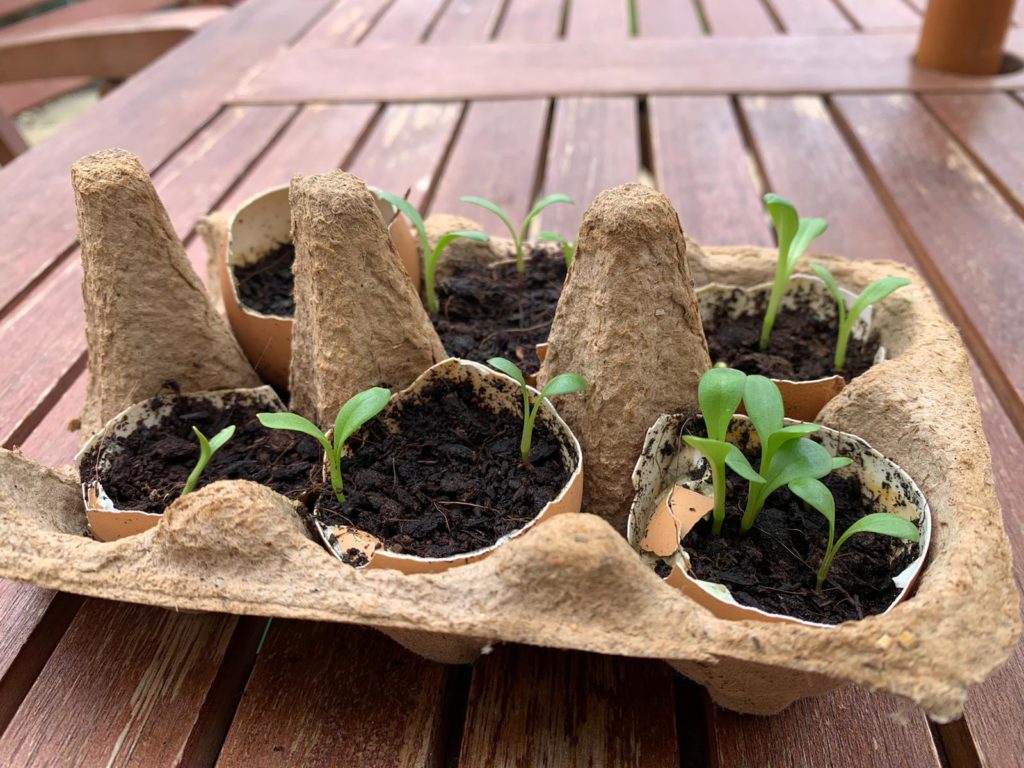
Next time you’re about to throw away your empty eggshells, spare the compost bin and keep hold of them. Many people use crushed up egg shells in gardening to add calcium to the soil, however we have another great way you can use egg shells to add to your garden. Many propagators or seed starter tubs are made out of plastic, which isn’t great for the environment. Why not use your empty egg shells to start your next batch of seeds?! It’s so quick and easy to do!
1. Firstly rinse out the shells, and then let them dry.
2. Once dry, fill the egg shells halfway with compost and sit them in the egg carton.
3. Sprinkle a little water on the compost and then add your chosen seeds to the compost.
4. Spread a thin layer of compost on top and drizzle a little bit more water.
5. Then place in a sunny spot indoors – a window ledge is a great place to start seeds.
6. Keep watering your eggshell seeds each night, and after a few days you should start to see them sprout!
Once they’re too big for the shell then transfer to a bigger spot to continue growing indoors or outdoors depending on the chosen seeds (see packet for details).
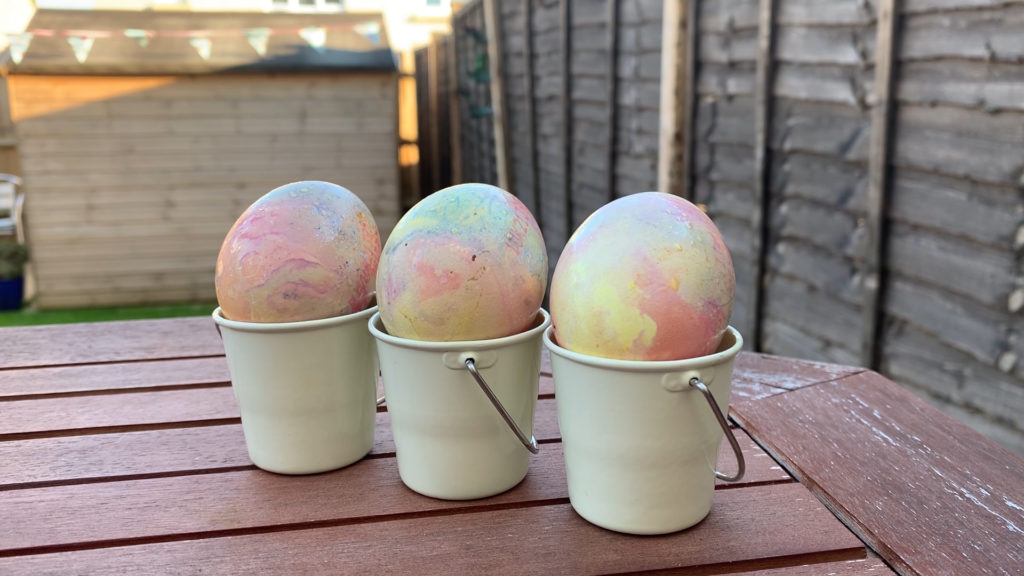
Make Easter more colourful with this super fun craft for the whole family – marbled eggs! Watch the video or follow the instructions below.
You will need: Eggs Food Coloring Vinegar Vegetable Oil
Instructions:
Take an egg and gently poke a hole at one end. Poke a hole at the other end of the egg which is slightly larger than the first.
Empty the egg by carefully blowing through the smaller of the holes, pushing the inside of the egg out into a bowl.
Set aside the egg mixture.
Add a tablespoon of food colouring to a bowl and mix with a splash of hot water and a tablespoon of vinegar.
Put the empty eggs in the bowls and let them sit there for a while, regularly turning them to get an even coating.
When the eggs has got some colour to them, drain and put on the side to dry.
Add a few drops of a different food colouring to a plate and mix with some water and a drop of vegetable oil. Roll the eggs on the plate to cover them in the second colour. They don’t need to be fully covered.
Repeat with a few different colours, adding more layers.
Let the eggs dry on a piece of kitchen roll.
You will now have some beautiful and truly unique marbled Easter eggs! Wash your hands thoroughly and scramble the eggs you put aside earlier for a delicious lunch!
By clicking "Accept All", you agree to the storing of cookies on your device to enhance site navigation, analyze site usage, and assist in our marketing efforts.
Privacy Preference Centre
When you visit any website, it may store or retrieve information on your browser, mostly in the form of cookies. This information might be about you, your preferences or your device and is mostly used to make the site work as you expect it to. The information does not usually directly identify you, but it can give you a more personalized web experience. Because we respect your right to privacy, you can choose not to allow some types of cookies. Click on the different category headings to find out more and change our default settings. However, blocking some types of cookies may impact your experience of the site and the services we are able to offer.
Manage Consent Preferences
Always Active
These cookies are necessary for the website to function and cannot be switched off in our systems. They are usually only set in response to actions made by you which amount to a request for services, such as setting your privacy preferences, logging in or filling in forms. You can set your browser to block or alert you about these cookies, but some parts of the site will not then work. These cookies do not store any personally identifiable information.
These cookies allow us to count visits and traffic sources so we can measure and improve the performance of our site. They help us to know which pages are the most and least popular and see how visitors move around the site. All information these cookies collect is aggregated and therefore anonymous. If you do not allow these cookies we will not know when you have visited our site, and will not be able to monitor its performance.
These cookies enable the website to provide enhanced functionality and personalisation. They may be set by us or by third party providers whose services we have added to our pages. If you do not allow these cookies then some or all of these services may not function properly.
These cookies may be set through our site by our advertising partners. They may be used by those companies to build a profile of your interests and show you relevant adverts on other sites. They do not store directly personal information, but are based on uniquely identifying your browser and internet device. If you do not allow these cookies, you will experience less targeted advertising.