Many of us know what it’s like. You start with a few chickens, thinking you’re just going to try it out, but once you realise what amazing pets they are and what delicious eggs they lay you will probably soon think it’s time to expand the flock and get some more hens for your garden.
But adding new chickens to an existing flock is easier said than done, and it’s important to know what you’re doing to avoid bickering and bullying, or even worse.
The key to introducing chickens is time. Be patient, it might take a while before your new individuals are living happily with your current flock, but it will be worth it in the end. Each breed of chicken is different, and all chickens have different personalities, so how well your attempts will go depends on many different factors. Here are some useful things to think about:
Make the right choices
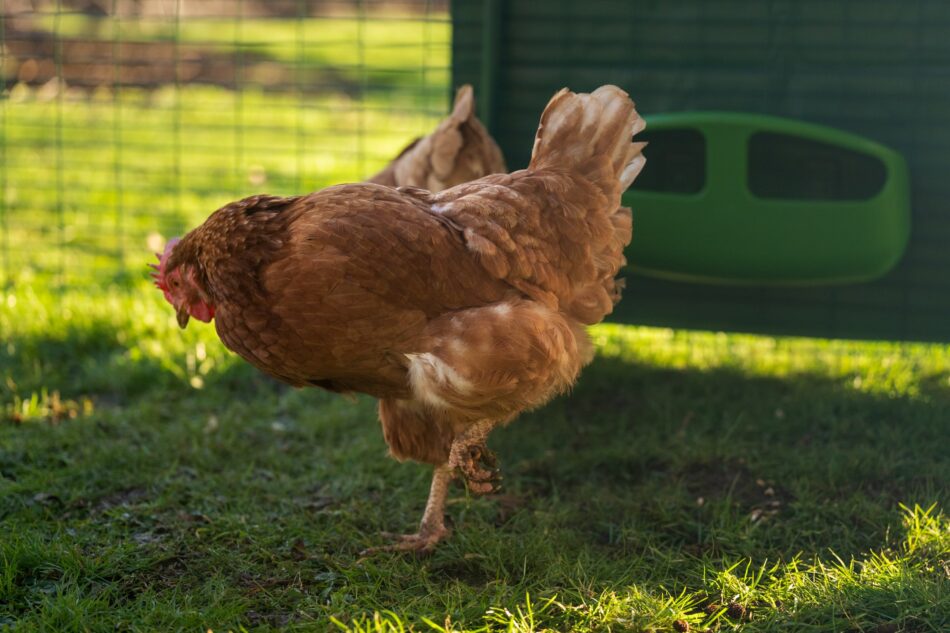
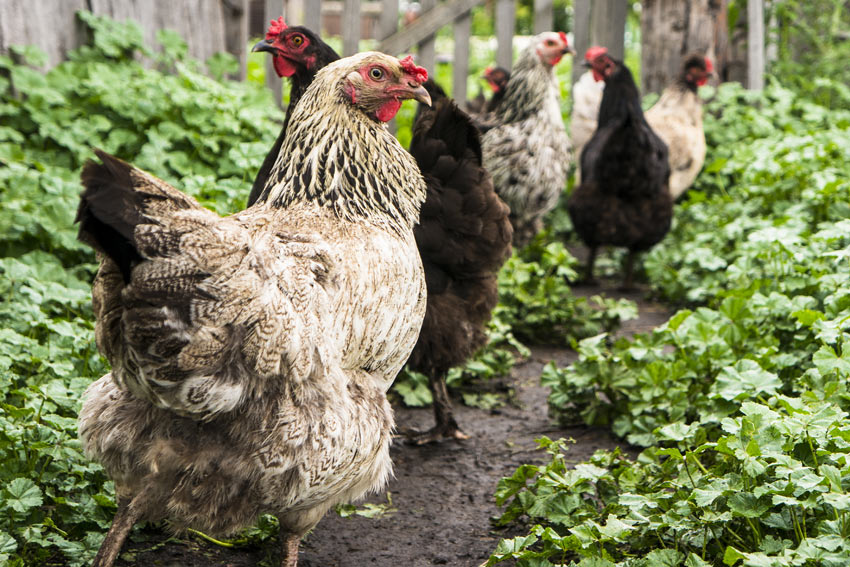
Some people say sticking to the same breed is a good idea, but it’s definitely possible to have several different breeds living side by side. If possible, add chickens that are of similar age and size as your existing ones. Smaller, younger hens will easily become a target if added to a group of larger chickens, and new younger, fitter chickens might cause stress for the older members of your current flock. Never add chicks to a group until they are old and strong enough to fight back if someone decides to bully them.
Also never introduce a chicken on her own; she is bound to become bullied in an already established pecking order. The more chickens you add, the more the pecking order will have to change, and it will be easier for the group to decide who is actually the most dominant. If possible, adding more chickens than you already have will often minimise problems with bullying, but it’s a risky game if you plan on expanding your flock more than once!
Quarantine
The first step in the process is to quarantine the new chickens somewhere away from your flock to make sure they don’t carry any diseases or parasites. Do regular health checks on the new chickens while you’re keeping them separate and treat any illness you might come across. It might be worth doing a worming treatment and to dust them in Diatomaceous Earth a few times to be extra sure they are not bringing in any parasites into your coop.
Quarantine the new birds for at least a week, preferably longer, or until you’re certain they are happy and healthy.
Slow introductions
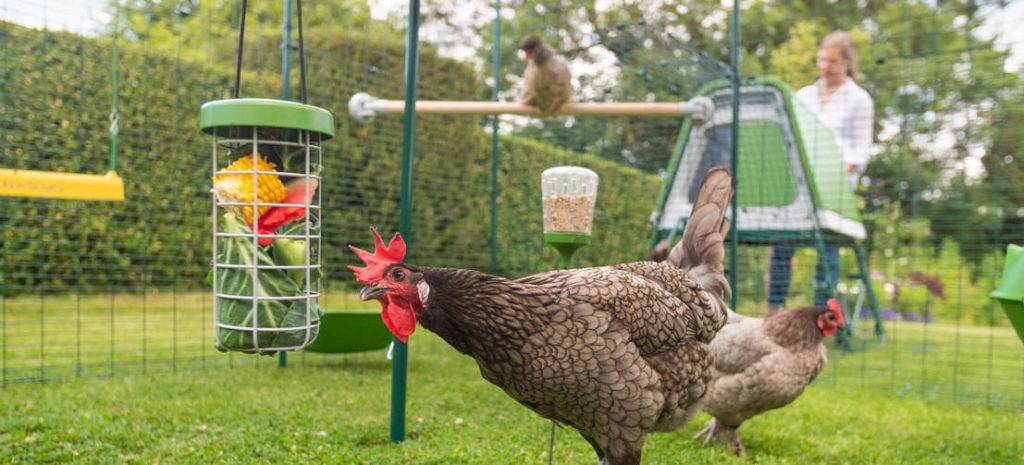
Unfortunately, you can’t just plonk the new chickens down with the old ones as soon as you’re sure they are healthy. Instead, you must allow them to get used to each other. Ideally this is done by placing the two groups close enough to each other that they can see and smell each other, but not close enough that they can touch. They will hopefully be curious of the other group, but not feel that their home is being invaded. The partitions for the Omlet Walk in run is perfect for this stage, as it means you can divide the run and slowly introduce the two groups.
Keep this setup for at least a week. It may seem like they have gotten used to each other after a few days, but for chickens there’s a big difference between seeing some hens over the fence and actually sharing a coop and run with them. Be patient, then you’re more likely to succeed.
The big meet
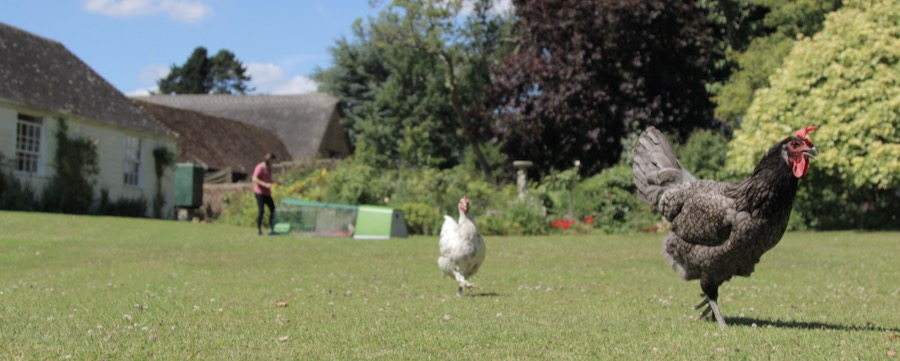
When you think it’s time for the two groups to meet for real, it is best done in a new, neutral area that no chicken has claimed as her own, even if it’s just a small fenced off area in the garden.
It’s always best to let the old flock come to the new, so put them down before you let your existing flock approach. This is especially important if you’re carrying out the introduction in the flock’s current run: don’t let them out of the coop until the new chickens are comfortable on the run.
Try putting up some entertaining distractions that might avert their attention somewhat. Fill a Peck Toy or a Caddi with your chickens’ favourite treat, and they will hopefully be more interested in that than the newcomers.
Another thing worth trying is introducing chickens in the night when they are quietly roosting in their coop. Open the door of the Eglu and put the new chickens in with your existing ones. This allows them to get used to the presence and the smell of the new chickens while they are sleepy and not likely to attack. This seems to work really well for some, whereas it leads to a few problems for others, so it’s up to you if you want to risk it. Make sure you are there in the morning when the chickens wake up to see how they are reacting to their new friends.
As we said, it might take a while before the flock goes back to its harmonious self. You must prepare yourself for some disagreement and a bit of bullying, this is part of establishing the pecking order. It should however have calmed down after a few days, maybe a week. If you notice that chickens are getting seriously hurt or are drawing blood it’s time to step in. Identify the main bully and isolate her somewhere else for a few days on her own. It might seem harsh, but it’s the best thing you can do for your flock. When you put her back with the group she will be too busy trying to figure out the new order that she won’t have time to bully.
This entry was posted in Chickens
Wondering how to find and buy chickens at the moment? In the past, finding chickens has been easier in the spring — but recent years have seen a shift in this trend. Find out where to find chickens right now, and what to expect when it comes time to bring them home.
Finding chickens online
A quick Google search can give you a list of chicken hatcheries either in your area or across the country. Chicken hatcheries specialize in chicks, but sometimes also sell older pullets or adult hens. If you’re looking for a specific breed, a chicken hatchery will likely be your best bet. And, most hatcheries will keep hatching and selling chicks all year long, so you won’t have to time your purchases with the seasons.
You can also find poultry farm pages and chicken breeder groups on Facebook. Or, if adopting hens in need is more in line with your chicken-keeping goals, then searching for a chicken rescue group online will help you locate an organization to work with.
Finding chickens in person
Your local farm supply or feed store will likely keep chicks in stock from March through September. This may vary depending on your climate — but as a general rule “chick season” is early spring through late fall. If you’re searching for adult hens, you have a couple of different options.
Individuals or chicken breeders are a good resource to find hens anytime during the year. You’ll probably need to seek them out online, but if you locate someone close to you, you’ll be able to go pick up your hens.
Breeders and expositioners are in full swing during the fall for local fairs or poultry club shows. Check with your local 4H club, high school FFA program, or your city or county exposition center for show dates. You can almost always find quality, purebred chickens for sale at these shows.
You can also check with your local animal shelter to see if they have any chickens available for adoption. Hens will periodically be surrendered or confiscated from previous owners, and are easily stressed in a shelter setting. Animal shelters will usually have low adoption fees for chickens in order to get them rehomed in a less stressful environment quickly.
Hatch eggs at home
You can incubate and hatch eggs any time of the year. Incubators are relatively inexpensive and easy to use, but we do suggest purchasing a trustworthy incubator with the following features:
- Automatic egg turner (otherwise you’ll need to rotate the eggs several times every day)
- Internal thermometer and hygrometer (to measure humidity levels)
- Hatching level plate (to give hatchlings enough room to stand after they hatch)
Fertile eggs are necessary for hatching. If your flock doesn’t have a rooster, hatching eggs can be found through hatcheries, breeders, or individuals.
If you don’t want to buy an incubator, you can wait for a hen to go broody — meaning they decide to sit and hatch a clutch of eggs. But, broody hens upset the natural laying schedule of the entire flock, as they will try to hoard all of the eggs under themselves in order to hatch them. It’s best not to encourage broodiness in hens unless you have a large laying flock, as well as a rooster to provide fertilized eggs. Otherwise, you will spend a lot of time “breaking” a broody hen.
Watching eggs hatch is a fun experience — especially for children. Chicken eggs hatch in 21 days under the right conditions, whether in a brooder or under a hen. Once hatched, your chicks will need to spend 12 weeks in a brooder pen.
Bringing your chickens home
Bringing home new chickens is exciting, and you’ll want to make sure you have the right setup to welcome them home. When you choose flock and keeper-friendly products from the start, caring for your chickens won’t feel like a chore — just an enjoyable experience.
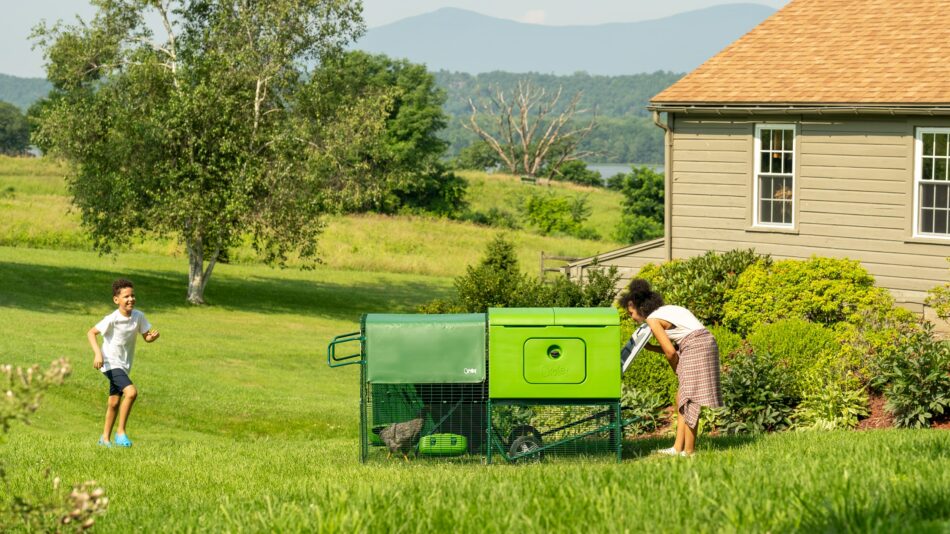
Omlet’s Eglu Cube chicken coop is the perfect size for growing flocks. It can comfortably house up to 10 small breed hens, and the attached run can be extended for extra pecking space. And, when combined with our Walk In Chicken Run, your new additions will have plenty of room to forage, play, perch, and enjoy your company.
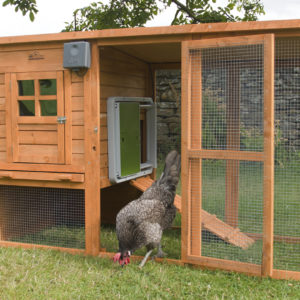
Whether you choose to let your chickens free range, or keep them in the run — adding an automatic chicken coop door gives your flock an extra layer of security between them and the things that go bump in the night. Install the Autodoor on the wire of our Walk In Run to make sure everyone is secure for the night, or on the Eglu Cube to tuck your hens in overnight. Or, place an Autodoor on both the Walk In Run and the Eglu Cube for a truly formidable flock fortress.
Omlet and your chickens
We’ve designed everything you need to keep a flock — no matter what stage of the journey you’re in. From young pullets to adult hens, your flock will be protected and comfortable in their Eglu Cube, Walk In Chicken Run, and Autodoor from the time they take their first flaps in their forever home.
This entry was posted in Chickens
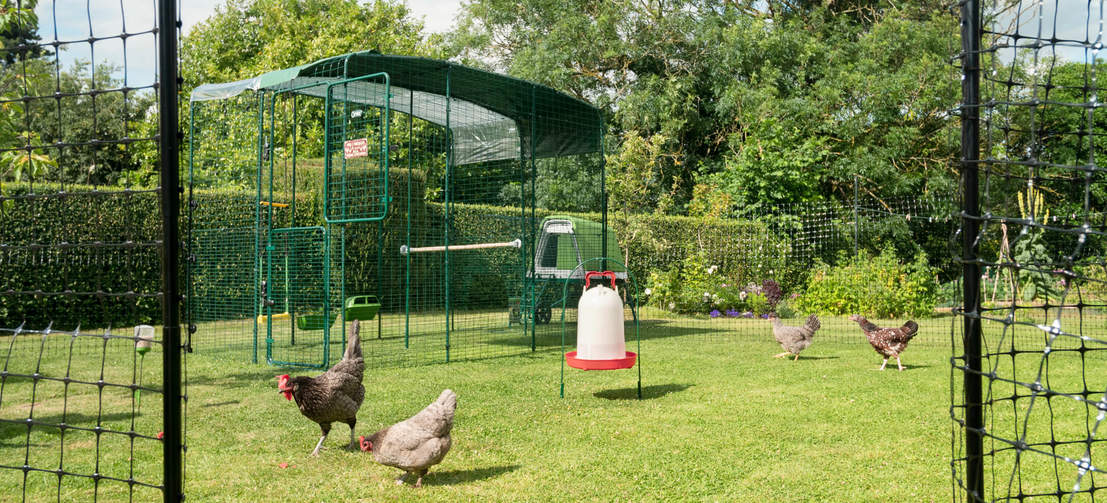
Omlet chicken fencing can be used to contain your chickens within an area, giving them more space to roam in your backyard.
Our chickens provide us with entertainment, company and fresh eggs – and lots and lots of poo! While cleaning out the Eglu might not be the most fun part of chicken keeping, those droppings can be turned into what gardeners sometimes refer to as “black gold”, one of the most desired fertilizers out there – and you can get it for free!
There are however a few things to think about when it comes to getting chicken manure right. Keep reading to find out more!
It can all be used
Unlike some other types of manure, chicken manure is too strong to use straight on your flower beds or vegetable patches. It will burn the roots or other parts of your flowers and crops and can also contain harmful bacteria that can cause illness if ingested. This is why it needs to be composted!
While you can put the chicken droppings straight on a bed in autumn and cover it with dry leaves that will molt through the winter, your best shot is probably to be patient and let it mature in a separate place.
Whether you do a weekly clean or pick up droppings in your Eglu every day, everything in the coop can be put straight onto your compost, including the bedding. Adding the bedding helps create the correct ratio or carbon (bedding) and nitrogen (droppings) needed to break down plant matter and waste. As chicken droppings are extremely high in nitrogen, you will probably want to add a larger ratio of other plant matter than you would in a normal compost. Dried leaves from the garden will make a great addition.
We recommend having a sealed container for your compost rather than a heap in a corner, as the latter can attract rodents and pets that should not be ingesting chicken poo.
 Composting chicken droppings
Apart from carbon and nitrogen, your compost will need air, moisture and heat. This is easily done; all you need to do is to water your mixture thoroughly and turn the heap every few weeks to get air flowing through. This will automatically heat the compost, breaking down the plant matter and burning off unwanted bacteria.
If you want to speed up the process and become a composting champion, you can purchase a compost thermometer at a local garden center and keep an eye on the temperature in the middle of the heap. The ideal temperature is 130-150 degrees Fahrenheit, and this should be maintained for about 3 days, after which you will need to turn the matter completely and start over.
This is however not necessary, you can just leave the compost to do its magic, just turning it regularly. How long it will take depends on the conditions, but to be sure everything is properly composted you should leave it for 9 months to a year.
Adding black gold to your garden
Once composted, chicken manure adds organic matter to your soil and increases the soil’s capacity to hold water, as well as returning nutrients to the soil. It’s also an amazing fertilizer that provides your plants with nitrogen, phosphorus and potassium in much higher levels than other types of manure. Chicken manure can be spread on top of your vegetable patch or flower bed or worked into existing soil. You can also put a handful of manure in a watering can and let it mix for a while before giving your flowers a very nutritious shower.
If you have composted the manure properly all the harmful bacteria will have been burned, and there is very little risk of you getting ill. However, if you’re on the worried side of things, make sure you clean your produce properly before eating them, or use the chicken manure on crops that are not touching the ground, like sweetcorn, peas or tomatoes.
This entry was posted in Chickens
Eggs are truly amazing things, and sometimes we might take them for granted. For something that only takes the hen about 24 hours to make, they are eggstremely well engineered and cleverly constructed, as well as really delicious! Here are some cracking egg blogs that will hopefully make you appreciate the humble egg a bit more!
Why are chicken eggs different colours?
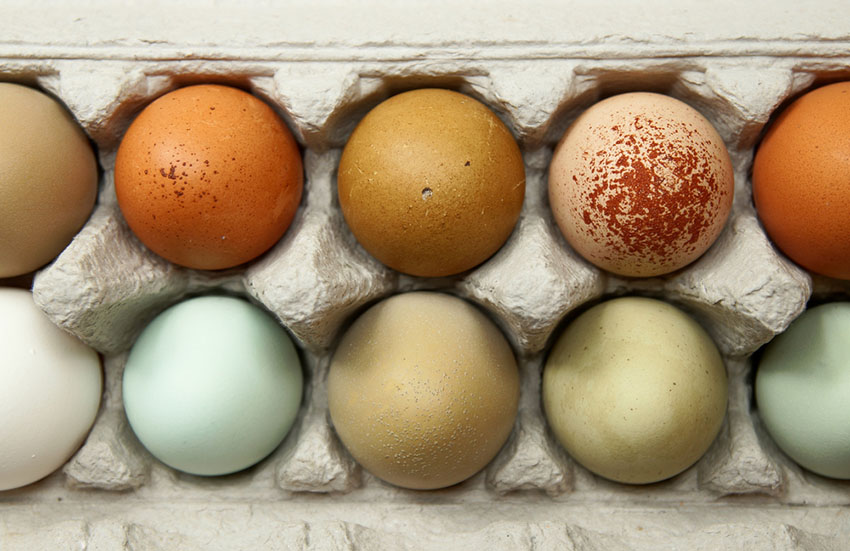
The ancestor of all chickens is the Red Junglefowl, Gallus gallus, a native of South-east Asia. All Junglefowl eggs have shells of a creamy white colour. And yet, as any chicken keeper knows, the eggs of domestic… Read more
How do Chicken Actually Lay Eggs?
The process of egg laying starts in the chicken’s eye. Sunlight enters the eye and activates a photosensitive gland, the pineal gland, located… Read more
Step by Step Guide to Hatching Chicks
As long as your chickens are laying and there’s a cockerel in your flock, you can hatch and incubate chicks all year round. However, traditionally the most popular time to breed your own chickens is in the spring. Hatching and rearing your own chicks from eggs… Read more
Why chickens hide their eggs and how to stop them doing it?
If you’re keeping chickens in your garden, you’ve probably become accustomed to your morning routine: wake up, drink a cup of tea or coffee and collect fresh eggs from your flock. Of course it’s an unpleasant… Read more

Not done with eggs? Download this printable colouring page and share with the family – fun for all ages!
This entry was posted in Chickens
April Fools!
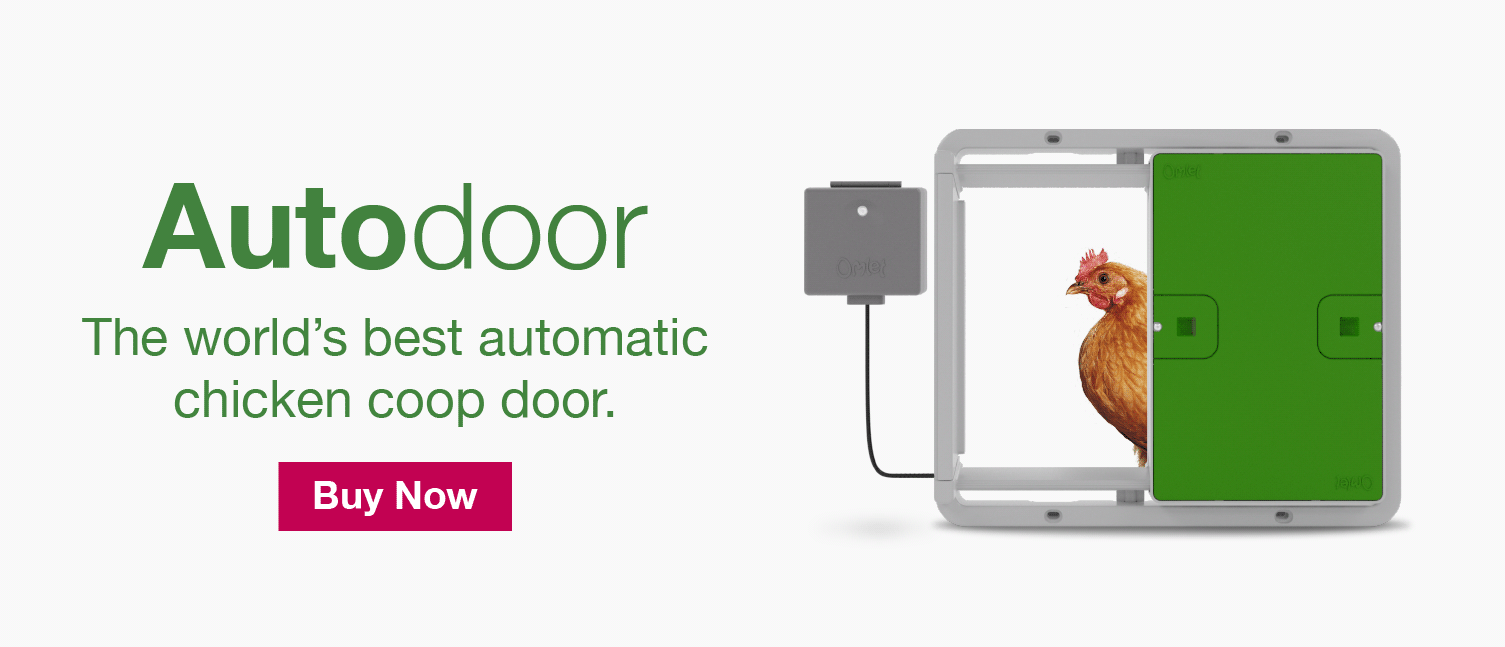
While an Eggscalator for lazy hens is not available (yet,) you can still bring your chicken coop into the 21st century with the amazing Automatic Chicken Coop Door from Omlet.
Here’s 7 reasons why the Autodoor is the best of its kind…
- The Autodoor can be installed on all wooden chicken coops, the MK1 and MK2 Eglu Cube, plus all Eglu runs and chicken wires.
- You can set your Autodoor to open and close at a specific time or light percentage to suit your chickens’ routine. No need to get up at the crack of dawn in summer to let your chickens out – the Autodoor will do it for you!
- Don’t worry about keeping your chicken coop close to a power source, the Autodoor is battery-powered by 4 AA batteries which can last up to 6 months.
- Reliable in all weather conditions, this is a gadget that will take you from winter to summer, and back again with no problem.
- The Autodoor’s built in safety sensors ensure no chicken is harmed or trapped in the door when investigating their new gadget.
- Improved coop security! The horizontal Autodoor is far safer than it’s vertical, guillotine style competitors, which can be easily lifted by predators.
- Low maintenance and easy to install, the Autoodor includes everything you need to get started in one box!
- You can now connect a coop light to your Autodoor to encourage your chickens to return in the evening. It also makes checking on your pets in the evening much easier!
This entry was posted in Chickens
Do you like travelling and seeing new places?
A: “Home is where the heart is”, as I always say. That’s where I feel the happiest.
B: I love exploring new places, and I’m always looking for a new place to visit.
C: I like the occasional holiday as a treat, but I prefer going places where I’ve already been.
D: I love going somewhere warm, but while there I mainly spend time by the pool.
How do you feel about children?
A: I LOVE children, they are so CUTE. And they say the funniest things!
B: Kids are like small adults really: I like some and find others quite annoying.
C: I don’t love babies, but once you can talk to them they are quite fun to be around.
D: Honesty, I don’t think they are worth the effort.
What’s your role in a group?
A: I normally stay in the background and let other people decide – it’s easier that way.
B: I tend to bond with the people who I have the most in common with and stick to them. I’m not really a people pleaser.
C: I often get the leader role without actually asking for it. Maybe I give off assertiveness? I don’t mind though, I quite enjoy it.
D: I’m normally the loud one who tries to make sure everyone is happy and that there is no awkwardness.
Would you say you’re friendly?
A: I get on with most people, and it’s important to me to be liked.
B: Yeah I suppose so. I’m extremely generous to people I like, but I don’t spend time and energy on being nice to people who I don’t like.
C: Yes, definitely. I’m curious, so I like meeting new people.
D: I can be a bit suspicious in the beginning, so maybe I don’t always come across as the friendliest of people.
How clean and tidy are you?
A: I really don’t like being dirty, and I keep my home spotless.
B: I’d say the perfect amount, but I think others would probably say I’m on the slightly messy side.
C: Can I say medium? Medium.
D: I’m not super fussed, mainly because there is always something more fun to do than to clean.
What would you say is your greatest quality?
A: I’m very easygoing.
B: I stand up for what I believe in.
C: I’m very friendly.
D: I’m ambitious and proactive.
How would you describe your sense of style?
A: I’m quite interested in fashion, especially shoes. You could say shoes are a bit of an obsession of mine.
B: The most important thing for me is that the things I wear are comfortable.
C: Elegant and classic.
D: I like big bold patterns, but my wardrobe is mainly black and white with a few colourful additions.

Mostly A: You’re a Cochin
Just like the fluffy Cochin, you are humble and appreciate the simple things in life. Because of your friendly demeanour you tend to get on well with most people and pets, but just like the Cochin sometimes becomes the submissive breed in a mixed flock you need to work on standing up for yourself to make sure no one takes advantage of you. You’re not particularly adventurous, but prefer to spend time at home with family and friends over crazy nights out, just like the Cochin. These rather lazy chickens stay close to the ground and prefer not to get their feathered feet dirty. They also have a strong maternal instinct and run the risk of regularly going broody.

Mostly B: You’re an Old English Game
These beautiful small chickens are one of the oldest breeds around. Just like you they are active and confident, always on the lookout for new things to explore. You are family orientated and very generous to those close to you. This can however mean that you find it hard to forgive people who have hurt you or the people you love, and you are quite happy to fight someone who you don’t agree with. Old English Game are hardy and quite noisy, and don’t do well with confinement. They are small and very friendly to humans, but especially roosters have an aggressive side to them, probably due to the fact that they descend from cockfighting birds.

Mostly C: You’re a Leghorn
You are an ambitious and hardworking person, and you tend to be the center of attention in any situation. Just like the Leghorn you’re not fussy and can handle most things life throws at you, but don’t like losing control. Due to their independent nature, Leghorns are difficult to tame, and if given the opportunity they will roost in trees. They are not natural sitters, but will care for their own children. They produce plenty of eggs and will be assertive but friendly towards humans.

Mostly D: You’re an Ancona
Just like these beautifully spotty birds you are independent and assertive, and will always be busy with something. You are open and friendly and take the role of the joker in a group, but it can take a while to get close to you as you only open up to those who you really trust. Anconas are happiest if they get to free range and forage for food during the day, but then return to the safety of a comfy coop. They produce a good amount of eggs, but are notoriously famous for their inability to sit on the eggs – just like you they don’t find babies that interesting.
This entry was posted in Chickens
Chickens have a well-defined hierarchy. Every hen knows who’s boss. This, indeed, is where the phrase ‘pecking order’ comes from.
In everyday chicken life, the occasional peck and minor tussle is perfectly normal. But when the pecking gets out of hand, you will soon have semi-plucked chickens looking thoroughly miserable on their perches.
Bullying will always break out when new birds are introduced to a flock. This is all part of sorting out the new pecking order, everything will be calm and back to normal in a few days, usually.
Hens may peck themselves, too, with the same result – feather loss. However, you’ll be pleased to hear that in both cases – self-plucking and plucking others – the problem can be addressed and solved quite easily.
Overcrowding in the Chicken Shed
Whenever there is insufficient space, hens will begin pecking each other. The only time they’re content with cramped conditions is when they’re settling down side by side for a cosy night’s sleep. Overcrowding causes stress, and stress leads to violence. It begins with the pecking and general bullying of any chicken that sits lower down in the henhouse pecking order.
Providing more space is always the answer here. The minimum space required per chicken depends on the size of the breed; but it is always best to give the birds as much room as possible. As a general rule of thumb, you will need 2 to 3 square feet (0.18 to 0.28 square metres) per chicken in the coop, and 8 to 10 square feet (0.74 to 0.93 square metres) per chicken in a run. This is the bare minimum, though. If you own an Eglu Go that accommodates up to four hens, six is clearly too many. Two, however, is absolutely fine.
An overheated chicken shed may also cause pecking and plucking, as the high temperatures make the birds’ skin itchy and uncomfortable. Too much light has the same effect; although this is a problem that only really afflicts birds kept in artificial light to boost egg production.
 When Chickens See Red
A hen may become the victim of pecking if she is unwell. Sometimes the other chickens will turn on an ailing companion. She will usually find a quiet spot to hide, and you will be able to intervene before things get out of hand.
If a wound is involved, however, the other hens will literally see red. Blood acts as a magnet for the birds, and they will pursue and peck at the wound, plucking surrounding feathers and making the injury worse, with obvious dire consequences. Deaths are not uncommon in these circumstances, and if the wound is combined with overcrowded conditions, cannibalism can occur.
The injured chicken must be isolated from the rest of flock until her wound is healed and she’s in top shape again. If you have a Walk in run for your chickens, partitions is a great solution that will prevent the other chickens from bullying the injured hen.
You can assist the healing process by applying anti-peck and healing lotions and creams.
The Chicken and the Vampires
In 99% of cases, a hen who pecks and plucks herself has parasites. The culprits are usually mites, tiny vampires who leave the chicken’s skin scabby and itchy. Lice and fleas have the same effect. An infested hen will not only look untidy and threadbare, she will also have a drooping comb and will be listless.
One type of parasite, the depluming mite, eats away at the roots of the feathers, causing them to fall out without any intervention from the hen. All these chicken-nibbling nasties can be deterred using spray-on or rub-on medicines.
If your chickens’ diet is low in protein (which will never be the case if their food revolves around good chicken feed pellets), they will look for it elsewhere. Insects and other invertebrates are good sources of protein; but so, too, are feathers. If feather pecking afflicts your flock, diet is another thing to add to the checklist when getting to the bottom of the problem.
When Pluck Runs Out
If your hens lay brown eggs, evidence suggests that you may have more problems with pecking and plucking than someone whose birds lay white eggs. This sounds bizarre, and the science is not conclusive, but observational studies have come to this conclusion. It is, however, largely a problem among chickens kept in large numbers for commercial purposes, and not a consideration the average backyard hen owner should worry about it. It’s certainly intriguing, though…
In most cases of pecking and plucking, you will be able to solve the problem by simple intervention. Give the hens enough space, and keep the chicken-sucking creepy crawlies at bay, and in most cases the problem is solved.
This entry was posted in Chickens

The ancestor of all chickens is the Red Junglefowl, Gallus gallus, a native of South-east Asia. All Junglefowl eggs have shells of a creamy white color. And yet, as any chicken keeper knows, the eggs of domestic hens can vary widely.
Many years ago British chicken egg producers realised that shoppers favoured brown eggs, and turned their noses up at white ones. It was even said that brown eggs were more nutritious (which is not the case – all chicken eggs have the same nutritional value).
This tyranny of supermarket brown eggs continued until about 20 years ago, when a niche market was created for eggs from specific breeds. Chocolate browns, blues, and even the much-maligned whites, all began to appear on the shelves.
But for anyone familiar with backyard chickens, this was nothing new. Pearly whites from the Sussex and Leghorn, lovely blues from the Ameraucana and Cream Legbar, red-brown beauties from the Barnevelder and Welsummer and the dreamy greeny-blue of the Araucana and Favaucana are all in a day’s egg-collecting.
But why, given the fact that those ancestral chickens all laid creamy white eggs, do these different colors exist?
Egg Painting – the Natural Way
An egg takes around 26 hours to fully form inside a hen. Twenty of those hours are dedicated to toughening and coloring the egg shell. Layers of calcium carbonate provide the toughening – which is why hens need plenty of calcium in their diets – and the coloring is down to pigments. Calcium carbonate is naturally white, so any other color has to be ‘painted on’, from the inside.
Breeders have created hundreds of chicken varieties over the centuries, and each of these has distinctive plumage and coloring. The pigments that give feathers color sometimes go hand in hand with specific pigments for coloring egg shells too.
For example, the Ameraucana carries the blue pigment biliverdin, and this is painted onto the shell in the later stages of the egg’s development in the oviduct. Both the outside and inside of the shell have the same blue color.
This is not the case with a standard brown egg. Crack one open and you’ll notice it’s white on the inside. The pigment responsible for brown coloring is protoporphyrin. This is present to a greater or lesser degree on the majority of chickens. Even eggs of a creamy color have a hint of protoporphyrin in their shells. Hens carrying an excess of the pigment – such as the Delaware and Marans – produce fabulous chocolate brown eggs.
Many hens lay brown eggs dappled with darker brown spots and streaks. The Neera and Welsummer are good examples of this. The effect is causes by the egg turning as it makes its way through the oviduct, and it is a common feature in the eggs of many wild bird species. It is details like this that enable owners to recognise eggs from their individual birds (in a small flock, that is!)
When the two types of pigment – the blue and the brown – are mixed together, the result is a greenish blue or olive color. If the brown pigment is light, as in the Favaucana and Araucana, the eggs are a soft greeny blue. With a darker brown in the mix, the olive color is increased, as in the aptly named Olive Egger.
What Color Are Your Chickens’ Earlobes?
It can come as a shock to learn that chickens have earlobes. Even more surprising to hear that these lobes give a clue to the color of egg shells.
The earlobes are obvious, once they’ve been pointed out. Chickens have three types of ‘wattle’ – the red crest, the wobbly ones on the throat, and the ones on the side of the head, towards the back – the earlobes.
White earlobes are found on hens with white or otherwise pale plumage. These birds have relatively small amounts of pigment, hence the light feathers. The same rule applies to the eggs – no pigment, and hence white eggs. Meanwhile, hens with brown or reddish earlobes lay brown eggs, and ones with a creamy, pearly, shiny white earlobes lay blue eggs.
These days, ironically, it is the non-standard-brown eggs that command the higher prices in the shops. And yet once you get a clutch of golden-yoked, grass-fed, free range chicken eggs cooking side by side in a pan, you can’t tell which shell produced which egg. When it comes to chicken eggs, beauty is indeed in the eye of the beholder – and the earlobe of the chicken!

This entry was posted in Chickens
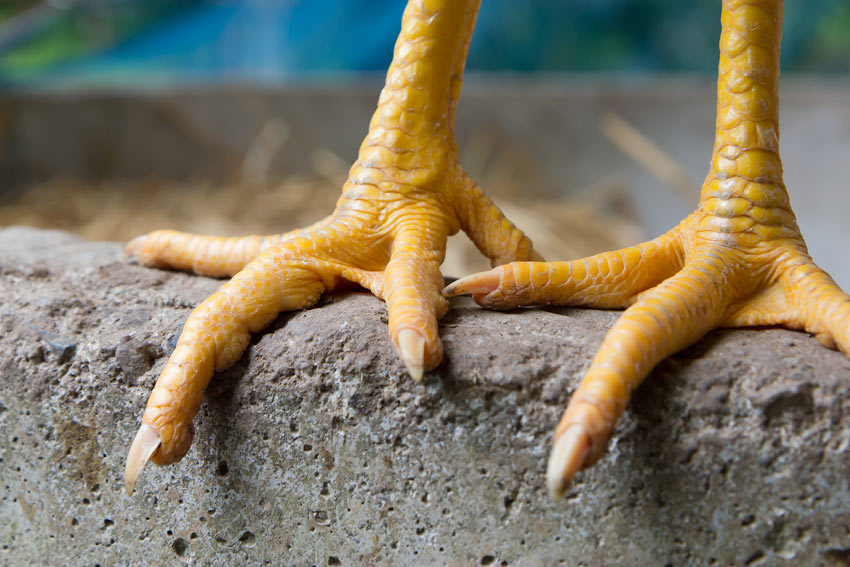 Watching chickens scratch at the frozen ground or strut through the snow, you might wonder how they manage to keep their feet and legs warm. After all, this is one part of their body with no feathers to keep it cozy (unless you happen to have a feathery-legged breed such as the Cochin, Brahma or Silkie).
Surprisingly, the simple answer to ‘How do they keep their leg warm?’ is ‘They don’t!’ Those skinny, bare legs have scales, which retain heat to a certain extent, but they will still get very cold if the bird stands still for too long.
And that’s the important detail. A chicken keeps its legs warm by moving, and by not keeping all its toes on the ground for too long. These parts of their body lose heat rapidly; but the solution is quite simple.
Perching is the most effective way of retaining heat. A hen hunkers down when roosting, and her legs are tucked into her warm body. If space allows, install a flat perch too. A piece of wood with a 10 cm width will enable the hens to roost without having to grip the perch, which in really cold weather will prevent their toes freezing. (The lucky ones will simply snuggle down in a nesting box, which is the chicken equivalent of a thick quilt!)
But of course, a hungry hen doesn’t want to waste the whole day perching, so even in the coldest spells she will make a lot of contact with the ground.
One-Legged Hens
Like many other birds, chickens often adopt the ‘one leg’ look, tucking one of their limbs up into the warmth of their bellies. This reduces overall heat loss and stops feet and toes from freezing on the icy ground.
An upturned pot, a log, pallet or other slightly elevated space – cleared of snow or ice – will help the hens get the circulation going again, without having to catch their breath on the frozen ground. Like all birds, chickens are warm-blooded, just like us, and their own body heat soon works its magic. Indeed, with an average body temperature of around 41°C, chickens can remain active in the coldest weather.
The leg-warming process is helped by other tricks, too. Fluffing up the feathers retains body heat, by trapping small pockets of air which are then heated up by the bird’s warm body.
Some owners give their hens a supper of corn and grains, which take longer to digest than a standard pellet or other chicken food. Part of the digestion process involves producing heat – a kind of internal hot water bottle!
In general, hens will eat more food in the cold months, as more of their energy is spent keeping warm. Some owners like to supplement the birds’ diets with extra protein or a little suet, to increase their fat levels for the winter. Fat retains heat, and the whole bird benefits – not just the legs (which will remain as thin as ever!)
Help With the Heating
You can help your hens keep their toes cosy by making sure the coop is clean and dry. Clear out any snow dragged in on the birds’ feet and keep an insulating layer of straw on the floor. You can give the birds extra protection by insulating the coop – although there should still be some ventilation, to allow the gases released from the birds’ droppings to escape.
You can install an automatic door to help keep the living quarters snug. Heaters are also available – but never use anything other than a heater designed specifically for hen houses. It’s also best to use these only if the temperature gets below 40°F, otherwise hens may get used to being cosy all the time, and that could be disastrous if the heater fails, and the birds are suddenly exposed. Heat-pampered poultry can die of cold shock.
A chicken coop should be draft-free, but not completely sealed, as ventilation is important for healthy hens. During the day, a sheltered spot in the run or garden will help them take a breather and warm those long-suffering legs.
Chickens are amazingly hardy, and although not exactly warm, their legs will be able to cope with anything the average winter throws at them. As long as they can toast their toes on a nice perch every now and then…
This entry was posted in Chickens
Are your chickens happy in their wooden coop? Is your chickens’ coop strong enough to make it through another winter? Is it time you upgraded your wooden coop? These are all questions many chicken keepers ask themselves when facing the reality that their wooden coop may not do its job, especially for another cold season. Take this short quiz to see whether your wooden coop is ready for this round of wintery weather.
Wood absorbs water – does your coop seem heavier?
A = Yes – either I’m getting weaker, or my coop has gotten heavier.
B = Yes, but I solved it by getting someone else to move the coop for me.
C = I’ve given up trying to move it.
D = Nope, I spent the summer sanding and sealing my chicken coop with a varnish, so now it’s more water-resistant.
Have you had to pour boiling water onto locks to get them to open?
A = Yes, I have to keep a coop de-icing kit.
B = Boiling water sounds easier than smashing the bolt with a rock or brick to get the coop unlatched during a freeze.
C = I religiously grease all hinges and bolts every few weeks to keep things moving.
D = I have very carefully aligned my coop to the morning sun so that the bolts and hinges have defrosted by the time I get out. On cloudy days I resort to hot water.
Has your wooden coop shifted or expanded since last winter?
A = Yes – the doors all seem too big for the frames, and nothing opens or shuts properly anymore.
B = Yes – the panels have swollen, and now I’m concerned for when they shrink again because I added extra chickens to fill the void.
C = For the most part it appears fine, but some sections don’t align the way they used to.
D = No – the staining and sealing seems to be keeping the coop intact.
Is the roof leaking?
A = Yes – I’ve already fixed the roof a few times this year, and now it’s already leaking again.
B = Yes, but this is the first time and I’m confident that I can fix it myself.
C = No – there aren’t any obvious leaks.
D = My wooden coop is brand new, so I don’t expect to have any problems this winter.
Is it cold and damp inside?
A = Yes – it feels cold inside, and the bedding gets damp quickly.
B = It’s a little chilly, but my hens huddle together to keep warm.
C = I haven’t noticed any dampness, and my hens act alright.
D = The coop keeps warm overnight once I have shut the door, and my chickens are outside during the day.
Did you have difficulties with red mites in summer?
A = Yes – I’ve had to prevent and treat red mites in my coop and chickens regularly, and I’m already dreading the next resurgence.
B = No more than usual – it’s just part of chicken keeping, and I’m used to dealing with them.
C = I had mild issues with red mites, but they weren’t out of control.
D = The red mites didn’t cause a problem in my coop this year.
How long does it take to clean your coop?
A = It’s an all-day task that I dread, so it doesn’t get cleaned regularly in winter.
B = It takes a while, especially in the winter, but I know my hens appreciate it.
C = It takes a few hours, but the whole family helps.
D = It doesn’t take me long at all – I have a good system in place.
The results…
Mostly As = If you experience repeated and frequent issues with your wooden chicken coop like red mites, a leaking roof, or poor ventilation, it’s definitely time to upgrade to a plastic chicken coop. Keeping chickens in the winter doesn’t have to be a dreaded or labor-intensive experience. Plastic chicken coops keep your chickens comfortable, dry, and mite-free all year round.
Mostly Bs = You’ve valiantly kept your wooden chicken coop going this long, and are determined to keep persevering through wooden chicken coop repairs. But the question remains: are your chickens happy in their wooden coop? Keep a watchful eye out for dampness and drafts inside of the coop, as these are extremely dangerous for hens – especially the older members of your flock.
Mostly Cs = You’re no stranger to wooden chicken coops and the potential problems and maintenance they present. But, there are plenty of reasons to avoid wooden chicken coops and to make the switch from wooden to plastic hen houses. Cleaning, comfort, and your overall workload will decrease substantially when you update your coop to plastic.
Mostly Ds = Your wooden chicken coop is in its early days, or you’ve spent countless hours preparing and preserving its integrity. Keep in mind however that all wooden chicken coops rot eventually, and all preservation methods are just that – a temporary improvement until the elements leave their mark on your wooden coop once more. If you’ve just invested in a wooden chicken coop and aren’t ready to make the switch to plastic, consider making some weather-resistant upgrades like an Automatic Chicken Coop Door to keep your hens more comfortable in the cold.
Upgrade with Omlet
Don’t just survive the winter weather – thrive in the cold. With our line of plastic chicken coops, your hens will be warm, dry, and comfortable whatever the weather. The Eglu Cube Chicken Coop is designed for larger flocks to find shelter in the bitter cold. And, with accessories like the Autodoor, you can schedule your flock’s outings to take place during the warmest part of the day, while keeping them tucked in a well-ventilated, draft-free coop at night. See how keeping chickens in the winter doesn’t have to be a chore, just another season to love your flock.
This entry was posted in Chickens
While most people check the weather forecast to help them plan their week activities or outfits, chicken keepers can also be using it to predict what accessories their coop needs to ensure their girls are as comfortable as possible.
From sun to snow, wind to wet, the breakfast time weather reports and the handy app on your phone are all giving you helpful hints that you might be ignoring.
? TEMPERATURE ?
Firstly, the most obvious indicator: the predicted temperature for the coming 10 days. Depending on what time of year we are in, this can be super helpful or utterly confusing if it is varying drastically. But let’s think about what we can act upon.
In winter, if the predicted temperature is at below 32 degrees Fahrenheit for more than 5 days in a row or the temperature is near freezing and you have very few chickens in your coop, you may want to consider attaching the Extreme Temperature Blanket to your Eglu to give your chickens some extra help with keeping warm, without limiting the coop ventilation.
During hot summer months, when temperatures can be above and beyond 85 degrees Fahrenheit daily in some countries, it is wise to move your chicken coop into an area that is in the shade for as much of the day as possible. For your chickens, daily health checks are essential to ensure they are not suffering with the high temperatures. If your coop is attached to or inside a secure run, you can leave your coop door open to increase airflow at nighttime without your girls being exposed to predators.
☀️ SUN ☀️
When the sun is shining, it is tempting to cover your chickens’ run with shades so that it is completely protected from the sun inside. However, this can have the opposite effect on what you intended. Instead of shading and cooling the area, lots of shades create a tunnel which traps the heat, like a greenhouse.
It is best to keep them in a shaded area, and protect one side of the run from the sun. If your chickens are out free ranging most of the day, make sure that they have access to shady patches in the garden, and that their food and water is also in shade.
❄️ SNOW ❄️
Exciting for some, but for others a weather warning for snow can be very disappointing. You may want to consider sheltering your coop’s run with clear covers to prevent as much snow getting on the ground inside the run as possible. If snow is predicted for the foreseeable future, you may want to prepare for long term icy conditions and bring your coop closer to the house so it is easier to check on your chickens, and they can benefit from some of the shelter your house might provide. During the snow, be sure to dry off damp feathers and remove any chunks of ice from claws. Increase the amount of bedding and food you are giving your chickens too as this will help them stay warm.
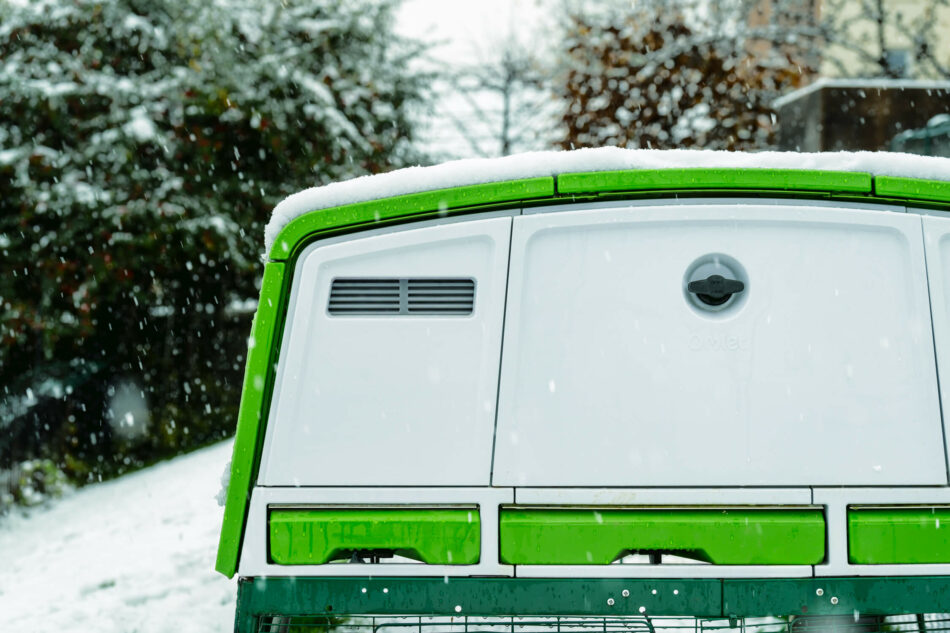
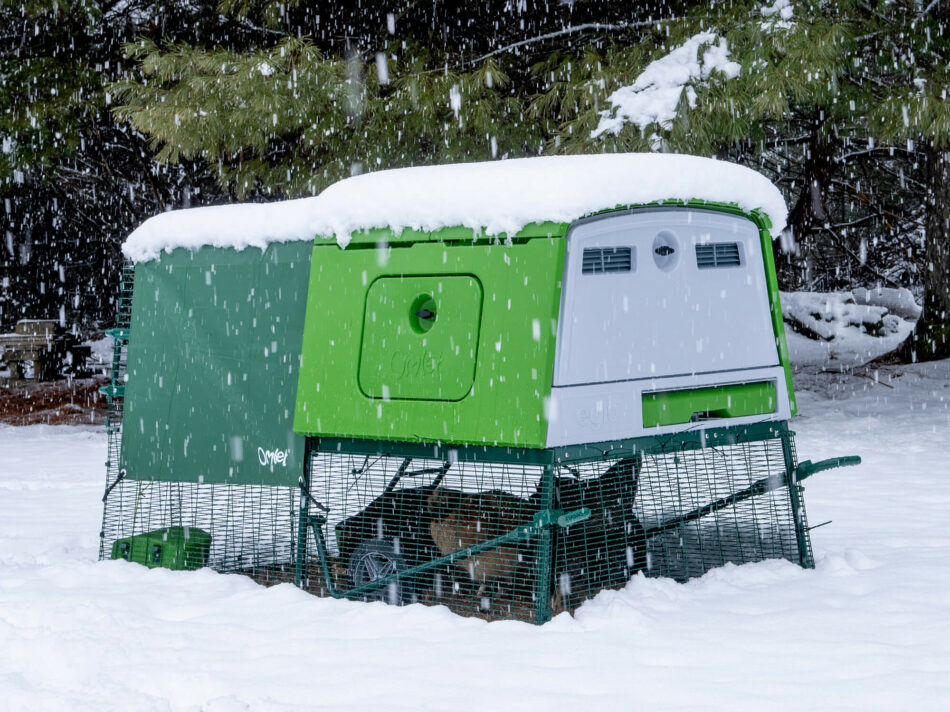
If you have time, it might be wise to consider how effective your chicken coop will be against the bitter cold. If you have a wooden coop, check if it is water-tight and well insulated. If you are not confident in your wooden coop, consider upgrading to a sturdy plastic alternative, like the Eglu Cube. It’s twin-wall insulation works in the same way as double glazing to keep the cold out of the coop, and the heat in during winter. The plastic material is waterproof and super easy to clean out quickly (especially important on chilly winter days).
☁️ CLOUD ☁️
The most boring of all weather forecasts, but often a rest bite from other more extreme conditions. During winter, a few cloudy days should raise the temperature slightly and give you a good opportunity to clean out your coop and thoroughly check on your chickens and make any changes needed for whatever the forecast predicts for the coming days.
? RAIN ?
Some weather reports are more helpful than others when it comes to the exact timing and chance of there being rain. But if you’re looking at days of 90% chance of heavy showers, it would be wise to act fast and get some protective clear covers over the run. If the ground under your chickens’ coop and run is already extremely muddy and wet, you might want to consider moving them to a new patch of grass, and maybe even laying down a base material, like wood shavings, to prevent it developing into a swamp!
? WIND ?
How you react to a windy forecast completely depends on the wind speeds predicted. Light winds, less than 25 mph, shouldn’t cause much of a problem. You might want to add some windbreaks around the base of your Eglu and a large clear cover down the most exposed side. However, in extreme high winds, the worst thing you can do is completely conceal your run, particularly a larger Walk in Run, with covers from top to bottom. In a large run, the mesh holes allow the wind to flow through without causing any issues to the structure, and a clear cover round one bottom corner of the run will provide chickens enough shelter. If you cover the run completely, the wind will be hammering against it and is more likely to cause the structure to lift or move.
If your chickens are in a smaller run attached to their coop, we recommend moving it to a position where it will be most protected from the wind and any falling debris, for example, against a sturdy building wall. The Eglu’s wheels allow you to easily move the coops around your garden to suit the conditions. If you are keeping your chickens in their Eglu coop and run, and not free ranging during dangerous weather conditions, consider adding some entertaining toys and treat dispenser for them to prevent boredom, such as the Peck Toy or Perch.
This entry was posted in Chickens
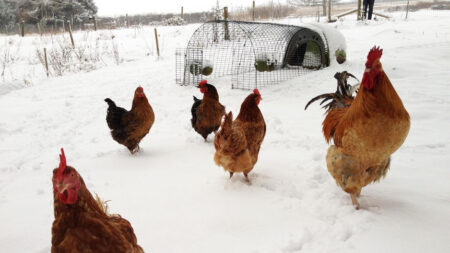
Backyard hens spend their entire lives outdoors. This means they have to cope with everything the year throws at them — from blazing summers and sub-zero winters, to year-round downpours. Being hardy birds, they take much of this in stride, but they benefit from a helping hand from their humans. Here are ways to help your flock and prepare for the chicken-keeping challenges in the year ahead.
Winter
Depending on your location, winter can be one of the most challenging seasons for all outdoor animals. While it varies from year to year, the 10 US states that typically receive the most amount of snowfall are:
- Vermont
- Maine
- New Hampshire
- Colorado
- Alaska
- Michigan
- New York
- Massachusetts
- Wyoming
- Wisconsin
No matter where you live, there’s a lot working against both humans and chickens when cold weather sets in – but thankfully chickens are naturally equipped to endure lower temperatures. Because of this, chicken-keeping in the winter isn’t much different from the rest of the year, but a few preparations can go a long way in helping your hens thrive in the cold.
Cold-weather chicken considerations
- Although chickens cope well with the cold, they’ll need some help when it’s both cold and wet. Keeping hens in an insulated Eglu Chicken Coop is a good place to start, with the option to add extra chicken coop weather protection to both the run and the coop. This is especially helpful if you live in an area that receives heavy snowfall.
- Perches in the run enable chickens to cuddle up when it’s cold – which is essential in the winter months. The Omlet Chicken Perch, being composed of eucalyptus, a strong, untreated wood, prevents chickens’ feet from becoming too cold. Offering perches above the frozen ground of the run gives your hens’ toes a break from the chill.
- In sustained sub-zero temperatures, rubbing Vaseline on your hens’ combs and wattles will help prevent them from becoming frostbitten.
- Keep your hens’ feet dry in wet weather by lining the run with wood chippings, straw, or hay.
Winter daylight hours
- Chickens usually return to the coop to roost at dusk. But in the winter, you may find your birds trying to get more time outside on the short days. If your hens are prone to wandering around in the dark, a high visibility hen coat will help you locate them – and also ensure they’re visible to anyone else, should they stray from your yard.
- Installing an automatic chicken coop door with a coop light will help your hens adhere to bedtime. The door can open and close automatically based on the amount of daylight, a specified time, or manually. The coop light will help beckon wandering birds to bed when darkness falls, as chickens will naturally gravitate toward a light source.
Your chickens’ health during colder months
Keep an eye out for coughing, sneezing, lethargy, or other signs of chicken illness. Older or weaker chickens can become more vulnerable to illness when the cold weather sets in.
- Egg production will decrease – but this doesn’t mean no eggs for breakfast. While your hens may not lay as frequently, and some may stop altogether throughout the colder months, a flock of 4 or more chickens should still provide an adequate supply of eggs for your family during the winter.
- Make sure your hens’ diet consists of high-quality feed and scratch, and consider adding some extra chicken vitamins and minerals to boost their immune systems. Offer hay or greens in a chicken treat holder to provide a nutritional activity on cold days.
- Their water will freeze, so be prepared to break the ice, and have some spare water dispensers ready in case the waterers freeze solid. Pour hot water over any icy water sources throughout the day to help keep things thawed. Consider placing submersible bird bath heaters in your chickens’ waterers to keep them thawed.
- On the upside, winter might kill off any lingering flies, mites, and other pests your chickens encounter during the warmer months.
Spring
As the days lengthen, your hens will start laying more eggs. Vegetation comes back to life, and chickens find insects, plants, and other findings worth scratching around for. Your chickens will likely be wanting to spend more time outside in the warmer temperatures and longer days, but predators also spend more waking hours roaming in the spring.
Protect your chickens from awakening predators
Chicken predators will be on the move when the days warm up and lengthen. In the northern states, large animals such as bears awaken from winter hibernation with a voracious appetite. Other predatory animals such as foxes, wolves, and badgers will also be on the prowl after a lean winter. Central and southern states will see an increase in activity from coyotes, bobcats, racoons, and snakes as the weather warms up.
Keeping your chickens in a secure, covered run is vitally important during early spring when nature’s predators are also taking advantage of the changing seasons. Automatic chicken coop doors will ensure the hens are in and out at the right times, and will prevent predators from gaining access after-hours. The door will also let your chickens out in the morning, so that you can enjoy weekend mornings in bed as the days get longer.
Prepare your chickens for extreme weather events
For southern states, spring can bring extreme weather changes and events such as tornadoes and severe thunderstorms. Housing your hens in a strong chicken coop and heavy-duty, covered run will ensure they stay safe during wild weather. An Eglu Cube chicken coop with added handles and wheels makes it simple to relocate your chickens and their entire home to shelter during severe weather. The Eglu Cube can also be tethered to the ground in preparation for high winds. But just how strong is the Eglu Cube? Some wild-weather events that the Eglu Cube has prevailed against include hurricanes, tornadoes, falling trees from high winds, and more.
Cover walk in chicken runs to protect against hail and heavy rainfall. While tarps will help keep heavy rainfall out of the run, high winds can blow rain in from the sides — and sustained heavy rainfall can create a muddy environment. Add straw to muddy areas of your chickens’ run to help prevent infections such as bumblefoot when the ground is saturated. A chicken tractor is another great option during soggy seasons, as your chickens’ area can be changed daily.
Take proactive steps to reduce chicken coop pests
It’s also important to note that mites and parasites make their debut in the spring, so if you don’t have an easy-to-clean plastic chicken coop, be sure to treat your coops and runs to get ahead of the pests. Mites thrive in wooden surfaces, so housing your hens in a plastic coop is a first line in defense to eliminate pests. Change bedding daily, and clean the interior of your coop frequently to keep your chickens healthy and happy when mites threaten to emerge.
Summer
It’s amazing to see the transformation in your chickens as the seasons change. Gone are the downy, fluffy winter and early spring jackets your hens sported mere months ago. Instead, you may now notice your hens’ feathers slowly becoming more dull, and they are spending more and more time under shaded areas.
For many flock-raisers, summer poses the largest threat to chickens. The main risks that flocks face in the summer months are excessive heat and too much sunlight. Be sure to have plenty of shaded areas where your chickens frequent, and keep fresh, cool water available at all times. A chicken coop that provides shade itself, like the space under the Eglu Cube or the Eglu Go Up, is ideal for the summer months.
On average, these 10 US states experience the hottest summer temperatures:
- Florida
- Hawaii
- Louisiana
- Texas
- Georgia
- Mississippi
- Alabama
- South Carolina
- Arkansas
- Arizona
In these states, special considerations should be made when caring for chickens. Evaporative cooling may help keep flocks cool in drier climates such as Arizona, but chickens living in states that experience heat and humidity have a distinct disadvantage when it comes to options to keep cool.
The Eglu Cube chicken coop is designed to reduce moisture and increase airflow through its ingenious ventilation design. Twin-wall insulation and vents along the back allow for cool air to circulate, while keeping the warm air out. Plastic doesn’t hold onto moisture the way that wood does, so your chickens can find relief from the damp, humid air. The Eglu Cube also offers a shaded area beneath the coop, with the option to add heavy-duty run covers to the sides and top of the run for additional protection from the sun. And, with added handles and wheels, the Eglu Cube can be moved to shadier, cooler spots as summer progresses.
Here are some other methods to alleviate heat-related stress in your flock during the summer months:
- Keep the water supply full, as hens drink more in warm weather. Add ice cubes to waterers if possible throughout the day to keep the water temperature at a refreshing level.
- Provide a dust bath – either a dry area of ground in the yard, or in a container in the chicken run. Cat litter trays, kiddie pools, and even old tires with the rims removed make great basins for dust baths.
- Offer treats like frozen corn or other chicken-safe veggies in a chicken treat dispenser or chicken peck toy.
- Look for any signs of heat stress in your hens. Open-mouth breathing (panting), lethargy, agitation, increased saliva production, or any other concerning symptoms should be reported to your veterinarian. Bring any chicken exhibiting heat stress into an air-conditioned space, but refrain from employing any other cooling measures until hearing from your veterinarian. It can be dangerous for an overheated chicken to have their body temperature brought down too quickly.
Fortunately, the “dog days of summer” usually yield to lower temperatures at night. You may want to offer more space outside of the coop for your chickens to roost overnight in the warmer months, as they will need extra space away from each other’s body heat during this season. A Freestanding Chicken Perch or PoleTree will give your hens aerial space to roost if they need to spread out at night. Just be sure that all of their enclosures are predator-resistant and have a top to prevent aerial attacks. Attaching a tarp to the walk-in run will keep UV rays down, offer protection from summer storms, and also thwart predator attempts from above.
Fall
Fall is a favorite season for both flocks and their keepers. Bugs are still abundant, the temperatures are comfortable, and gardens offer hen-friendly snacking opportunities when gardeners rotate crops.
Hens will often molt this time of year in preparation for colder temperatures, so they need a good diet to help them stay healthy and grow new feathers. Extra vitamins and minerals will boost feather growth, and a little apple cider vinegar in their water will help them grow healthy and glossy plumage. Egg production will cease or drastically reduce while hens are molting, but once they’ve completed their transformation, your hens will resume their laying schedule. The shorter days will prompt chickens to lay less frequently, but good layers will continue to produce eggs during the fall and winter.
It’s important to remember that states along the eastern coast experience the peak of hurricane season during the fall. Be sure to have an evacuation plan that includes your chickens, and prepare for extreme weather. Ensure any chicken enclosures are safe in windy conditions, and cover your chickens’ run to protect against heavy rains.
Year-round chicken care with Omlet
At Omlet, we’re here to support chicken keepers all year round. By keeping your hens in an Eglu Chicken Coop and Walk In Chicken Run that are both easy to maintain and clean, you’ll create an environment that is enjoyable for both you and your flock no matter the season. These, along with Walk In Run Covers, make seasonal preparation quick and easy so that the changes in weather, amount of daylight, and looming predators don’t detract from the wondrous connection you’ve created with your chickens. So here’s to another year of chicken-keeping, the Omlet way.
This entry was posted in Chickens
During the winter, one of the biggest concerns among chicken keepers that have purchased, or are considering, an Eglu is how well it can keep their flock warm. In this blog, we will dive into the science behind the Eglu’s thoughtful design, with particular emphasis on how these features will help your chickens stay warm during the colder months.
Insulation
Insulation prevents energy from passing through it, and air is an excellent insulator! Think of your chickens in the cold – they fluff up their feathers in order to trap more air between their layers of feathers. Pretty amazing, right? By doing this, they create their very own insulation. Air is such a great insulator because it has very little conductivity, which is the ability to transfer heat. Air molecules are spread out, so even though warm, fast moving molecules are bouncing around within the air, they only lose heat when they come into contact with slower moving molecules to pass warmth off to – which in turns causes the temperature to cool. In short: air doesn’t have as many molecules for heat to pass its warmth off to, thereby keeping an area warmer for longer. Air is used to insulate many commonly encountered objects and structures – from your favorite puffer coat, to your thermos and even the walls of your home.
Just like the walls of your home, the Eglu’s unique twin-wall design captures air in between the layers, creating a “pocket” of insulation to surround the coop. Not only does this method prevent cool air from moving in, but it also keeps the body heat your chickens generate inside. On the flip side, the same method helps to keep heat out of the coop during warm weather.
Ventilation
Ventilation is any coop’s best friend – but it’s a delicate balance between how much airflow is needed. Too much airflow creates chilly drafts, and too little airflow causes moisture to build up inside the coop which can lead to multiple health issues for your hens.
Eglu coops are designed to allow air to flow through the coop through well positioned vents. This draft-free system ensures that clean air is able to circulate through the coop while still keeping your chickens warm. The moisture created by your chickens will be circulated out through the same process, preventing moisture buildup.
How chickens keep themselves warm
As mentioned, chickens have a built-in mechanism for creating their own insulated barrier from the cold. You’ll notice your chickens “molt” (shed their feathers) in preparation for the winter. While it may look alarming, your half-naked chickens will regrow thicker, more dense feathers for the winter. These dense feathers are used in their “puffing up” technique to help hold the longer feathers on top away from their skin. The thickness of their downy feathers underneath traps the air that their visible plumage is allowing in. The result is a fluffed up, warm (and adorable!) hen.
Chickens will also ramp-up their already fast metabolisms in the winter to help generate heat. Be sure to offer them extra feed during this time to support this metabolic shift! Feeding extra scratch grains or alfalfa hay in the evenings will help keep their body heat up on chilly winter nights.
As a cold-defense mechanism, blood flow will be redirected from your chickens’ legs and to their bodies in an effort to keep them warm. Their feather-less legs have scale-like coverings that trap some heat in, but often you’ll see your chickens warming up their chilly legs. Some hens will alternate standing on one leg in a flamingo pose to warm one leg up against their body. The hen will switch legs to repeat the process on the other side once one leg has been sufficiently warmed. You’ll also notice that chickens will drape their feathery skirts over their toes when they roost to warm them up! By giving them chicken perches or chicken trees in their run, they’ll have multiple opportunities to warm their toes after walking on the frozen ground.
The Eglu isn’t made of ice, but it can withstand it
Our Eglu coops might not be made of ice, but they’ve been created to withstand the elements! For particularly cold areas, extreme temperature jackets can be added for extra-insulation. And since you’re now a pro at understanding how air is a great insulator, you can see why adding another layer to trap even more air around your chicken coop will help keep more heat in and more cold out!
Inventing and engineering minds are always hard at work at Omlet, and the Eglu chicken coop is just one of many pet products designed with practical science to benefit both the animals and the people that love them! You can rest easy this winter knowing that your chickens will be nice and warm all season long in their Eglu coop.
This entry was posted in Chickens
…make it this one.
From the latest smartphone to super clever hairdryers, we often hear and read about the top new gadgets that we need in our lives, and more recently we are beginning to see amazing tech products for our pets! But what about chickens? Yep, even our feathered friends are getting a look into the future, and this is not something to be missed.
If you buy one thing for yourself or your chickens this week, make it this.
The Autodoor.

This one simple addition to your chickens’ coop, can make a hugely significant difference to your life as a chicken keeper, and many users swear by it.
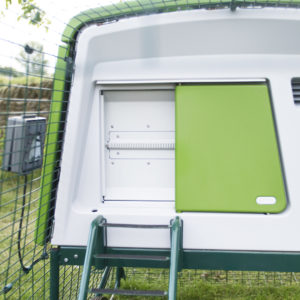
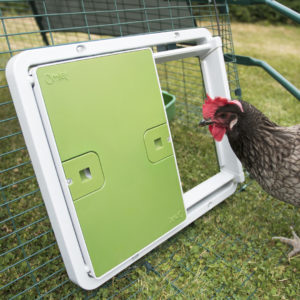
Secure the Autodoor to your chickens’ enclosure; this can be the Eglu Cube house, Eglu run, any wooden chicken coop or chicken wire, and use the control panel to set when the door opens and closes, based on a specific time or a percentage of light.
In the morning, the Autodoor will open with no fuss, allowing your chickens out of their coop or run to explore, graze and stretch their wings, especially useful in summer, when your chickens are wanting to get going far earlier than you. There’s no need to get up at 5am when you have an Autodoor.
In the evening, as the sun sets, the Autodoor can be programmed to close at a time when you know all your chickens will have gone into their coop to roost, so they can be secured and safe from predators. In winter, when it can be dark before you get home, you won’t have to worry about having to hurry back in time to shut them in. The Autodoor can do it for you.
Here’s 5 other reasons, you need the Autodoor…
- Battery-powered. No need to keep your coop close to a power source.
- Reliable in all weather conditions. This is a gadget that will take you from winter to summer, and back again.
- Built in safety sensors ensure no chicken is harmed when investigating their new gadget.
- Improves coop security and insulation. The horizontal door is far safer than it’s vertical, guillotine style competitors which can be easily lifted by predators.
- …and finally, the Autodoor is now 25% OFF when you sign up to the Omlet newsletter here. That’s a huge saving of $47.25! Find out more and get your unique discount code here.

This entry was posted in Chickens
Winter brings unique challenges for chicken keeping, and avoiding common pitfalls can help keep your flock healthy and thriving. In this guide, you’ll discover 10 things to avoid as a winter chicken keeper, empowering you to navigate the season with confidence and care in your backyard. From managing coop conditions to understanding your hens’ needs, these insights will ensure you’re well-prepared for the chilly months ahead.
What to avoid this winter
Knowing what to avoid is just as important as knowing the right things to do when caring for your chickens. Preparing your flock for winter is essential, but there are some common mistakes that you might overlook or misunderstand about winter chicken-keeping. Here’s what not to do this season:
Don’t coop your chickens up
Your chickens are built to be outdoors, and they’re naturally resilient against cold temperatures. In fact, a hen’s internal temperature is around 105°F, making it easier for them to handle the cold than the heat. Beneath that shiny plumage, dense downy feathers, courtesy of your flock’s annual molt in the fall, provide excellent insulation.
It might be tempting to keep your chickens fully enclosed in their coop, but they can easily become bored and stressed. Instead of locking them up all day, open their coop door once the sun has been up for a few hours to warm up their environment. Or, program your Smart Autodoor to open at a set time. Invest in chicken run covers to prevent snow and ice buildup, and provide plenty of chicken perches to help keep their feet off the frozen ground. With these measures, your flock will thrive even outside of their coop.
Don’t make their coop airtight
One common mistake is trying to seal your chicken coop completely. Your flock needs fresh air circulating to prevent moisture buildup and respiratory issues. Insulated chicken coops are designed to keep harsh elements out while still allowing enough airflow.
While drafts can be a concern in the winter, a well-ventilated coop won’t let in dangerous cold drafts. Even with extreme temperature chicken coop jackets, Omlet’s Eglu Chicken Coops provide just the right amount of fresh air without letting in harmful drafts.
Don’t offer supplemental heat
Your chickens are hardy creatures, and they adapt naturally to falling temperatures. If you heat their coop, they miss out on the process of acclimating to the cold and might be shocked, quite literally, when they step out into freezing weather. This sudden shock can even be fatal to your flock.
Heat sources also present a fire hazard for your chickens, so they should only be used with close supervision. While brooder plates, heat lamps, or heating pads can be helpful for sick birds or young chicks, they should only be used in dire situations for healthy hens. Instead, add extra insulating bedding like straw or hay to nesting boxes and roosting areas to provide warm comfort without the risk of electric heat sources.
Don’t leave eggs in the coop
It’s easy to remember egg collection in the warm days of summer, but when temperatures dip below freezing, you need to gather eggs quickly. Eggs shouldn’t be left in the coop for more than a couple of hours if it’s freezing outside. A frozen egg might not be spoiled initially, but as the contents expand, they can crack the shell. Once that shell is compromised, bacteria can sneak in, rendering the egg inedible.
Make it a habit to check for and collect eggs each time you visit the coop. This proactive approach works well in any season, but especially when facing the challenges of extreme temperatures.
Don’t forget their water
When winter arrives, keeping your chickens’ water from freezing becomes a daily challenge. Standard chicken waterers can quickly turn into ice blocks, so it’s important to check and break up any ice several times a day to ensure your flock always has access to fresh water. Pouring warm water over frozen waterers can help thaw them, and using electric bird bath or submersible heaters designed for poultry waterers is another effective option, just make sure to keep cords and components safely out of reach of curious beaks.
You can also try placing a floating object, such as a tennis ball, in the waterer. The gentle movement helps prevent solid ice from forming, though its effectiveness can depend on factors like wind and the size of the object.
For an even easier solution, consider using an insulated waterer like the Omlet Insulated Stay Clean Chicken Waterer. Its double-walled design helps keep water from freezing, reducing the need for constant checks and refills. This can be a real time-saver during those extra chilly days.
Don’t put off cleaning the coop
Before the cold weather truly sets in, give your chicken coop a deep clean. This allows you to use a pressure washer one last time before ice becomes a problem. Refresh the bedding with thick, warm materials like shavings or straw, and double-check that run covers are secure and adjusted.
When it’s too cold to use water, you can maintain cleanliness with a rag or a stiff brush. Be sure to empty droppings trays regularly and brush off any debris from roosting and nesting areas. Keeping the coop clean, ensuring proper ventilation, and monitoring humidity levels promotes good respiratory health for your chickens all winter long.
Don’t limit their fun
Your chickens might wander less far from their coop during the winter, especially as insects and vegetation become scarce, which can affect certain breeds more than others. Snow and ice can sometimes dampen their enthusiasm. To keep boredom at bay, make sure your flock has plenty of engaging activities to enjoy.
Incorporate chicken perches, peck toys, treat holders, or even a Chicken Swing in their run or free-ranging space. These fun additions can transform dreary winter days into delightful moments that cheer both your heart and your hens’.
Don’t go easy on the feed
During the winter months, different chicken breeds may require varying amounts of energy to maintain body heat, so they tend to get hungrier, requiring more chicken feed than usual. With their increased appetite, you’ll likely find yourself refilling their chicken feeders more frequently.
Treat your flock to extra nutrition during these colder times. Consider adding dried mealworms or soldier fly larvae to their scratch grains, offering alfalfa hay, or even preparing a warm chicken mash to satisfy their cravings and keep them energized.
For added convenience and peace of mind, the Omlet Smart No Waste Chicken Feeder can be a game-changer during winter. This innovative feeder notifies you when your feed is low, helping you keep up with your flock’s increased appetite without you having to constantly check the feeder itself. Its weather-resistant design also ensures feed stays dry and fresh, even in snowy or damp conditions, so your chickens always have access to the nutrition they need.
Don’t forget combs and wattles
Frostbite can affect any chicken breed, but hens with larger combs and wattles are especially vulnerable. Keep an eye out for signs of frostbite such as:
- A pale or white appearance
- Black spots or sections
- Misshapen edges
A little petroleum jelly applied to these areas can help prevent frostbite in chickens. While frostbite isn’t typically deadly, it is uncomfortable, and once areas are discolored, they might fall off, leaving your hens with misshapen combs or wattles.
Don’t forget chicken self-care
Sunbathing and chicken dust baths are all part of your hens’ daily pleasures during warmer months. They’ll continue to appreciate these activities in winter as well. Dust baths help keep their feathers in good condition, ensuring they stay warm, comfortable, and free from excess water.
Having clear run covers that allow the gentle warmth of the sun to filter through can create cozy spots for your flock, making those winter days feel a little bit brighter.
Omlet and your flock
Prepare your flock for winter with our thoughtfully designed products, created with you and your hens in mind. Our chicken coops, run covers, and smart automatic chicken coop doors make winter chicken-keeping a breeze rather than a freezing ordeal. This winter, work smarter, not harder, by choosing Omlet’s chicken products to support you and your flock throughout the season.

This entry was posted in Chickens
Wondering how to make a dust bath for your chickens? Most hens are perfectly content to dig up their own patch of earth to roll around and fluff their feathers in – but by making your own dust bath from chicken-safe ingredients, you’ll elevate your hens’ bathing from a metaphorical bucket of cold water, to a luxurious bubble (well, dust) bath.
Why do chickens need dust baths?
Dust baths are an important part of overall chicken health. Like humans, chickens bathe to get impurities off of themselves and to feel better in general. It may seem counterintuitive to roll in the dirt to get clean, but the right dust bathing spot can absorb moisture and oils on the skin, and can rid birds of mites and lice. Hens aren’t the only birds that enjoy a good roll in the dirt – many wild avian species can be observed taking dust baths.
Chickens will find a soft, dusty or sandy spot and scratch around in order to create a shallow well to plop down into. Once they’ve laid down, hens will wiggle back and forth while flapping their wings in a shoulder-shrugging motion. They will lay on each side and repeat the process until they are sufficiently coated in dust or sand. When they’re done, they’ll hop up and shake vigorously – just like a dog after a bath. After a quick feather preening they’ll be done and dusted (literally).
Bathing this way benefits chickens mentally as well as physically. Just like we may take a warm bath to unwind at the end of the day, dust bathing helps hens relax and feel better. Hens may also hit the dust when they feel like socializing – much like humans in a sauna or hot tub. You may notice hens taking a dust bath with 2 or 3 of their closest flock friends.
Making a dust bathing area for your chickens
Giving your hens a designated dust bathing spot will deter them from creating their own – potentially in your favorite flower bed or another less-than-desirable location. You can use cat litter pans, the tray from a small animal cage or the bottom part of an enclosed dog kennel. But, if you have larger hens or a large flock, they may need more space than these shallow basins have to offer.
Use your imagination to create a dust bathing spot for your hens. Here are some ideas for inspiration:
- An old tire
- Flexible storage tote
- Livestock feeding pans
- Plastic toddler pools
You can also create a permanent dust bathing area by digging out a shape in the ground and edging it with pavers or stones.
Dust bathing areas or containers should have an edge at least 12 inches above the “dust fill line” to avoid hens tossing all of the contents out during their vigorous cleaning sessions. Make sure that the edge is high enough to contain the dust, but also low enough to accommodate your smallest flock members.
Place your flock’s bathing area in a sunny spot. Chickens will seek out sunny areas to bathe in – especially during the winter months. Be sure to keep their bath in an area where it can stay dry. Wet dust bath contents will dry eventually if they get rained on – but depending on the amount it could take several days. Chickens will bathe daily, so try to keep it as dry as possible. A large, elevated chicken coop can provide the perfect spot underneath with just enough sunlight and protection from the rain.
5 things to add to a chicken dust bath
You can make your flock a nutrient-packing dust bath from simple ingredients – many of which you may already have at home.
1. Wood ash
One of the most beneficial ingredients to a good chicken dust bath is something you can find in your own home or backyard. Wood ash from fireplaces or outdoor fire pits are great additions to your hens’ bath. Ash contains vitamin K, calcium, and magnesium, and helps absorb toxins from the skin of chickens. You may see your hens eat some ash, which can also benefit them.
It’s important to only use wood ash if you’re sure of its source. Do not use any ash from treated wood or lumber, as it contains toxic chemicals that can harm your hens.
2. Food-grade Diatomaceous Earth (DE)
This all-natural, silica-rich powder is a powerful anti-parasitic both on your hens and around their coop. DE destroys the exoskeletons of parasites like red mites, lice, fleas, and ticks. In fact, DE can also be added to your hens’ diet for additional parasite prevention. In addition to your flock’s bath, sprinkle some DE around the edge of your chickens’ run and coop to keep pests at bay.
3. Sand
Sand makes a great base for dust baths, but be sure to get the right kind. There are many types of sand available, but steer clear of children’s play sand, as it’s usually treated with chemicals. Aim for a coarse variety like contractor’s or multipurpose sand. Don’t use fine sand on its own – if ingested, fine sand can lead to crop impaction in hens.
The main purpose of sand is to ensure that the rest of your chicken dust bath ingredients don’t clump together, and to add weight to the mixture. If you’re using fine sand, make sure to mix it thoroughly with soil.
4. Top soil or peat moss
If you don’t want to dig up your own dirt, a bag of top soil or peat moss can be used instead. Widely available and inexpensive, bags of top soil and peat moss offer the benefits of natural soil without the hassle of digging it up.
5. Dried herbs
If you’re a chicken keeper that also gardens, you’ll likely have herbs available to add to your hens’ dust bath. Herbs help attract hens to bathing spots in addition to being beneficial for their skin and immune systems. Some herbs to add to your flock’s dust bath include:
- Lavender
- Rosemary
- Thyme
- Mint
- Oregano
- Sage
- Parsley
Don’t forget to save some herbs for your hens’ feed as well as their bath. All of these herbs help to support a healthy hen diet and lifestyle – both inside and out.
Maintaining your chickens’ dust bath
For dust-bath maintenance, simply clean out any droppings that find their way in and refill the contents of the bath when needed. Some hens may bathe multiple times a day, while others may bathe every other day. Depending on how heavy the dust bath usage is, you may want to keep an air-tight container of pre-mixed chicken dust bath for easy refills.
While chicken perches are flock favorites, be sure not to place your hens’ dust bathing area directly below their perching areas to avoid accumulation of droppings. If you have a walk in chicken run, cover the portion of the run that has the bathing area with clear weather protection covers both on the top and sides to prevent the contents from getting wet. This will allow for sunshine to warm their dust bath without the risk of it turning into mud.
Omlet and your hens’ health
Keeping chickens healthy and happy doesn’t have to be a chore. With thoughtfully designed chicken products like the Eglu Cube Chicken Coop, Walk In Chicken Run, and Weather Protection Covers, taking care of your chickens has never been easier. A homemade chicken dust bath is the perfect addition to these purposefully crafted products.
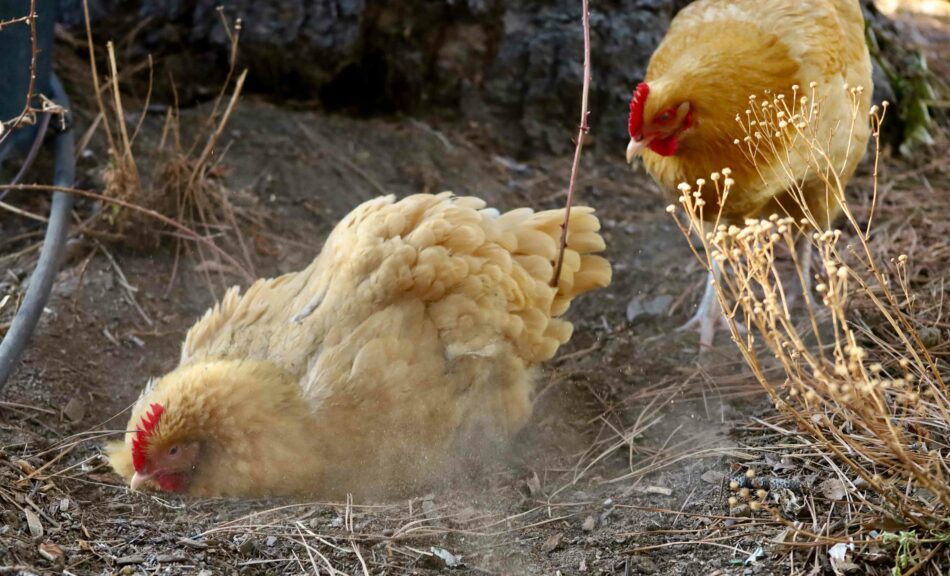
This entry was posted in Chickens
Most people decide to keep chickens because of the prospect of being supplied with fresh and delicious eggs! So, when your hens don’t deliver the goods or stop laying completely, it can be worrying, baffling, and frustrating. There are several reasons to explain this behavior, and fortunately, in many circumstances, this is no cause for concern. Here are the most common reasons as to why your chickens have stopped laying eggs:
The Age of Your Hens
When raising chickens, you’ll notice that they have a laying cycle, or how their age affects their egg production. Backyard hens typically live to around six to eight years old but will only lay eggs for a certain number of these.
Many hens will not produce eggs until they are six months old and thereabouts, but the exact timing depends on the breed. Some breeds, such as Australorps, Golden Comets, and Leghorns, begin laying early, in fact as early as between 16 and 18 weeks. Some larger breeds such as Orpingtons, Plymouth Rocks, and Wyandottes, however, could have you waiting up to eight months for their first egg to appear!
Whilst egg production will gradually decrease every year, your hens will eventually stop laying eggs approximately around the six-year mark. Again, this is dependent on the breed and some hens can stop a lot earlier or later than this.
If you’re unsure of how old your chickens are, have a read of our previous blog: How to Tell the Age of a Chicken.
Time of the Year
Another complicating factor as to why your chickens have stopped or are not laying eggs anymore, is the time of year, which is the most common answer to the “why are my hens not laying?” question.
For most breeds, hens tend to stop producing eggs, or drastically reduce their output, in the colder months. This is due to the reduced daylight hours during the winter. When summer ends, there is of course less daylight, which triggers a hormonal response in hens. For egg production, hens typically need between 12-14 hours of daylight each day and 16 for optimum egg laying, which is why they can struggle over winter. Furthermore, hens that reach egg-laying maturity in the autumn or winter may not lay again until spring.
Molting
Molting is an annual (or sometimes biannual) occurrence, whereby chickens shed their old feathers and grow new ones. The process usually lasts between 1 and 2 months and whilst it can happen at any time of the year, in the UK, this is usually in late summer or the beginning of autumn.
When chickens molt, most hens will take ‘time off’ from laying eggs with their physical efforts now concentrated on growing new feathers. During this time, you should continue to provide your chickens with a healthy diet, along with adding a bit of extra protein to their diet and ensuring they have plenty of vitamins and minerals. You can also add some apple cider vinegar to their water to help with a healthy, glossy, new plumage.
Poor Nutrition
This underlines another important point – a nutritious diet is vital all year round. Whilst it’s a great idea to help get your chickens some extra nutrients whilst they’re molting, it’s also important to provide them with what they need to keep healthy and laying eggs whatever time of year it is!
Put simply, if hens are malnourished, egg production will drop, with hens either laying fewer eggs or none at all. Whilst chickens naturally forage for food, to keep producing eggs, hens need a balanced diet of enough protein and carbohydrates. A steady supply of a good quality feed and access to grit will ensure that your chickens get everything they need.
You’ve Got a Broody Hen
Sometimes a chicken will decide to sit tight and wait for her egg to hatch. This is known as a broody hen, and while she’s broody, she’ll stop producing eggs. This is handy if you want to hatch chicks, as the hen will happily sit there for the three weeks it takes to hatch an egg. It’s less handy if you want her to produce more eggs, though!
A hen can either be left for three weeks, after which she will resume normal service. Alternatively, you can gently discourage her, should your hen be nesting in an unsuitable environment (or if you find yourself in dire need of eggs!). Breaking a broody hen can be difficult but placing a bag of ice cubes or frozen peas underneath her can do the trick. Some chicken keepers also recommend placing the hen in a wire cage or dog crate with food and water for a few days. This can be a little uncomfortable but will usually break the brooding habit.
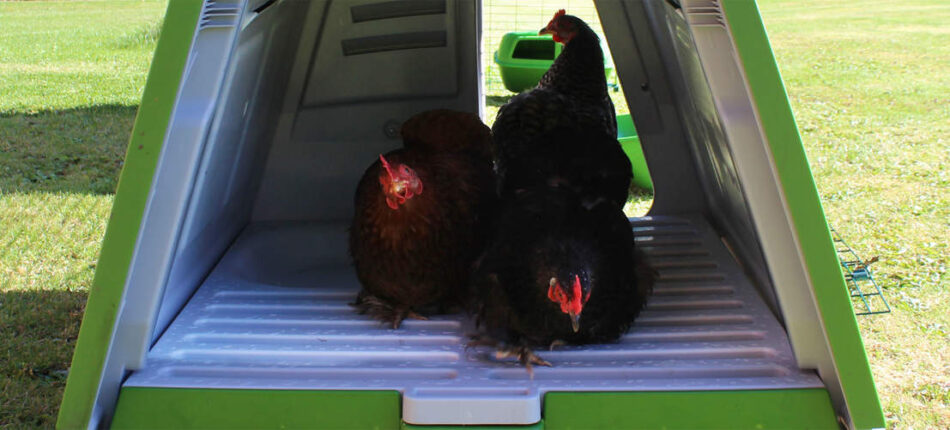 Sick Chickens Stop Laying Eggs
If your chicken stops laying eggs and you have ruled out that your hen is neither too young nor too old, not molting, not brooding, and not hunkering down for a cold winter, then the reason for the drop in eggs could be illness. In particular, parasites such as lice, mites, fleas, and internal worms can be causing bodily stress, which has a significant impact on laying. For a bit more information on illness in chickens, check out our pages on chicken health for advice on diagnosing and – where possible – treating problems.
As well as illness being a cause of stress, it can also be brought on by other factors such as bullying, too much handling, injury, noisy children and pets in the garden, or a poor environment. Making sure the hens have a space where they can stay happy and healthy is vital. A setup such as the Eglu chicken coop and run, along with suitable perches, feeders and other essential accessories can help with this.
Something Else to Consider…
It’s also very possible that your hens are in fact laying eggs, but they’re going missing before you even have the chance to collect them! However, rest assured, the mystery behind ‘vanishing eggs’ can usually be explained with two main reasons.
The first of which is that free-ranging chickens often ‘go native’ and begin laying eggs in a spot in the undergrowth, rather than in the coop. You should check under shrubs, in long grass, and any secluded corner of your plot of land. If the AWOL laying has been going on for a long time, there may be a few eggs out there in the wilderness. Check their freshness by placing them in a bowl of water. If the eggs lie on their sides, they are fresh. If they are more upright (between 45 and 90 degrees), but still resting on the bottom of the bowl, they are not fresh, but still usable. Any that float have passed their sell-by date!
Eggs may also disappear if a hen acquires a taste for them. Egg-eating amongst chickens can be a sign of overcrowding or poor diet. Once she has acquired the taste, it can be difficult to stop a hen from eating eggs, and she may need isolating to stop her pecking at her Neighbours’ eggs. The isolation may also induce slight stress, just enough to interrupt her own laying, which may, in turn, break the habit.
Normal Egg Service Resumed
Don’t worry – unless a hen is very old or very ill, her egg-laying should soon resume. Owners can aid the process by making sure they’re giving the birds everything they need. The key to a good egg supply is good food, a good space – and patience!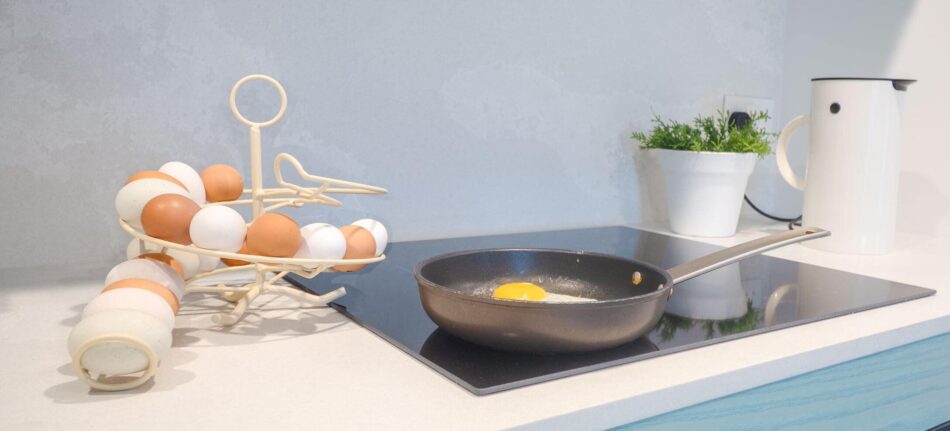
This entry was posted in Chickens
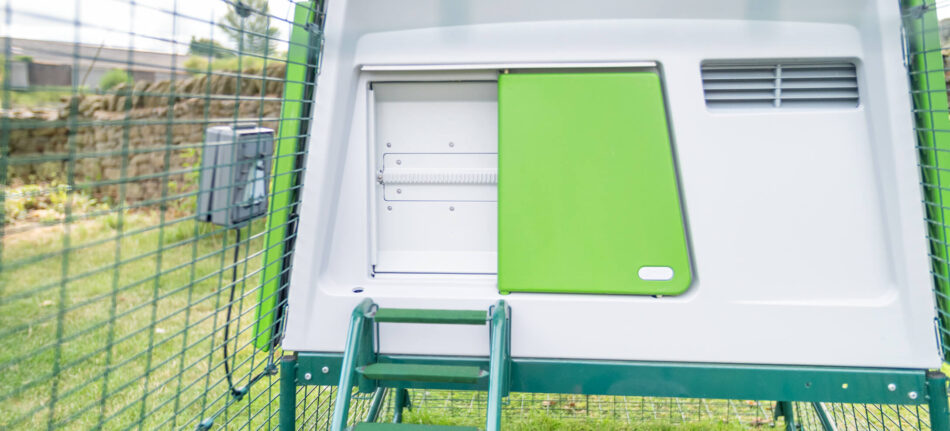
Here at Omlet we often receive calls from aspiring chicken keepers who are seeking chicken keeping advice before getting their first birds. Some of the most popular questions we get asked are, what should I feed my chicken with or how can I protect my chickens from predators? One question that keeps coming up is, do I need to shut the Eglu door at night?
Often people ask us this question because the idea of adding another task to their daily routine might be one of the reasons which puts them off chicken keeping. Much like you wouldn’t like to sleep with your front door open, unfortunately for chicken keepers, nor do your chickens, therefore most nights we would recommend you close the chicken coop door.
But having to close the door doesn’t necessarily mean that it would need to be done by the chicken keeper themselves! Have you ever thought about automatic door system? Well luckily for chicken keepers, Omlet has recently launched a new Autodoor which will solve all of these problems.
Even though our Eglus are specially designed to keep your chickens warm in winter with a unique twin-wall insulation system which works in a similar way to double glazing, leaving the door open overnight would let the cold enter inside which might result in having frozen eggs after a freezing winter night and could make your chickens feel unwell. Therefore, we strongly recommend you use the handle on top of the Eglu and simply lift and twist it to close the door in one convenient motion each evening after having make sure all your flock are inside.
As important as it is to close the door to protect your hens from the cold, it is also important to do it to protect them from potential overnight predator attacks. Most predators would wait for the night to attack your chickens therefore by simply closing the door it would protect your flock from being attacked by predators such as racoons, foxes and coyotes.
Having said how important it is to close your chicken coop overnight we understand that not everyone has the luxury of being at home every night to close the coop door especially for people working late shifts that are often home well after the sun sets. That is why we recently launched an automatic chicken coop door that can be attached directly to any wooden chicken coop, wire or the Omlet Eglu Cube Mk1 and Mk2.
Much like a personal chicken coop concierge, the Autodoor will always make sure your chicken’s coop is securely closed at night even when you’re running late. Whether you decide to use the light or time mode, the Omlet secure and safe Autodoor will either open and close at dawn and dusk or at specific times that you have programmed it to. In addition to being designed to be used in different modes the Autodoor has a unique safety sensor detecting any blockages to prevent your chickens from being injured when they decide to stop half way through the door.
Benefits of the Omlet Automatic Chicken Coop Door:
- Easy to install, no maintenance required
- Operated by light sensor or timer
- Powered by battery
- Works with all wooden chicken coops
- Improves coop security and insulation
- Compatible with the Eglu Cube
- Reliable in all weather conditions
- Built-in safety sensors
- Can be used with any chicken run or mesh
To summarise, closing the coop door is definitely the recommended action for every chicken keeper in order to protect their chickens from the cold and predators however this task can easily be completed by an Autodoor.
Check out the review below to see what one of our Autodoor owners thinks of this new product:
“Thank you Omlet for a wonderful product and great service. The door arrived quickly, very well packaged and my concerns over fitting it were unfounded as I was able to complete the task completely unaided. The door is easy to operate and means my girls are safely tucked up at dusk and I do not have to get up ridiculously early to open the coop and stop them hollering!” – Wendy
Read more reviews
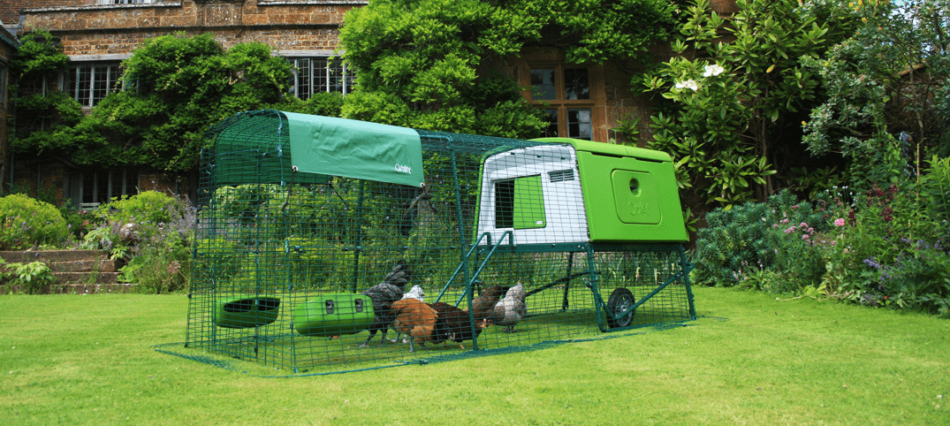
This entry was posted in Chickens
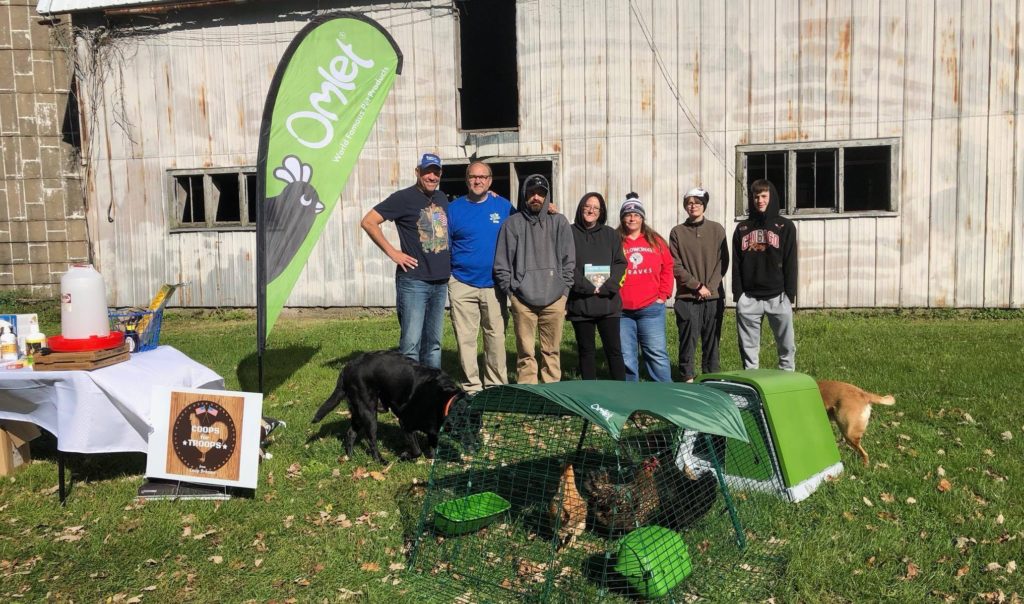
While filming a segment of our television program Coop Dreams, around Austin Texas, we were taken on a field trip to a nursing home that had a chicken coop. Daily the residents would have ‘Chicken time’ where they could hold, pet and interact with the chickens. What we witnessed was incredible. The chickens were amazingly calm and the residents were transformed back in time to when they had raised or experienced a life with chickens. It was super cool to see chickens and residents so comfortable that they both wound up napping while the chickens were on their laps in chairs… And that sparked a curiosity.
The birth of Coops For Troops
Moved by what we experienced, we couldn’t stop talking about it and googling everything around chickens involving support and therapy. We found some amazing information and stories about how chickens can help with:
- Loneliness – We’ve all experienced and been amused by their crazy antics and personalities.
- Stress Relief – Whether it’s the vocalizations or the scratching and pecking there is something very calming about sitting with chickens.
- Depression – A study of the UK organization Henpower shows that – people become less lonely and depressed when caring for the hens.
- Loss of self-worth – There is a sense of purpose one feels when caring for and feeding chickens.
- PTSD – Animals have been shown to be great in relieving the symptoms and elements associated with PTSD.
And after those Google searches we decided to launch Coops For Troops (Coopsfortroops.com) where we present veterans and military families with chickens, supplies and an Omlet chicken coop to help them start their journey into backyard chicken keeping.
Sixteen and counting!!!
Currently we’ve presented 16 Coops For Troops packages and are excited to continue passing on the amazing healing power of chickens.
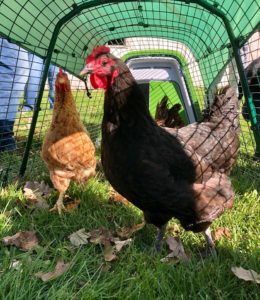
We’ve presented in nine states to date and are sifting through the next round of nominations. Initially it was going to be a one and done event and a small segment in an episode of our Coop Dreams TV show but the response was so great it has spun into its own TV show.
Not only does this allow us to thank more veterans and deliver more coops but the weekly TV audience allows us to share this benefit to others who may be suffering and are in need of some help and relief.
Our viewers and partners help us to continue to pay it forward.
Coops For Troops episodes can be watched, for free, any day and anytime on our webpage by clicking the Video On Demand tab and clicking the Coops For Troops episodes. They can also be seen on our Coop Dreams YouTube channel.
The Results
We all know how chicken math works and that doesn’t change if you’re a veteran, a beginner or an experienced chicken keeper and it is so great to see so many of our Coops For Troops recipients grow and add to their flocks and continue to communicate to us how the addition of chickens has helped in quieting some of the symptoms these incredible individuals now carry.
Sooooooo… On this Veterans Day what can you do? Spread the word and pay it forward. If you know of someone in need maybe mention how the help may be found in these incredible, quirky and amazing animals.
This entry was posted in Chickens
We can learn a lot from chickens. They go to bed early, and know how to snuggle up together to get warm on a cold winter’s night, ready to seize the next day when the sun comes up. But, once winter sets in, it’s hard for humans to rise and shine when it means having to trudge out to the coop in the cold. Discover how the Smart Autodoor makes winter easier for you and your chickens when you employ this chicken-life changing piece of technology to be your personal coop concierge.
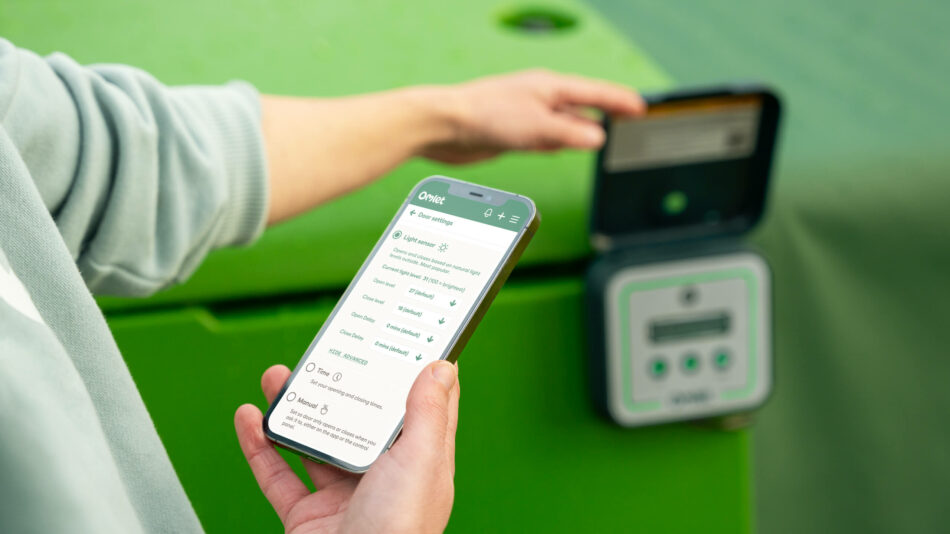
A Smart Autodoor for any coop
The Smart Autodoor is the perfect solution for all chicken keepers. It attaches to any chicken coop or run, and can be controlled via the control panel or through a mobile app. When connected to WiFi, the Smart Autodoor can be customized, opened, closed, and updated anytime, from anywhere in the world, when in notification and control mode.
Like many ingenious inventions—think wind-up radios, compasses, or steam engines—Omlet’s Smart Autodoor is simple, but effective, enhancing efficiency in managing your chicken coop. This hands-free, automatic device has several customizable settings, including wifi connectivity, making it perfect for any schedule, be it human or chicken.
The Smart Autodoor’s open and close schedules can be based on the sun or the clock. The daylight setting adheres to a schedule based on how much daylight is available, keeping your flock in their routine even when the time changes in preparation for winter. If you prefer to have more control over your coop, the time setting can be programmed to open and close the coop door at the times of your choosing. The manual setting enables you to open and close the door at the push of a button on the app or control panel, or by speaking a request to your Alexa or Google Home device.
Attaching the Smart Autodoor
The Smart Autodoor was made to be the perfect companion to our larger chicken coops. If your flock already lives in an Eglu Cube or Eglu Pro, installation is quick and simple for your convenience. But, fitting the Smart Autodoor to traditional chicken wire, Omlet’s chicken run wire, or wooden chicken coops is also simple thanks to the corresponding attachment kits.
Once installed, the control panel is powered with batteries or through the direct wire connection, facilitating seamless automation of the door’s operations. The integrated light sensors of the control panel are intuitive, ensuring that passing headlights or sudden cloud coverage doesn’t trigger the Smart Autodoor to open or close when using the daylight setting. Positioning your control panel on the side of the coop with a mounting bracket will allow constant access to ambient lighting.
The optional coop light helps your hens head to bed on time. By installing the light around the roosting area of your coop, your flock will have a night light to beckon them to bed. The coop light will come on five minutes before the Smart Autodoor closes by default, but this time can be adjusted through the app to accommodate hens that may tend to stay out past their roost-time.
Why is the Smart Autodoor better in the winter?
Aside from the warmer mornings in bed, or sparing yourself a chilly trek to the coop with a few taps on your mobile device, the Smart Autodoor offers practical benefits for your flock in the winter. The seal of the Smart Autodoor further insulates our chicken coops by maintaining a draft-free environment around the door. And, the control panel and Smart Autodoor mechanism has been tested and proven to perform in temperatures below 0 degrees Fahrenheit.
The horizontally-opening mechanism of the Smart Autodoor is strong, designed to reliably perform in all weather conditions and to enhance security by protecting against predators. Instead of a typical string and pulley system, the components of the Smart Autodoor are nearly impossible for predators to pry open. But even with its strength, our automatic coop door has a delicate door sensor that ensures that no part of a hen is closed in the door. If the sensors detect an obstruction, the door will stop and reverse its path, and will try again after a few minutes.
Between holiday travels and the fluctuating daylight hours, receiving notifications through wifi helps in keeping your flock safe and on schedule. Like a true coop concierge, the Smart Autodoor eliminates the need for you to brave the cold outside of your cozy bed to let your flock out of their coop, or venture out in the freezing temperatures to close your hens in their house for the night.
Omlet and your flock
We’re here to make winter a more enjoyable experience for you and your flock. From our Smart Autodoor to our insulated chicken coops and chicken waterer, we have everything you need to keep your chickens safe, warm, and covered throughout the entire season. Enjoy the warmer hours of the day with your flock, while our ingenious products take care of them during the cold.
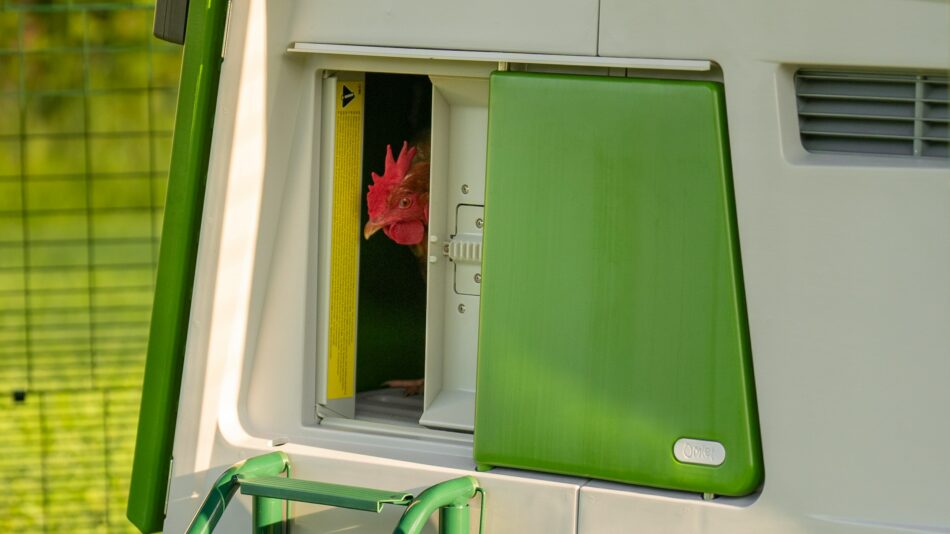

This entry was posted in Chickens