Cold weather can be a worry for chicken keepers but there are ways to prepare your chicken coop for winter. Preparations such as:
Moving you coop closer to your house
Upgrading to a plastic coop
Installing an automatic chicken coop door
Adding a chicken run cover
Adding an extreme temperature jacket
Get your chickens’ coop ready for the colder months and rest easy knowing that your girls are warm and healthy throughout winter.
Take a look at some of our top tips for getting your chicken coop winter-ready.
Move your coop closer to the house
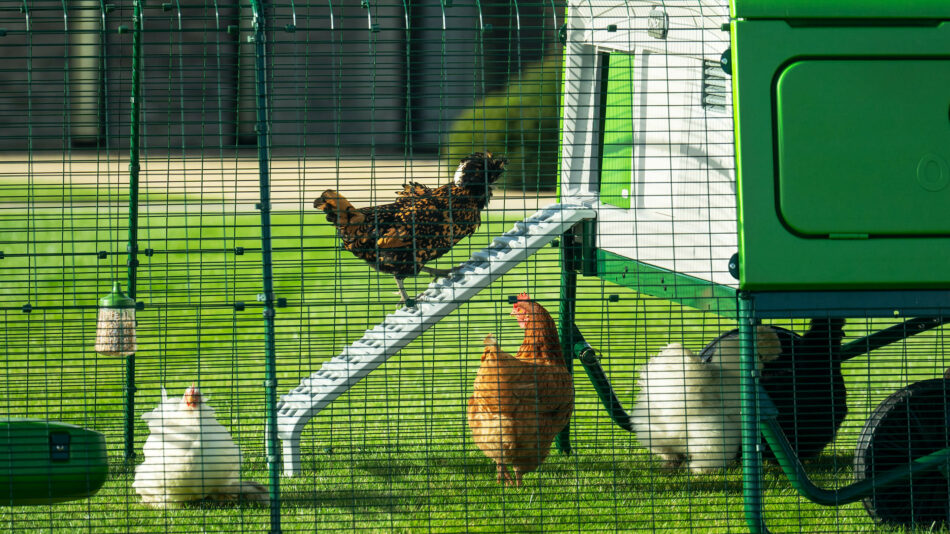
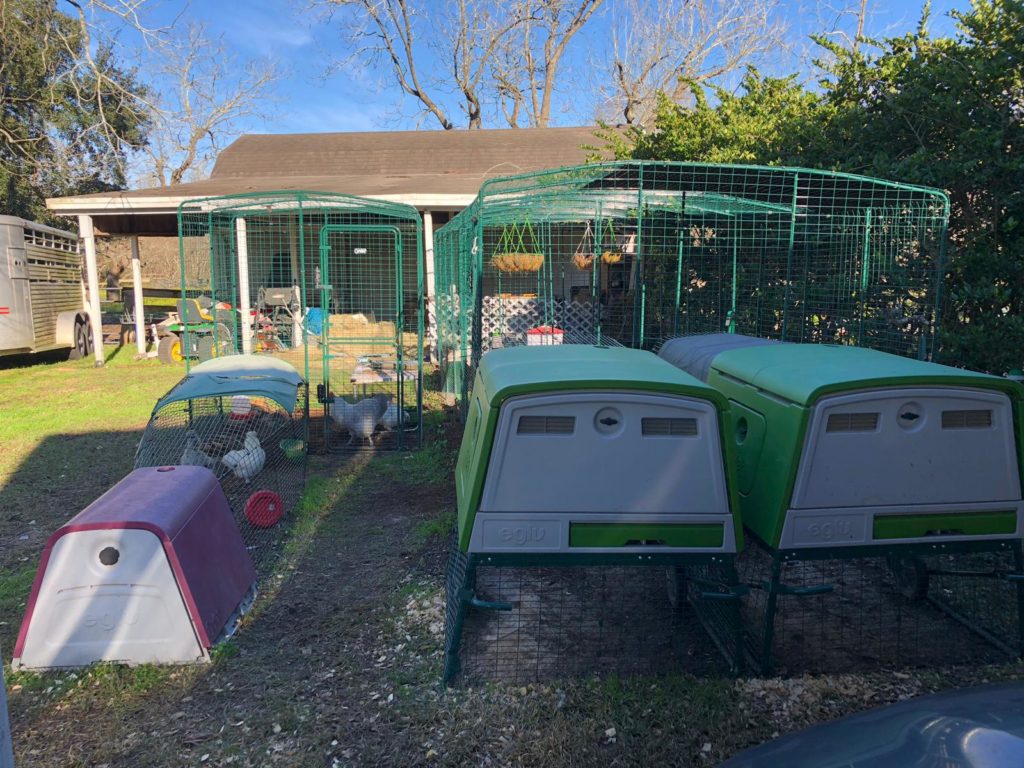
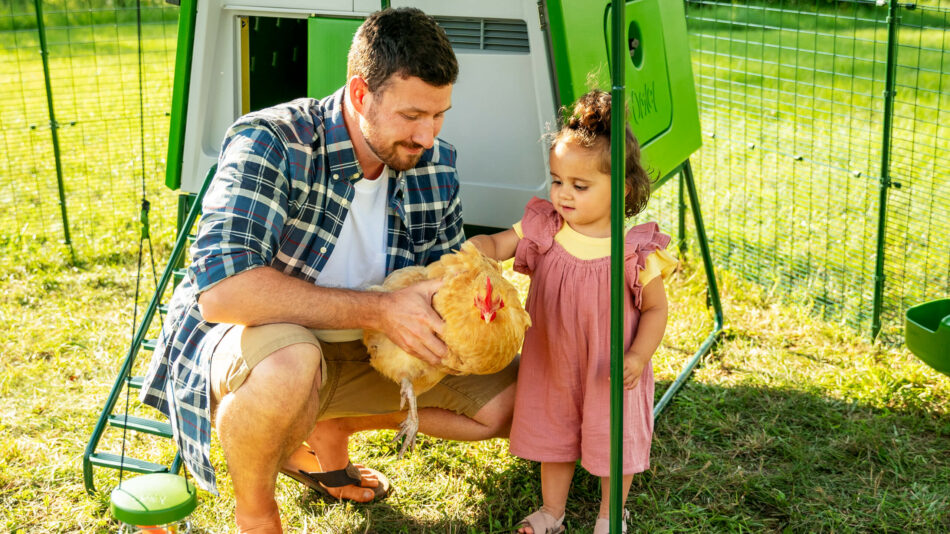
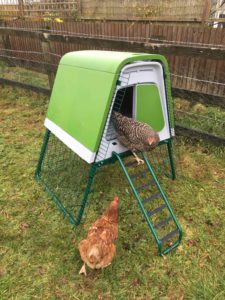
Moving your chicken coop closer to the house is a simple step for making it easier for you to look after your girls and give them their daily health checks, which are even more important in the colder months. Choose a lightweight coop with wheels, like the Eglu, to make it even easier to move it around your yard.
Upgrade your wooden coop to a plastic chicken coop
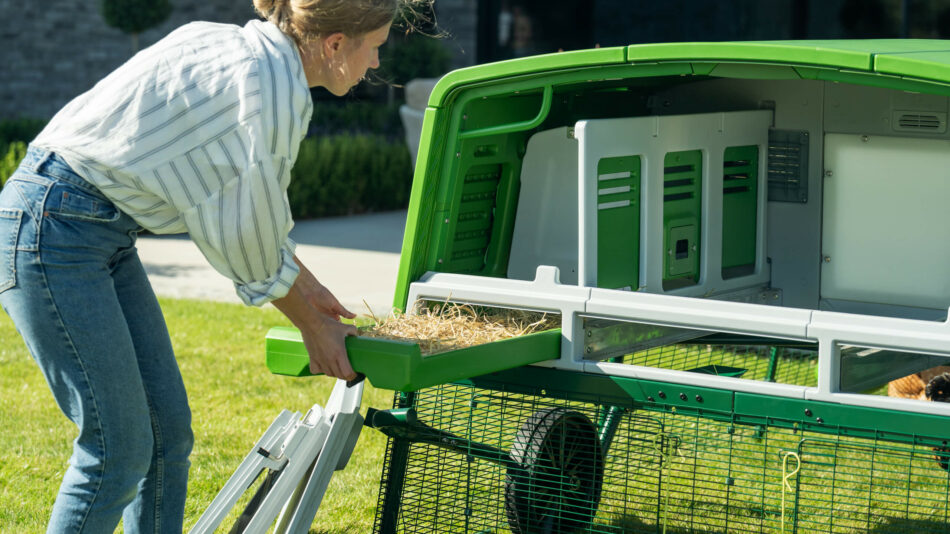
Upgrading your wooden chicken coop to a plastic coop has many benefits. The main benefit of a plastic Eglu Cube Chicken Coop for chicken keepers in winter is the twin wall insulation found in the design of the plastic house. This works in a similar way to double glazing, by creating a barrier between the cold air outside the coop, and the air inside. The air between the two walls conducts poorly, which means inside the house stays at a consistent and warm temperature throughout winter, whatever the weather is doing outside. Chickens are very efficient at keeping themselves warm, all you will need to do is make sure the coop door is shut at nighttime.
Install an automatic chicken coop door
Installing an Automatic Chicken Coop Door is a convenient solution for plastic or wooden chicken coops. You can set the Autodoor to close at a specific time or light percentage to suit when all your girls have gone up to bed and the sun has set. The Autodoor runs off batteries and has been tested to work down to -10 degrees celcius so there is no worry, however cold it gets outside!
The other benefit to the Autodoor is that it will open again at dawn so you can head off to work early before the sun rises and your girls need to be let out, or you can stay in bed for even longer at the weekends without going out in the freezing cold to let your chickens out of their coop!
“The nights are drawing in and I couldn’t be happier knowing that my girls are safely tucked up in bed with their Omlet Autodoor closed behind them. The Autodoor has given me peace of mind, flexibility and a well needed lie in! Couldn’t recommend it enough!” – Hayley’s Lottie Haven
Add a chicken run cover
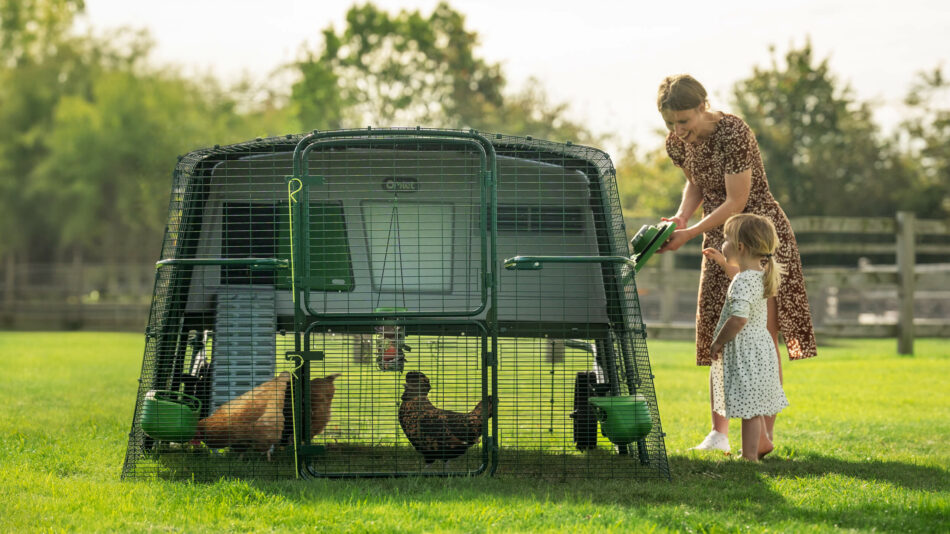
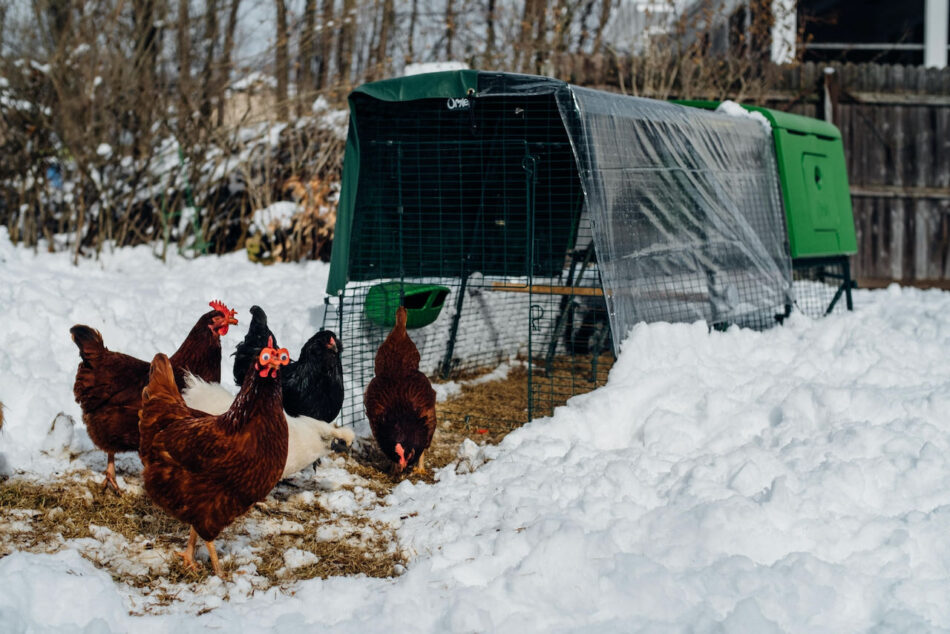
Chickens are very good at coping in cold temperatures, but don’t like getting wet. Adding a run cover allows them to be protected from the elements when outside in their run. Available in a variety of sizes to suit your run length, the clear run covers protect your girls from wind and rain so they can continue to play whatever the weather, whilst still allowing light into the run.
Add an extreme temperature jacket
When the temperature drops below freezing for multiple days in a row during the very depths of winter, it might be wise to give your chickens extra warmth with an extreme temperature jacket. Filled with a heat trapping recycled material that is breathable, the jackets keep your pets warm and protected from the worst that the weather can throw at them. Preparing your chicken coop for the winter will definitely benefit poorly or older chickens.
Provide Hentertainment
Prevent chickens getting bored when rain stops play with a variety of fun and interactive toys that can keep them entertained in all weathers. The Chicken Perch provides an easy outdoor perch which can be installed in their run (and protected by the run covers) for when your chickens can’t perch in their usual spots around your yard. The Chicken Swing provides hours of fun and again, can be easily installed in any run. While the Peck Toys and Caddi Treat Holder offer enriching entertainment as well as a rewarding flow of treats.
Water Heaters & Chicken Treats
Prevent your chickens’ water from freezing with a water heater to ensure they have access to flowing water at all times. It is also recommended to provide extra layers pellets and treats during winter, as chickens will need more energy to keep themselves warm and lay their eggs in the colder months.
Red mites are a sure way to put a damper on your flock’s coop life. Learning how to protect your chickens from red mites is essential for their overall health and happiness. While pesky and persistent, red mites can be prevented and treated – especially when you have the right setup.
What are red mites?
Red mites, or Dermanyssus gallinae, are small, red parasites that lie in wait in your chickens’ coop, ready to strike during the nighttime hours. Often known as one of a chicken keeper’s worst foes, these tricky little bugs can prove challenging to locate and eradicate. Being nocturnal, they hide in the nooks and crannies of wooden chicken coops and roosting bars, and sneak their meals of chicken blood while your flock sleeps.
How do I know if it’s red mites?
Red mites are most active in the warmer spring and summer months. The first symptoms of red mites infiltrating your flock will be distressed or lethargic behavior. Bites from red mites are itchy and uncomfortable, and since they prefer to feed through midnight snacks, your hens won’t be getting their required beauty rest. Your flock may appear sleepy, or display scratching or excessive preening behaviors.
As the infestation progresses, your hens can become anemic through losing too much blood to the parasites. Their combs and wattles may appear pale rather than red. You may also notice a reluctance to go to roost at night, as they will have come to associate roost-time with painful bites.
How to remove red mites from your coop
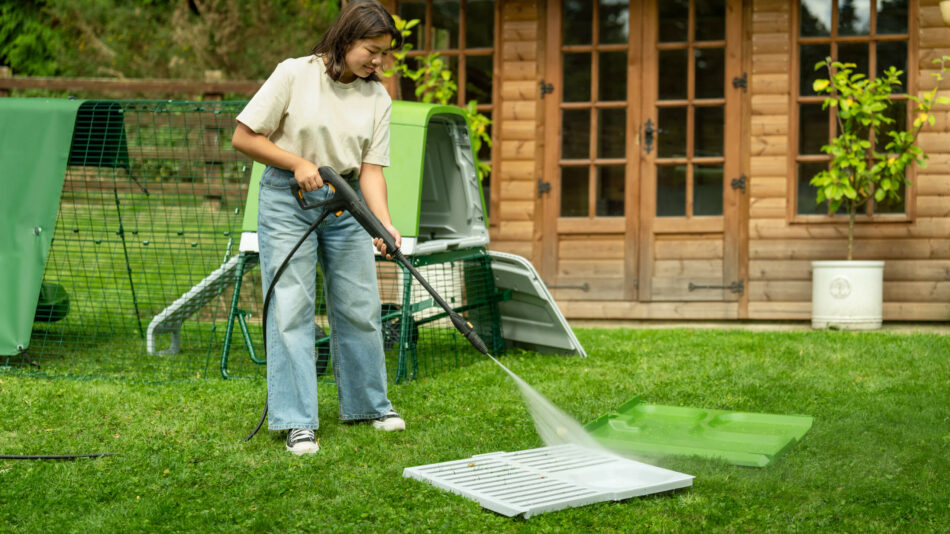
If you’ve come to the conclusion that your flock’s coop is under attack from red mites, you’ll need to take quick, aggressive action against them. Clean the coop thoroughly, removing all bedding, nesting material, and all detachable components like roosts or racks. Scrub the coop thoroughly with warm water, and clean any feeders or waterers. If possible, use a pressure washer to clean the coop and its components.
Once the coop is cleaned, leave it to air out in a well ventilated, sunny area. If you see mites making their escape, wait 10-15 minutes before pressure washing again. After any repeated washings, allow the coop to dry fully, and then treat it with a red mite product that is safe for chickens. There are powders or concentrates to mix with water and spray onto affected areas, so choose which you’re most comfortable working with. Diatomaceous Earth (DE) is also an excellent choice for preventing and treating red mite infestations, and it’s perfectly safe for your flock. You can add this ingredient to your chickens’ dust baths, or sprinkle it directly into their feathers.
How to treat chickens for red mites
If your flock has been infested with red mites, you’ll need to treat any affected chickens along with their coop. DE will kill the existing red mites, but your chickens’ skin will likely be raw and sore from the bites. There are other homemade remedies like garlic or other herbal sprays that will kill mites, just be sure that all of the ingredients are safe for chickens. Apple cider vinegar and electrolytes in your flock’s water will help boost their energy and healing, as well as promote healthy feather growth. If your flock appears to be anemic, ask your veterinarian for advice on any other supplements that might be beneficial. Treat bare areas where feathers have been preened out with anti-peck and healing topicals for chickens.
Preventing red mites
It’s far easier to prevent red mites than it is to treat them. Choosing a plastic chicken coop eliminates the fine cracks and crevices that wood allows for red mites to hide in, and they can be pressure washed and cleaned in mere minutes with little dry-time afterward. Wooden chicken coops have far too many opportune hiding spots for red mites, making them hotspots for the offending parasites.
In addition to having a plastic chicken coop instead of a wooden chicken coop, you can treat the inside of the coop and the ground around the coop with DE to act as a natural deterrent for red mites. Regular cleanings will help keep parasites of all varieties at bay, and will ensure that your flock stays comfortable during peak-pest season. And, unlike wooden coops, plastic chicken coops don’t need to be treated with sprayed insecticides to prevent red mites.
Omlet and your flock
The smooth surfaces of Omlet’s plastic chicken coops prevents red mites from setting up shop, and will keep your flock comfortable all summer long. Worried about outside of the coop? Our chicken toys and perches are all made from mite-resistant materials to ensure that your flock can have their fun without the threat of parasites. Combined with a walk in chicken run for plenty of outdoor space, your chickens’ setup will be perfect and parasite-free for the summer, laying the groundwork for those leisurely days together.
As an Omlet Ambassador I’ve heard that line hundreds of times at trade shows and expo halls all across the United States. However, as a former DIY luxury chicken coop builder and longtime Omlet Coop owner I would like to set the record straight and explain why on Omlet Coop is the best purchase a backyard chicken tender can make.
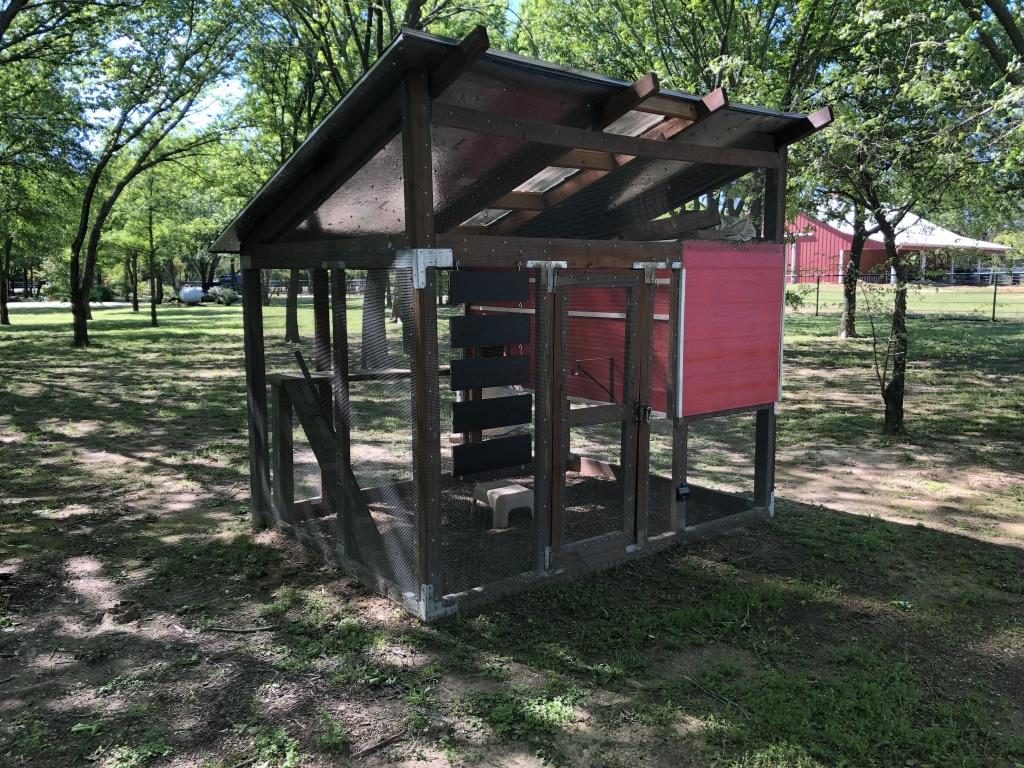
This was my pride and joy:
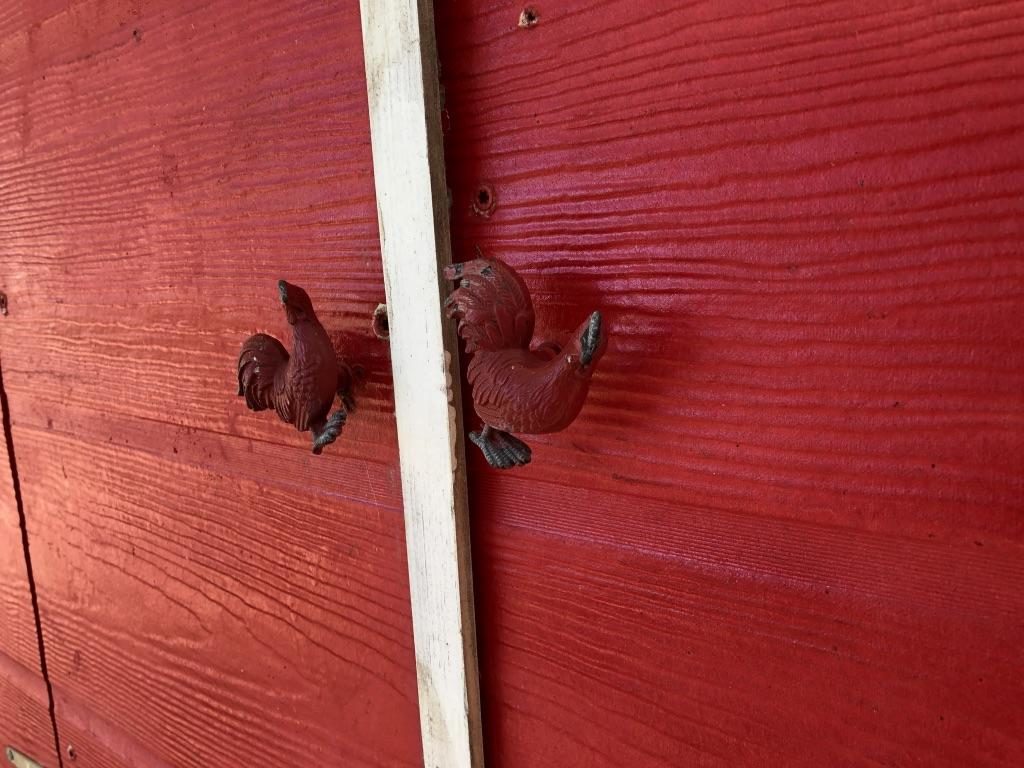
A luxury coop that is Pinterest worthy and constructed of the best materials I could get my hands on. It has a radiant barrier roof that I shingled! It has a skylight in the middle that is UV blocking and tinted so as to only protect against the harsh and hot Texas sun. We used metal bracing on every corner to make sure we were squared up and secure. There are hundreds of screws holding up the double layer of hardware cloth. Literally, hundreds of screws. I used pressure treated wood that was rated for ground contact and further sealed with deck sealant. I used fiber cement siding that was rated to withstand hail impact and wind thrown objects. No expense was spared in building the Fort Knox of chicken coops that I thought would last a lifetime. I even ordered special chicken shaped handles for the coop doors:
Why is an Omlet Coop a better buy than building a DIY coop?
Experience should not be underestimated when lives are on the line
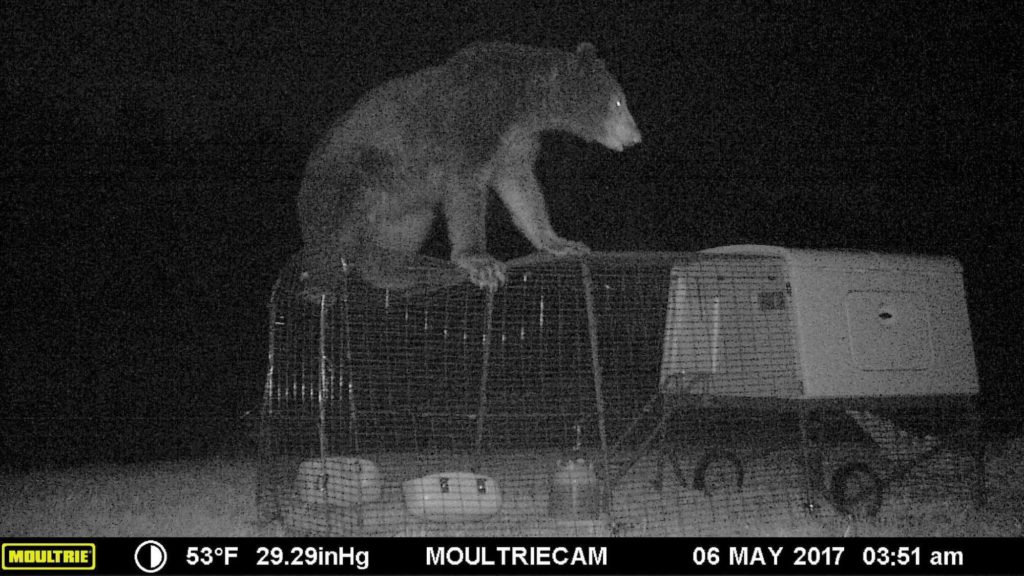
Omlet was founded in 2003 and has been innovating since. That is over 16 years of experience in building chicken coops. That is 16 years of predicting and preventing predators from getting chicken dinners. The average DIY’er that I meet at trade shows or talk to on forums such as BackYardChickens.com is a first-time chicken owner who hasn’t witnessed the creativity and determination of predator animals such as raccoons, foxes, and even neighborhood dogs.
Included in the price of each and every Omlet coop is 16 years of research and development to give us chicken tenders the best possible home for our flocks. That is 16 years of perfecting the Omlet Coops that get delivered to front doors all across the World. I cannot emphasize this enough because it is the most important factor in why I chose Omlet over DIY’ing another coop. It is not 16 years of making the same old coop over and over again like you’ll find at Tractor Supply or the local hardware/feed store. It is 16 years of constant innovation and stalwart dedication to making the safest coop on the market. While you read the rest of this please ask yourself whether you think a few google searches, a Facebook group, or in my case a Pinterest post can compete with 16 years of on the ground experience with thousands of models sold and tested across not just the US but the world at large. Think about the chickens you will soon be bringing home to live in the coop. Do you trust their lives to a weekend DIY project? Also, if you have kids and they are involved with the chickens then please consider the trauma of them waking up some day to find that a raccoon has turned their favorite hens into a recreation of a CSI episode with a headless hen as the victim. The cost may be steeper up front, but I can personally assure you that it will be more than worth it in the end for the peace of mind, the portability, the cleanliness, and so many other reasons.
DIY may seem like the cheaper route but I can assure you that the first time you wake up to find your favorite hens dismembered by a racoon or de-feathered and half eaten by a fox the last thing on your mind will be how you saved a couple bucks here and there. Why go through the heartbreak of losing hens and then spend the next couple days having to drain your wallet to renovate and repair the coop? Also, once a predator gets into your coop once they will keep coming back for more. They will poke, pull, and attempt to gain access in any way possible since they now know that an all you can eat chicken dinner is just inside. Why not stop them the first time so they never even consider coming back?
Materials
The most commonly encountered coops on the internet are constructed of wood. Wood can either be treated or untreated. Treated wood is wood that has been infused with copper products under extreme pressure in order to give it a few extra years of protection against Mother Nature.
However, treated wood does not protect against the ammonia rich droppings left behind by fluffy chicken butts. Chickens do not urinate and defecate separately like us humans do. Instead they combine the two acts and their droppings are highly concentrated and highly corrosive to many materials. This results in an accelerated rate of decay and decomposition of any and all wooden components of a DIY coop. This is a hugely important point to consider because decaying wood is similar to rotten wood in that it is incredibly fragile, and fragility is not something any chicken owner wants when it comes to their coop. The only way to circumvent this is to be diligent in replacing decaying panels as soon as you notice the first signs of decay. Mind you, this requires purchasing more materials, expending more of your time performing the labor to remove the decaying parts and reinstalling the new parts, and adds undue stress to your flock as you tinker with their home.
Of note, there are various sealants and paints that can be used on both treated and untreated wood, but my firsthand experience showed that these only served to prolong the inevitable as they too decayed. Furthermore, I would caution against their use as they can become a health hazard for your flock. Chickens will eat just about anything they can fit into their beaks so as the paint and sealant begin to crack, chip, and flake off the chickens will pick at the cracking paint or sealant and will quickly eat any flakes they can knock off or catch on the ground. I am not a veterinarian, but it certainly doesn’t take one to warn against the well-known dangers of ingesting paint.
Omlet coops are made out of a high-density plastic polymers that are non-porous and designed to be durable against both Mother Nature and any mother hen. The corrosive droppings from your chickens do not affect the durability of the Omlet coop and will not cause it to degrade or deteriorate with wood. It will stay strong for decades or more without any need to repair, replace or renovate.
Chicken wire, I would like to just say to stay as far away from this as possible because every week I hear from people who used chicken wire only to discover their coops broken into and flock decimated. Chicken wire is good at containing chickens but is absolutely worthless for keeping predators out. Raccoons can reach their hands through it and can pull it apart in under an hour. Coyotes, foxes and neighborhood dogs can easily bite and pull it apart. Snakes slither right on in without trouble.
The other wire that people commonly use is hardware cloth. This is what I used when I first built my own coop and it does work for a while. However, over time it will sag, and it is not meant to bear weight well. It can prevent predators most predators for a while but it is far from impenetrable and without proper installation and constant checks it can easily fail and need replacing.
The run components are made from welded steel panels. I could go further into detail about these, but I think the picture below is worth a thousand words:
Portability
It was a sad day when I had to leave behind the Pinterest quality barn-inspired coop because we sold the house and couldn’t haul off the coop without hiring a forklift and crew to load it onto a flatbed.
Thankfully, that will never happen with Omlet Coops. They are portable when fully assembled and they are also so easy to disassemble and flat pack that I can now fit our multiple coops and run attachments into the bed of my pickup truck with ease. In fact, I had to do just that when we moved from Tulsa, Oklahoma to Austin, Texas.
Modular and Expandable with ease
One of the hardest parts about designing and building a DIY coop is that you have to know how many chickens you want from the start. That may seem like an innocuous task but there is a phenomenon known to chicken owners as “chicken math.” It is something I have encountered first hand and been a victim of. In what started with 3 chickens has now since expanded to 31 chickens and counting. Our barn inspired chicken coop was meant to house 5-6 hens at a time and any sort of expansion would be extremely costly and require cutting into, and compromising the structural integrity of the original coop to attach any expansions on it.
Our Omlet coop expanded with us and we are already saving up for another full-size WALK-IN-RUN to add. Attaching any sort of expansion or add on is literally a 10-minute job. Due to the modular structure of the Coop and the Walk-in-Run all that has to be done is clip on the new expansions to the existing ones.
Cost
The total cost of the Pinterest coop that I build was around $1600. It fit 5 chickens comfortably and held up for just short of 2 years before we started to have to replace parts and deal with decay.
Chicken coops from Tractor Supply range from $250 to over $1,000. However, most of these have wooden components that will break down and need replacing so you will have to throw money at it regularly to keep it functional.
There are a handful of plastic polymer options at TSC but none of them allow for attaching a run, or any sort of modular upgrades that will allow you to grow your flock or custom tailor your coop to your yard. Therefore, you will end up spending well over the cost of an Omlet coop for something that is not designed to fit together and is not as adaptable and flexible as a product from Omlet’s ecosystem.
Peace of mind knowing all of the “What if’s” have been accounted for.
As stated above, Omlet has more experience in this field than any DIY’er. They have answered all of the if, and, buts, and what ifs with first hand experience. The peace of mind that comes with being able to purchase an all in one coop that will last for decades, keep the flock safe, and be adaptable to your future needs is worth more than saving a few bucks by risking all of that.
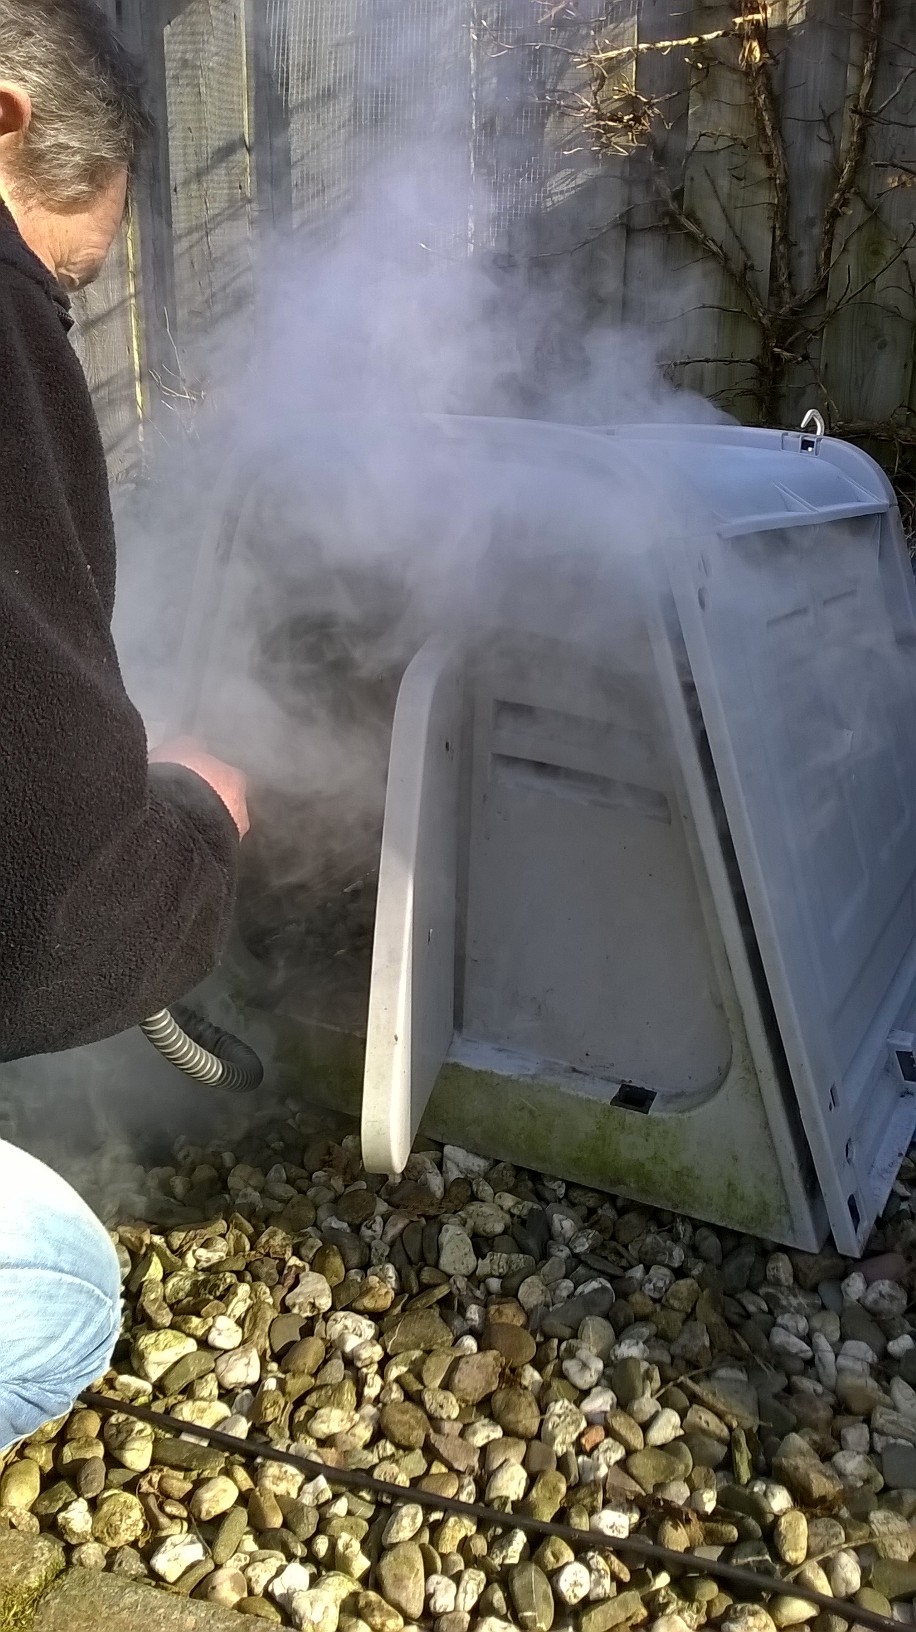
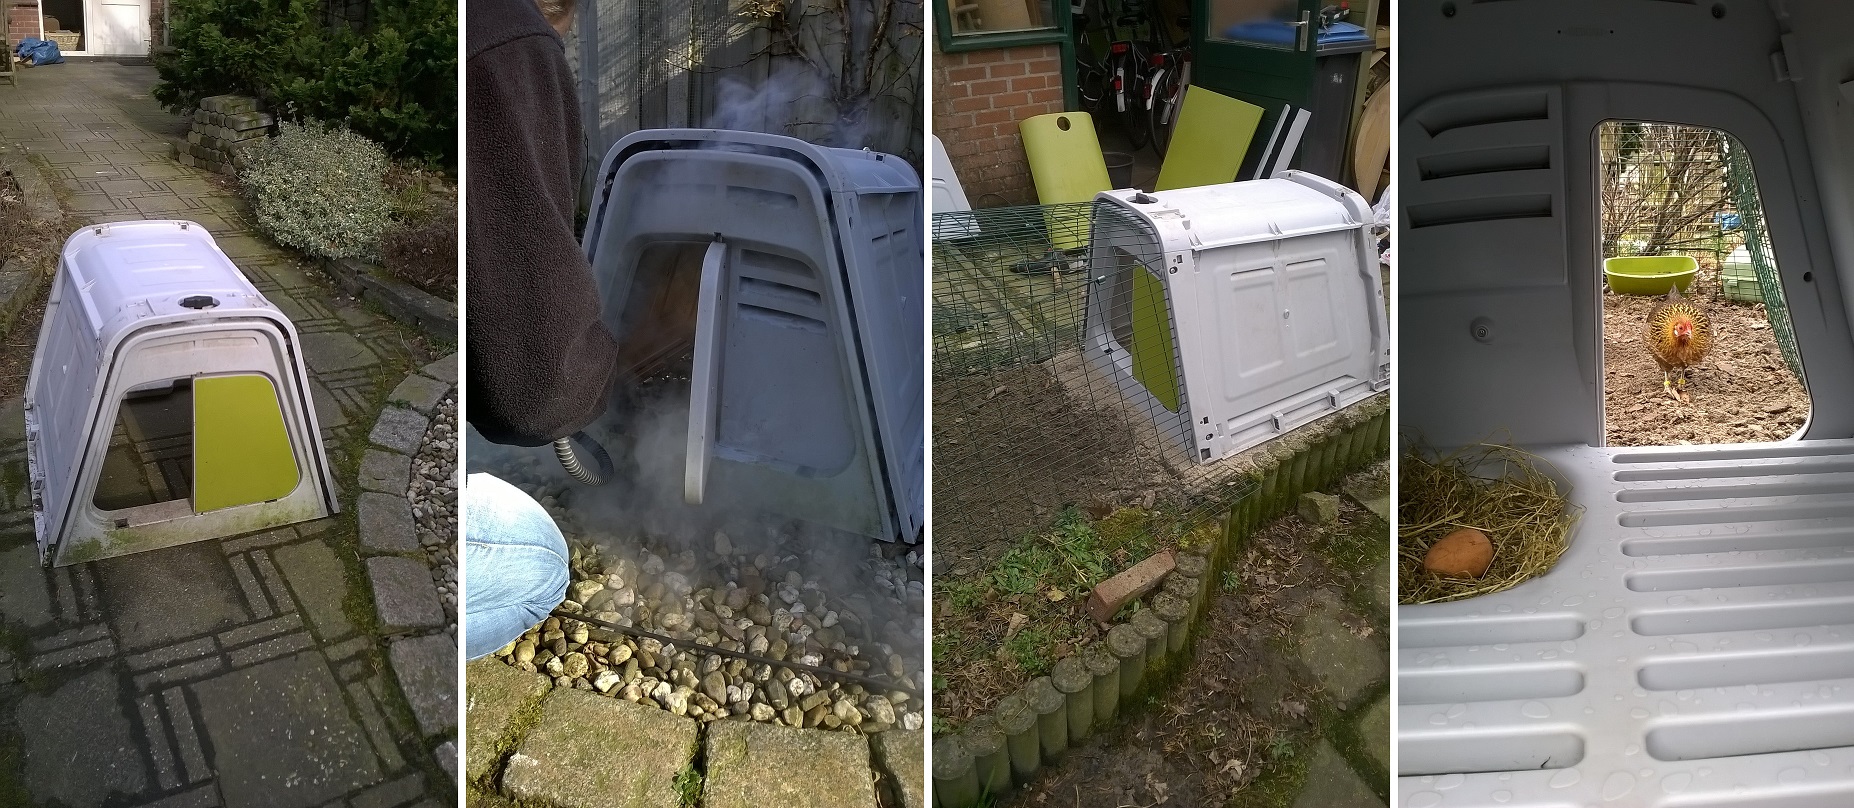
Using a steam cleaner to clean any Eglu can be a very effective way. It will not affect the plastic, whereas all surfaces are cleaned, disinfected, and all killed mites, insects and dust are blown away by the power of the steam. As a bonus the surfaces will be dry in no time, because the plastic is warmed up.
Deep-cleaning an Eglu Go once or twice a year is extra easy if one follows these steps:
1. Take of the top panel (lid)
2. Unscrew both side panels and bumpers, and take these off as well. For a complete cleaning you may want to disconnect the run as well.
3. You now have access to all inner and outer surfaces. Clean them thoroughly with the steam cleaner, if required using an old dish brush as well.
4. Clean the bumpers, panels and top lid in the same way.
5. Re-assemble the run and the coop.
This cleaning method has been used for several years now by our Dutch team-member and is guaranteed to keep your Eglu in top condition, without damaging any parts!
The ultimate chicken keeping checklist is essential for all new flock raisers. When you’re first getting started, having a list of essentials will help you prepare for your hens, and learn what to expect once you’ve brought them home. From what to shop for, to what to feed them, we’ve got everything you need to know in this all-inclusive chicken keeping checklist.
The essentials
Some things are nice to have when you keep a flock of chickens, but others are essential to their health and wellbeing. Here are the “must-haves” of chicken keeping:
There are several factors to consider when choosing a chicken coop, but mainly the decision will come down to how many chickens you plan to keep. Most chicken keepers encounter the phenomenon known as chicken math – which essentially means you set out to get a modest number of chickens, but once you see how endearing chickens are, you end up with considerably more. It happens to nearly every chicken keeper, especially those that aren’t under any restrictions for flock sizes.
It’s always best to get the largest chicken coop that your space can accommodate. This will give you the flexibility to add more chickens to your flock, and will ensure that all of your hens have enough space to roost and lay their eggs. Omlet’s Eglu Pro Chicken Coop can house up to 15 hens, and can be cleaned in just minutes. Weather-proof, predator-resistant, and hen-approved, the Eglu Pro is the only chicken coop you’ll ever need.
Chicken runs or chicken fencing?
Chickens need some healthy boundaries – especially when it comes to your yard. As prey animals, they can be a quick meal for aerial predators, but chickens are also opportunistic foragers and will happily make their way through your herb or vegetable garden. So, in order to keep them (and your plants) safe, you’ll need to restrict their roaming.
Is easily repositioned, and can be shaped any way you’d like
Can be attached to a wall, or create a standalone perimeter
Offers wide, open spaces for your flock to forage
Chicken fencing should be used when you’re outside with your flock, or if other predator-proofing measures have been taken. And, as some chickens can fly better than others, you’ll need to make sure your hens don’t try to scale the 4 foot height of the fencing.
Protect your flock from the elements
Even if you elect for a free-ranging experience for your flock, most chicken coops come with an attached chicken run. This is helpful for keeping your hens penned up during severe weather, or for other events that require them to be in a safe place. These attached runs also offer protection from the elements with chicken coop run covers, which keeps your flock shady or dry, and will keep their feed from spoiling in the rain or snow.
Keeping your chickens’ run covered will give them a safe place to retreat to during sunny or windy days, and will keep them dry during spring showers or wintery weather. Omlet’s covers also provide a wind break, which your flock will appreciate on blustery days. Clear and solid options are available to adjust the amount of sunlight depending on the season, but they’re both waterproof and designed to last several years in the elements.
Feeding and watering your chickens
Chickens are one of the most convenient pets to feed because they are one of the few species that will not overeat. Your flock’s feed can be left out free-choice and topped off as needed, but you may want to collect any remaining rations at night to avoid the attention of rodents. You should always store your chickens’ feed in airtight containers in between feedings, and wash chicken feeders and waterers weekly to prevent mold or mildew from building up.
The type of feed you give your flock is up to you, but laying breeds of chickens need a feed consisting of at least 16% protein to maintain their production. Pellets, crumbles, or pearls are all available forms of feed, but the size or shape of the feed does not affect their nutritional value. Choose a feed that your flock eats comfortably as their main source of nutrition.
Fresh water should be available to your flock at all times. In the summer, you can add ice cubes periodically to keep the temperature cool. For winter freezes, you’ll need to pour warm water over any frozen water, or break the ice as needed. Keep their water high enough so that your chickens don’t kick dirt or bedding into it throughout the day.
The best bedding
Bedding beneath the roosting area of your chicken coop will catch droppings overnight, and absorb odors and moisture. If you live in a humid environment, choose a bedding that is absorbent without holding moisture. Ideal bedding for roosting areas are:
Pine shavings
Pine pellets
Hemp bedding
The nesting box of your coop also needs bedding, which can be the same or different from the bedding used under the roosting area. Common bedding for nesting areas include:
Pine shavings
Hemp
Straw
Recycled paper
Artificial turf or silicone nesting box pads are too stiff and unnatural for hens to lay their eggs comfortably. Choose a bedding that has enough flexibility for your hens to fluff up their ideal nest to lay in.
Automate your flock
While not a necessity, an automatic chicken coop door adds security and comfort to your chickens’ coop, and flexibility to your schedule. Gone are the days of having to dash home at dusk to secure your flock in their coop. With an automatic chicken coop door, you can stay out or sleep in all while keeping your flock on schedule.
Omlet’s Smart Autodoor has a horizontal opening mechanism that makes your coop more predator-resistant, and can be programmed to open and close with the sun or the clock through a smartphone app, or mounted control panel. You can open and close the Autodoor wherever you are with a Wi-Fi connection, and receive notifications from the Omlet Autodoor app when the door opens or closes.
Boredom-busting chicken toys
Like other pets, chickens can become bored if their environment isn’t stimulating enough. Chicken entertainment isn’t limited to chasing bugs and scratching the earth – there are several chicken toys and accessories that will keep your flock entertained. Flock-favorite toys and accessories include:
But these elements aren’t just for your hens’ entertainment – they were created with your enjoyment in mind. As a chicken keeper, watching your flock peck, perch, and climb is time well spent.
Omlet and your chickens
We’ve thought out all of the chicken-essentials – and when the best wasn’t an option, we invented it. Now, our chicken products are keeping hens all over the world healthy and happy. From extra large chicken coops to spacious walk in chicken runs, chicken keepers and flock alike rest easy at night knowing they’re being protected by the best. And, with Wi-Fi enabled in our smart automatic chicken coop door, you can take control of your chickens’ schedules and tuck them in or let them out in the morning with just a few clicks on your smartphone.
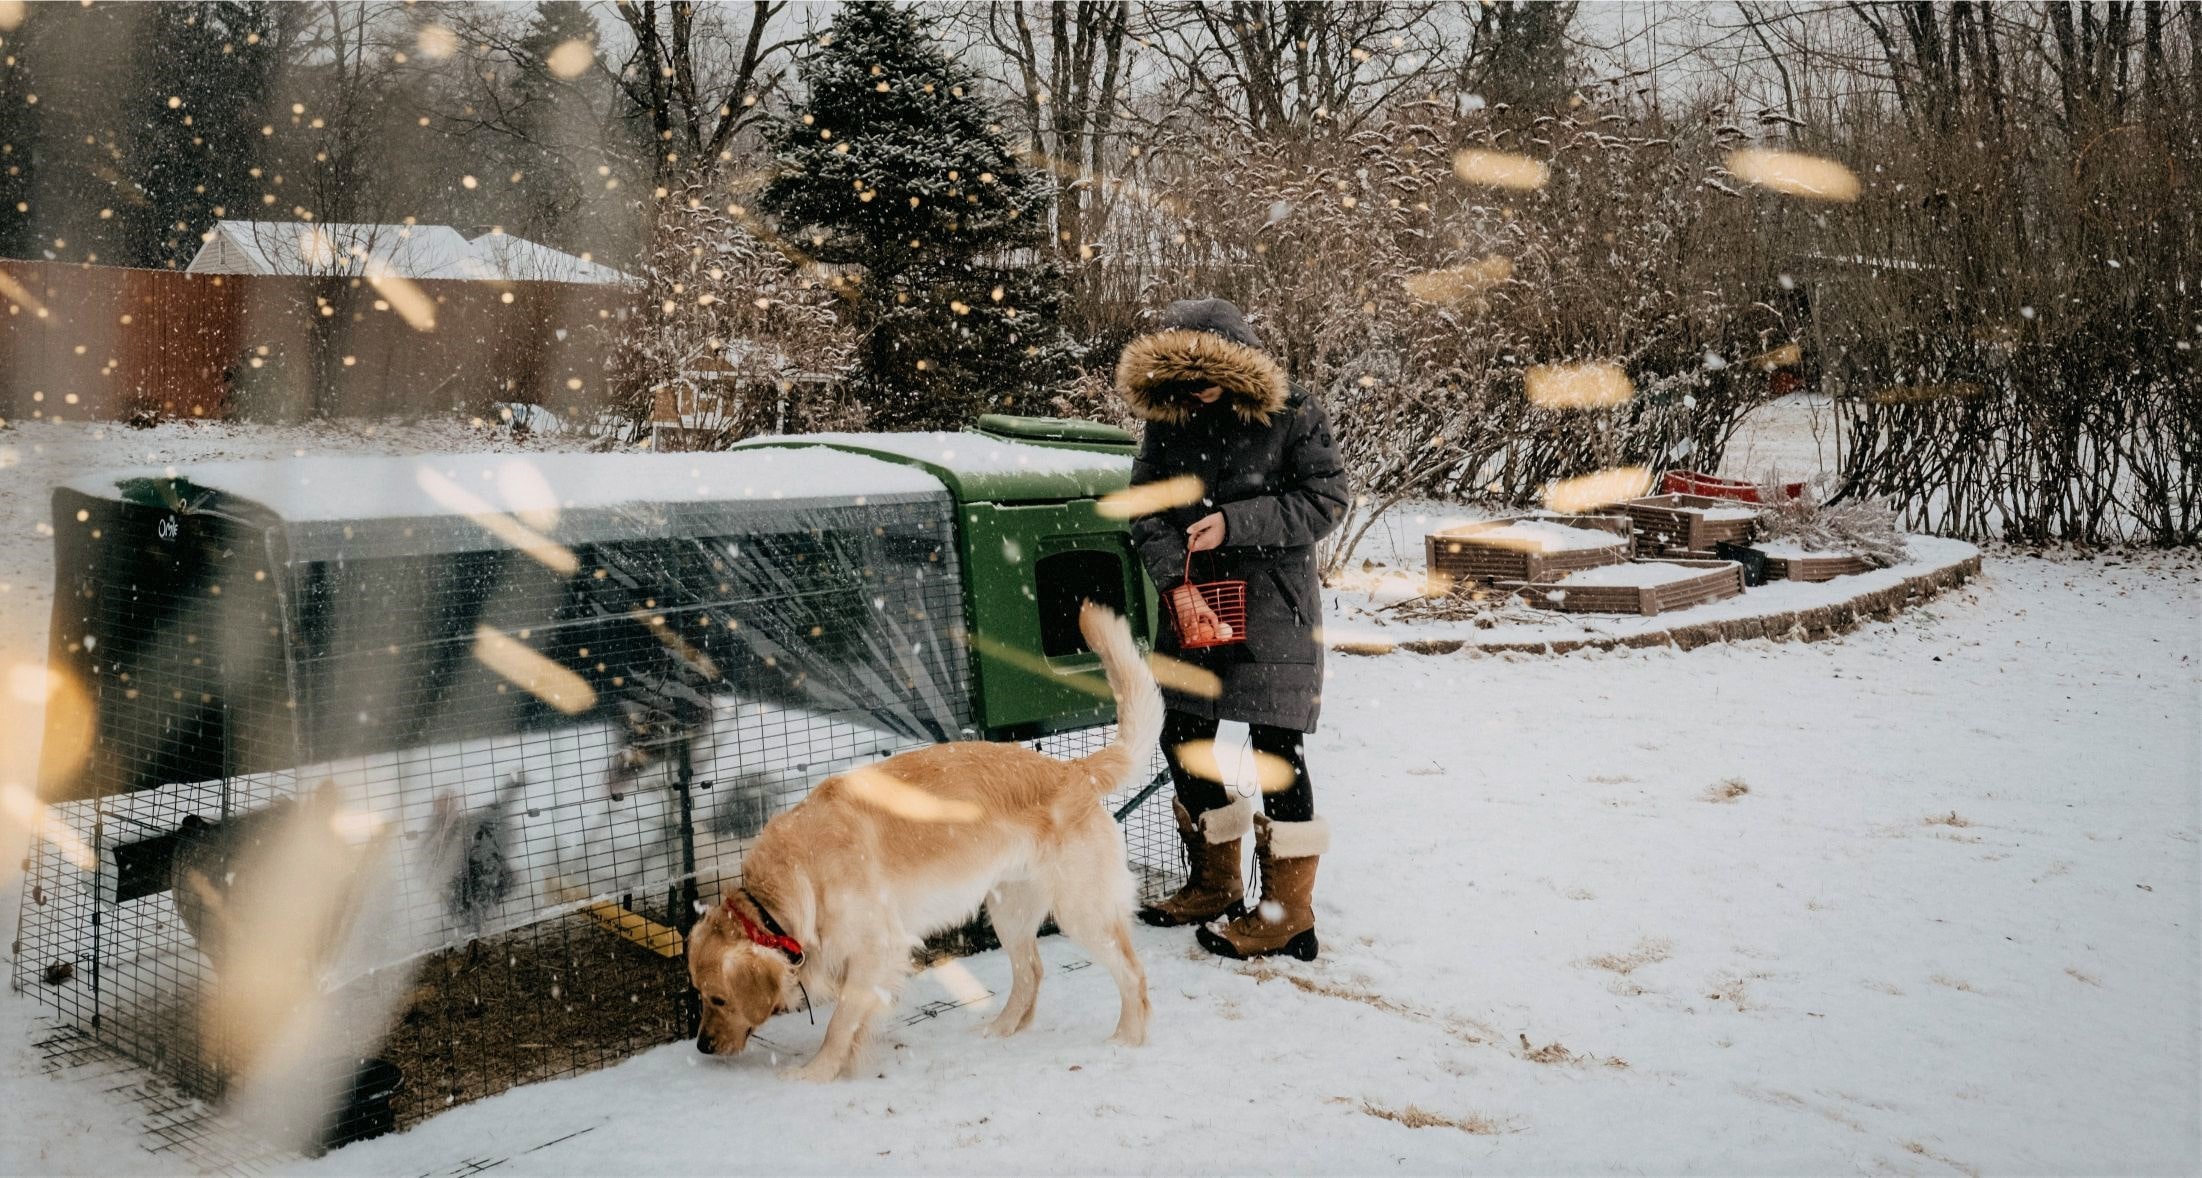
A lot of chicken keepers are worried about their chickens during cold winter days. Chickens are usually well adapted to the cold and as long as their coop is dry on the inside, they feel happy and warm in the Eglu.
Of course there are a few things to look out for and prepare for during the winter, so we have spoken to Stefanie, who is going through her second winter with the chickens in their Eglu Cube this year. She tells us about the preparations and adaptations she makes for when the weather gets icy and how she and her chickens get through the season.
Omlet: How long have you been keeping chickens and how many have you got?
Stefanie: We have been keeping six chickens since February 2018.
Omlet: What is your favourite thing about keeping chickens?
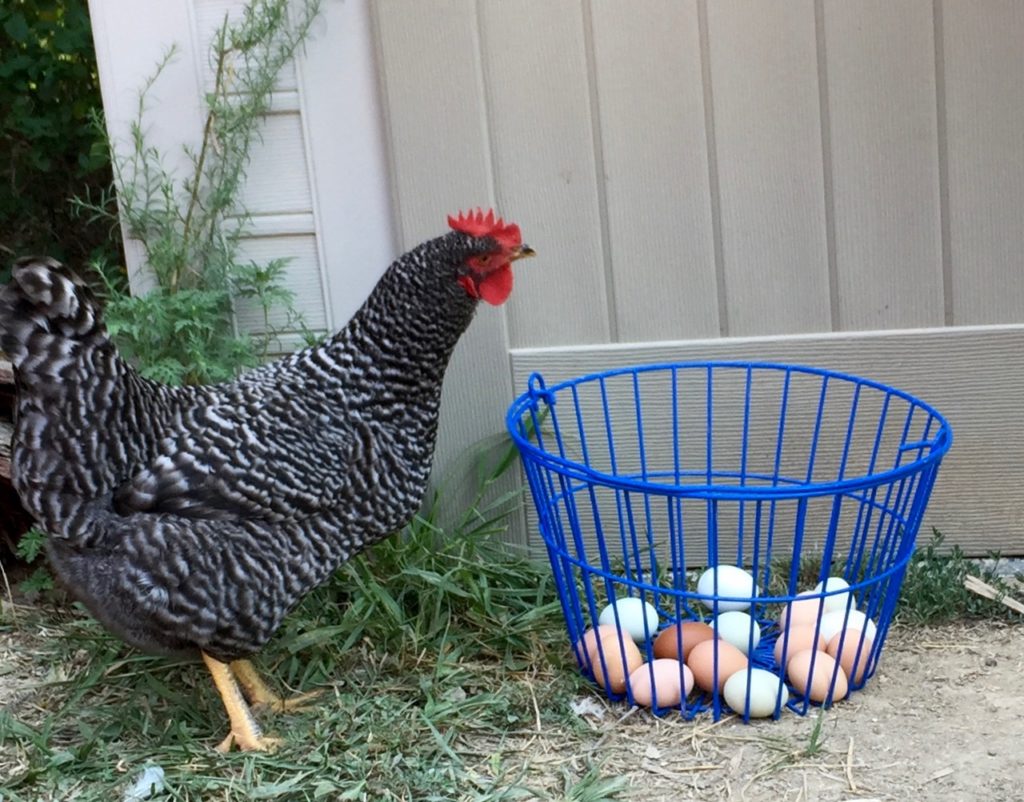
Stefanie: I love that we have our own, freshly laid eggs every morning.
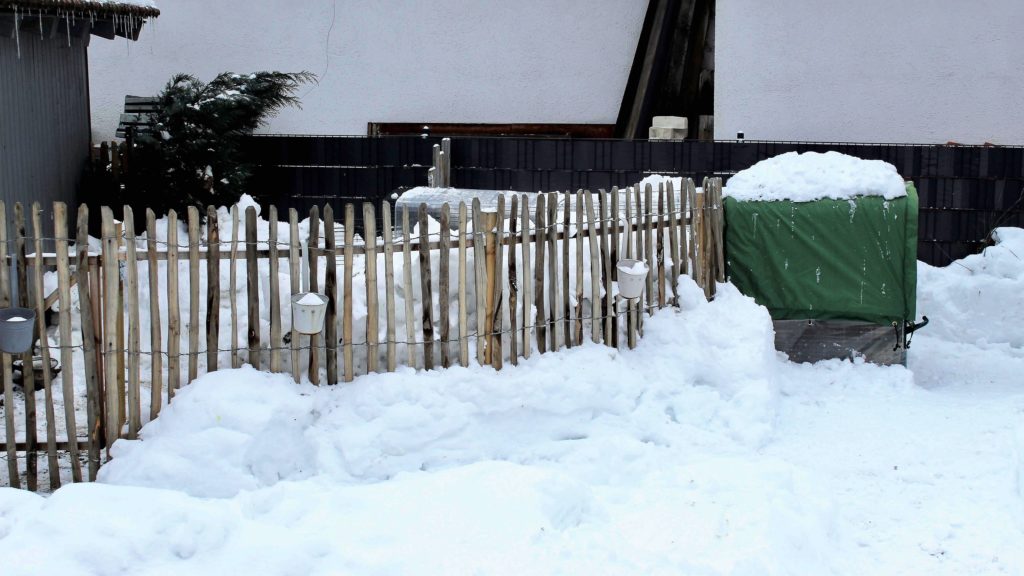
Omlet: You live in an area of Germany that usually gets very cold and snowy in winter. How cold can it get in winter and how much snow do you have at the moment?
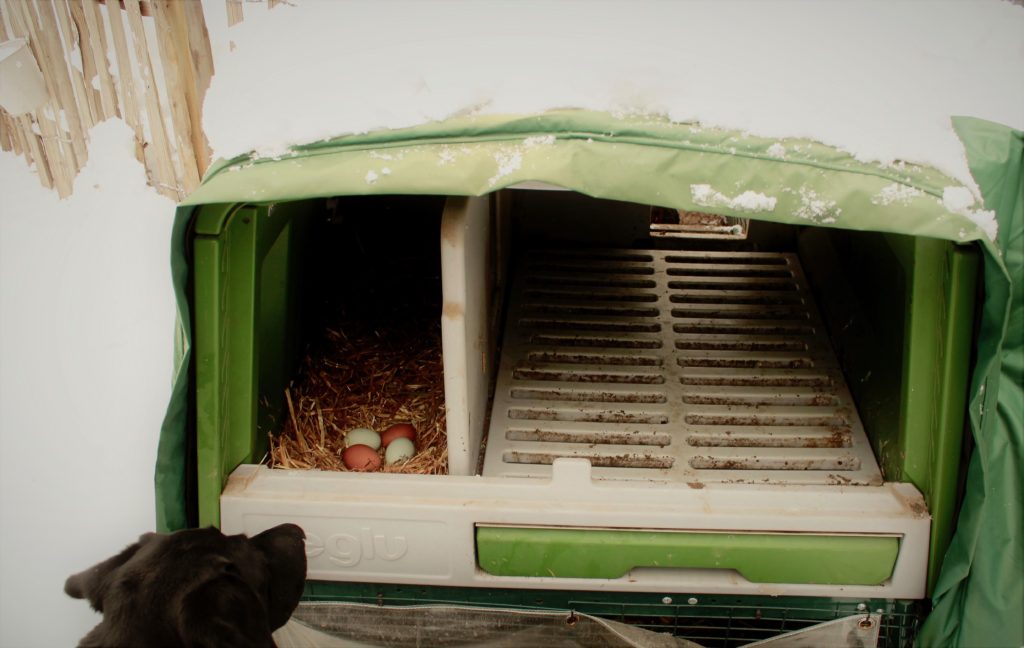
Stefanie: We live in Lohberg, in the south of Germany. The temperatures are usually between -5 and -15 degrees centigrade in winter (5f), so it does get very cold here. We currently have around 50cm of snow, which is normal for this time of year.
Omlet: What changes did you make to the Eglu Cube to get it ready for winter?
Omlet: Do you change the daily food and water routine during the winter?
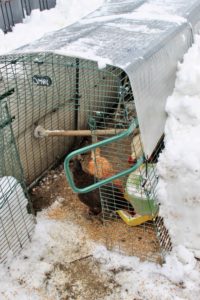
Stefanie: We make sure to feed them more regularly and keep an eye on them to make sure they definitely eat enough. They eat a lot of fresh lettuce, and I like to give them warm food to help them keep warm. Keeping an eye on the water is extremely important as it easily freezes.
Omlet: Do the chickens use the run more or less in the winter than they do the rest of the year and do your chickens like snow?
Stefanie: My chickens don’t like snow at all, so that’s why they mainly keep to the covered areas of their run, where it’s dry.
Omlet: Do your chickens lay eggs in the winter?
Stefanie: Our six girls don’t lay as much as they usually do during other times of the year, but even though we have a lot of snow, we still get around two to three eggs every day.
Omlet: Do you add a light source to your coop?
Stefanie: Yes, we do have a light in the coop as it gets dark very early these days.
Omlet: As chickens love scratching and foraging for food, do you give them some other entertainment when it’s snowy and icy?
Stefanie: Yes, we tend to spread some corn in the covered areas of their run. This keeps them entertained and offers them a chance to scratch naturally.
These are great ideas to keep your chickens happy and healthy during the winter. Have a look at our video of top tips for chicken keeping in winter:
On a cold winter’s day, when there’s a heavy frost or a thick blanket of snow do you ever wonder how your chickens manage without central heating and a mug of cocoa? It’s natural to worry if your hens will be comfortable when the temperature dips below freezing.
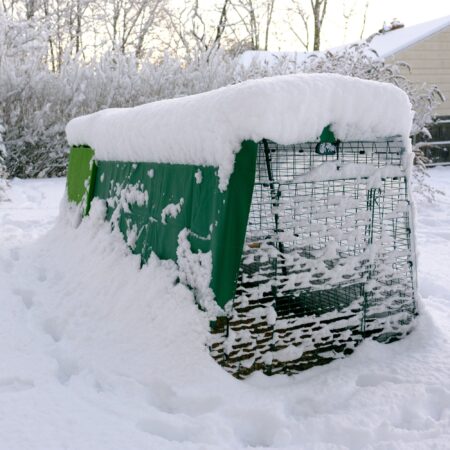
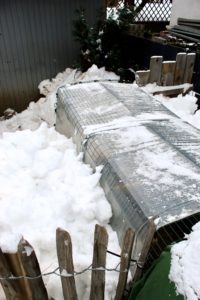
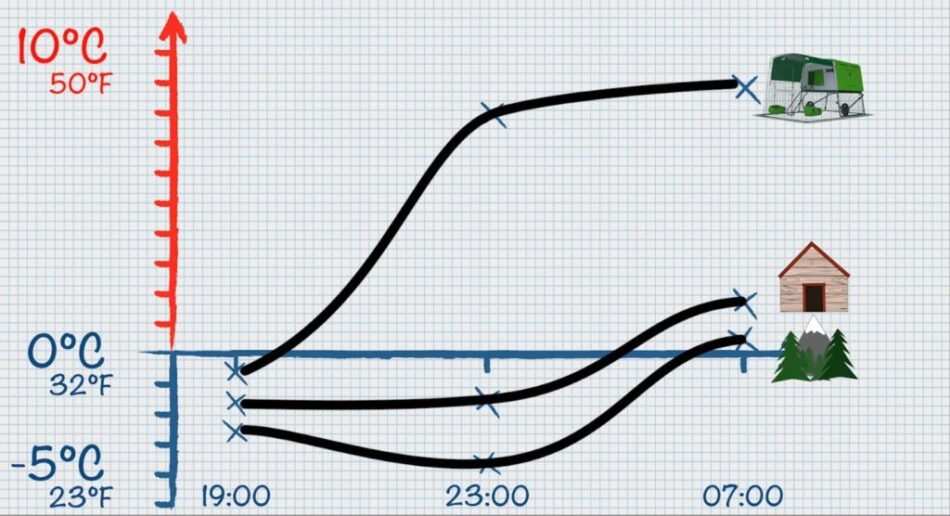
Unsurprisingly, chickens will look for shelter when the weather’s bad so the first thing you can do to keep your chickens cosy is make sure they have a winter proof chicken coop. In this respect choosing the right chicken coop is similar to choosing your own house. You wouldn’t want drafty windows and doors, a leaky roof, and paper thin walls – and neither do your chickens. Many coops that are bought are fine during the summer, but unfortunately when winter comes they can leave their occupants shivering. We set about testing two very different chicken coops over the course of 3 nights in the Bavarian Forest in Germany. A place that gets more than its fair share of snow and ice.
The first chicken coop was typical of the type sold all over the internet. On first impressions everything fits together well and it’s attractively painted, it comes with a roosting bar and a nesting box and a run. It appears that this is a perfectly good chicken coop. However, on closer inspection it’s worrying to find that large sections of the wooden panels are only 5mm thick. There’s no insulation and nothing in the instructions regarding the suitability of the coop for year round use.
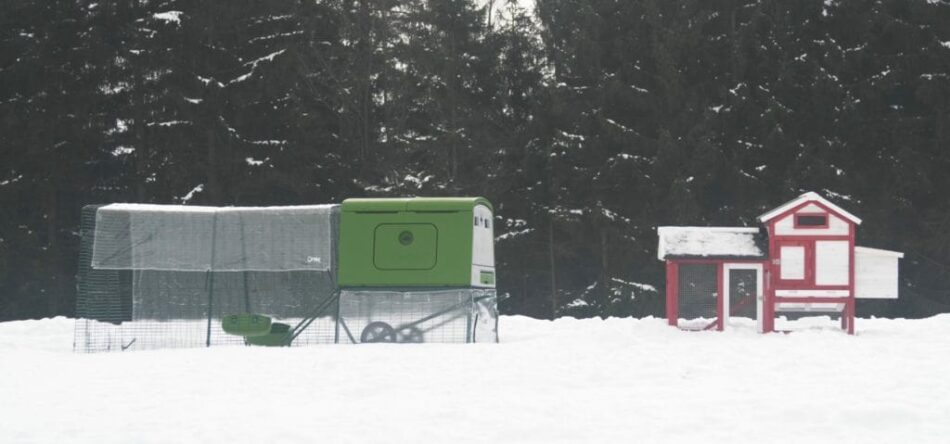
The second coop was the Eglu Cube Chicken Coop by Omlet. This chicken coop is part of the Eglu range which all feature a twin walled construction providing an insulating layer all round the coop. Similar to the way ice chests are made, it feels extremely robust and heavy duty. You could say it’s agricultural quality in a hobby chicken coop. It looks the part – but would the Eglu keep the cold out and the warm in?
Identical digital thermometers were placed inside the Eglu and the wooden coop which would take readings both inside and outside the coops during the night. Cameras were also placed inside the coops to record the chickens. After the chickens went to bed the front doors were closed, in fact the Eglu Cube came complete with a rather fancy Automatic Chicken Coop Door which gently closed behind the last chicken.
As it got dark the outside temperature dropped to -3.8℃. While it was getting colder outside, it was getting warmer in the Eglu Cube Chicken Coop. Around an hour after the chickens had gone to roost the temperature inside the Eglu Cube was 8.3℃ and it stayed there all night. That’s a plus 12℃ temperature difference.
Unfortunately it was not as cosy in the wooden house. As the temperature outside dropped so too did the temperature inside the wooden coop. At 11pm it was -2℃ inside the coop. That’s only 1℃ warmer than the outside temperature. In fact the inside of the wooden coop stayed below zero for nearly the whole night, warming to just above zero by 7am.
If it was freezing inside you might be wondering how on earth the chickens survived. Chickens, as with all other warm blooded animals, have temperature-regulating mechanisms to keep their body temperature at a constant level (around 41-45℃ in a healthy adult hen), so they can cope with a certain amount of cold. Just like wild birds, chickens will fluff up their feathers when it gets cold; this traps a layer of air which insulates the chickens against the cold. This is why it’s so important that chickens don’t get wet during cold weather, as this prevents them from being able to fluff their feathers up. In addition a drafty coop will make it hard for them to trap this layer of warm air too.
They will also tuck their head under their wings and huddle together with their coop companions to keep themselves warm. On the in coop camera recording you could clearly see how the chickens select a roosting place, and then fluff up their feathers.
So if the chickens in the wooden coop were able to keep themselves warm even though it was freezing inside there’s nothing to worry about? Not quite, a coop that’s not insulated or draughty will place extra demands on your chickens because of the heat being lost. Chickens in a cold coop will have to increase their metabolism to turn food and fat reserves into heat at a faster rate than hens in a cosy coop. If the heat loss is extreme, or a chicken is not fully fit then over the course of several cold nights there is a risk that all the energy reserves are used up resulting in the chicken being unable to keep it’s body temperature high enough with potentially fatal consequences.
What this test shows is that properly insulated, winter ready chicken coop can make all the difference between a cosy night in the coop and one spent shivering to keep warm. As an added bonus hens that use up less energy keeping warm are more likely to keep laying.
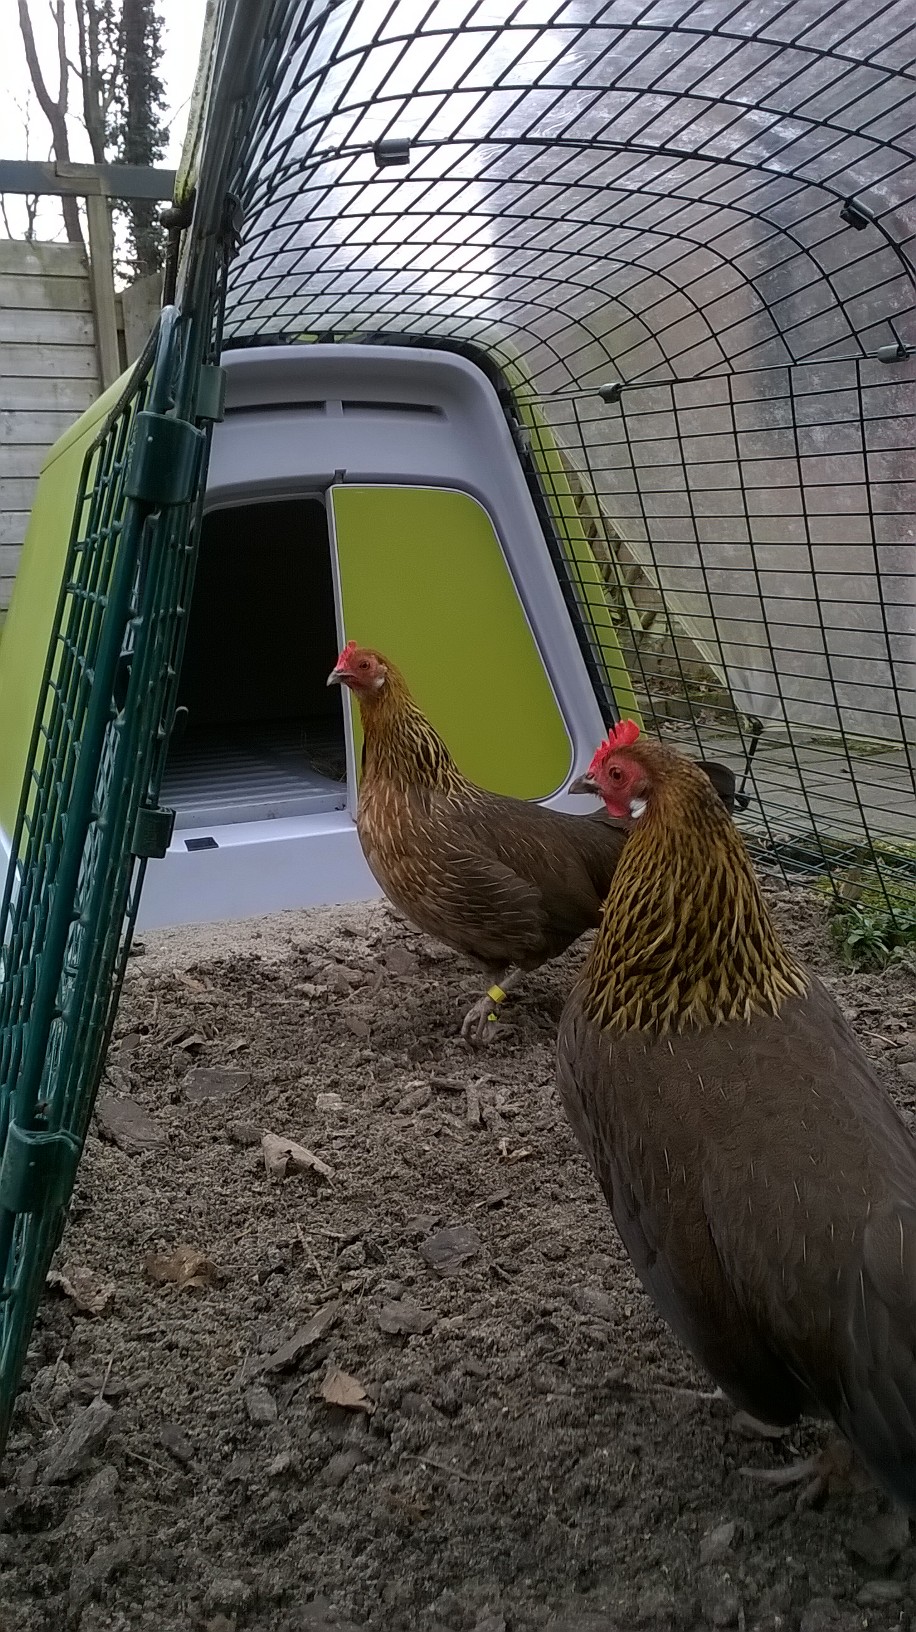
Jo Page is a veterinary nurse who also runs the blog My Little Country Lifestyle, where she shares stories from her countryside life in the South West of England. Jo recently upgraded her old wooden chicken coop for an Eglu Go UP, and has written about her first weeks with the new coop:
“As a veterinary nurse I take the welfare of all my animals very seriously. As humans we have bred animals and birds to suit our wants and needs and on occasion this does mean they aren’t able to survive or thrive without human intervention.
The hens are also not ‘only a chicken’ they are birds I have chosen to keep for the benefit of fresh eggs and it is my responsibility to ensure their needs are met.
The Eglu Go UP is worlds away from the make shift house they had when we moved and much more superior to the coop and run at our previous house. Both were predominately made of wood and we have already had to dispose of one chicken house due to a red mite infestation which we could not clear. Red mite bite the chickens at dawn and dusk, can make them anaemic and effect egg production. They thrive in damp woody environments so traditional wooden chicken coops are a breeding haven for them.”
Insulating your chicken coop and getting your flock ready for winter is vital for their health and happiness. Most chicken breeds cope well in moderately cold temperatures as long as they have a well-insulated, dry coop. Chickens normally acclimatize to the cold weather, so if you have an insulated coop such as an Eglu Chicken Coop, you won’t need to fret during the cold months. In fact, chickens are able to adapt to the cold much better than hot weather! But with a little extra planning and preparation, you can ensure that your flock not only endures the winter, but thrives in it.
Why you should use an insulated chicken coop
Whilst chickens tolerate the cold well, ensuring your chicken coop is insulated during the cold months can promote their health. Whether you live in a state such as Alaska that is cold all year round, or experience warm summers followed by cold winters it’s vital you choose a coop suitable for the weather.
Our range of Eglus are designed with warmth as a core aspect. With a unique double-wall insulation system, you’ll find that our coops work in a similar way to double glazing. Your hens’ body heat is trapped inside whilst ensuring cold air cannot get into the sides of the coop. When comparing Eglus to a traditional wooden coop, you’ll discover that the Eglu provides far more insulation.
The insulation of our chicken coops is not the only benefit they provide. They are easy to assemble, easy to clean, portable and simple to attach to chicken runs. This will allow you to give your flock the space they need to roam during the day, as well as a cozy spot to sleep at night.
How to easily insulate your chicken coop
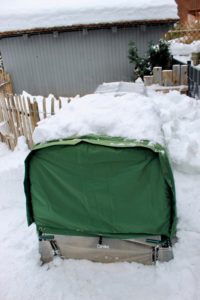
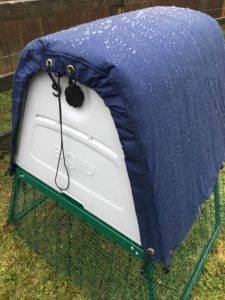
Whilst our chicken coops are naturally insulated, in really cold temperatures you may wish to insulate their home even more. Our Eglu Extreme Weather Protection are designed to perfectly fit your coop for added insulation. The temperature blankets are filled with a heat trapping recycled material that is breathable whilst keeping your pets warm. They are simple to fit to your Eglu and are easily secured with bunjees.
However, if you do not have an Eglu there are other ways to insulate your coop:
Weather protection & insulation for wooden coops
Your chickens’ coop must be waterproof! Most chicken breeds do well in the cold so long as they are dry. Chicken coops should also be insulated enough to remain warm inside even in the cold of winter. Here are our tips for insulating a chicken coop:
Spray foam insulation – you can hire someone to insulate your chicken coop with spray foam to help trap heat inside your hens’ nest.
Fiberglass insulation – using fiberglass insulation is an easy way to add DIY warmth.
Wool blankets – adding wool blankets to the smalls can help to keep the coop insulated.
Ventilation whilst keeping cozy
A well-ventilated chicken coop will ensure that plenty of fresh air gets inside the coop. This will keep the odors down and avoid moisture build-up. Whilst you want to stop chilly drafts, a chicken coop without ventilation will retain moisture along with heat. And while some air circulation is good, make sure the coop is draft-free.
Elevation to reduce dampness
Height can also be an issue when making sure chicken coops are insulated. Coops should be raised off the ground to prevent the base becoming damp. For larger flocks, the Eglu Cube is an excellent choice for both insulation and elevation. If your coop doesn’t have legs, you can place bricks under the coop to allow air to circulate and reduce dampness. Always make sure you place or build your chicken coop and run-on high ground that won’t flood during heavy rainfall.
Size of the coop
It seems counterintuitive, but chicken coops can actually be too big. When the coop is too big for the size of the flock you have, your chickens won’t create enough body heat to warm up the space. This is why it’s so important to understand how much space your chickens need, when deciding which coop to buy. Chickens huddle together and keep each other warm, so they don’t need much space in their sleeping quarters. Try not to open the door of the coop at night when your chickens are roosting as it can compromise your insulation. Be mindful that this pent-up body heat is keeping them warm, so make coop and egg checks quick! If you have a large coop or barn and just a few chickens, you can place a large cardboard box on its side, half filled with chopped straw or wood shavings in a corner to help them conserve their body heat.
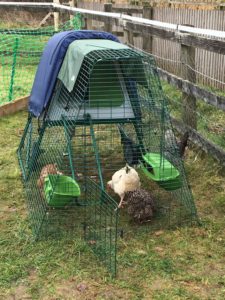
Keeping your chicken run insulated
It’s important that at least part of your chicken run is covered during winter months. Using weatherproof chicken run covers will help reduce how much snow can build up inside the run. You can also build a greenhouse-style addition to your coop, covering it with clear plastic, which will help convert sunlight into warmth. To prevent areas under the run from becoming too muddy, cover wet spots with pelleted pine bedding (usually used for horse stalls). Mud is a breeding ground for poultry parasites, so muddy areas should always be addressed.
Perches for cold chickens
Give your chickens plenty of places to roost. To prevent their feet from getting too cold on the frozen ground, you’ll need to give your chickens a place to perch in both their coop and run. The perches need to be wide enough so that the chickens can cover their toes with their feathers to thaw out chilled toes. By placing freestanding chicken perches or wire-mounted chicken perches, you’ll give multiple hens the opportunity to warm their feet while they’re out of the coop.
Cleaning your coop in winter
Keep your chicken coop clean and dry. Clean the droppings from inside the coop daily and replace bedding as necessary. By keeping the coop both dry and clean, you will help to prevent moisture buildup, which can lead to frostbite on your chickens combs and wattles.
It is important your flock always has a source of fresh, unfrozen water. Depending on where you live, this can pose a challenge. To prevent frequent defrosting, you can invest in a heated waterer or heated poultry drinking base. You can also insulate the water like you have your coop, by wrapping the chicken drinkers up in a layer of bubble wrap to keep the water thawed for longer. Don’t place the water inside the coop, as it will increase humidity levels.
Chicken feed in the cold
During winter your chickens feed consumption will be higher than in the spring/summer. Often chickens enjoy warm feed, like cooked lentils or warm oatmeal with some raisins or other small, dried fruits. Give your hens extra corn or scratch inside of a peck toy for both physical and mental stimulation in the afternoon, as this will heat them up internally as they digest it overnight. Offer hay or dried grasses for extra ruffage to fuel their metabolisms. Hens will decrease or even stop laying eggs in the winter to conserve energy. But you can help encourage hens to continue laying by providing adequate feed – both in quality and quantity. Supply layer pellets to give the right nutrients your egg-producers need throughout the winter.
Take care of their combs and wattles
If it gets extremely cold during the winter, your chickens’ combs and wattles can be in danger of getting frostbite. Most hardy breeds have small combs, but if you have chicken breeds with very large, floppy combs you will need to gently rub Vaseline on their combs and wattles. You will also need to keep an eye out for coughing, sneezing, and general symptoms of being unwell.
Vermin
Remember at this time of year, there are hungry rats and mice attracted to the chickens feed and water. Take extra care with the storage of your feeds. Store feed away from the coop and keep it in an airtight container. If you notice any signs of vermin, remove the feeders and drinkers at night, when they are most active. Offer kitchen scraps or fresh vegetables in a Caddi Treat Holder to keep the floor of your flock’s run free of tempting treats for unwanted visitors.
Fighting winter boredom
With less grass and weeds to munch and fewer bugs to feast on, your chickens will experience boredom in the winter. This can lead to behavioral issues, like feather pecking, egg-eating etc. Prevent boredom by giving your chickens toys like Chicken Swings, perches, piles of leaves, mirrors, or even a xylophone mounted to the run! Keeping your chickens hentertained will ensure they’re mentally stimulated and kept busy.
Introducing Omlet Petcare
Whether you’re a keen chicken keeper, or have a whole pack of pets, we’re here to help you take care of them. From chicken pens to roam in, to comfy dog beds your pooch will adore.
A familiar problem for both backyard chicken keepers and commercial farms lies in how to prevent and treat red mite infestations. Compared to other poultry parasites such as fowl ticks, lice and flies – mites are by far the most common, destructive and difficult to remove. So why are these pests dreaded by chicken keepers? Learn more about these parasites and how to keep your flock protected.
WHAT ARE RED MITES?
Red mites, also known as Dermanyssus gallinae, are nocturnal parasites that hide themselves in gaps and cracks during the day, laying wait to wreak havoc on your flock at night. In fact, their feeding schedule is the main distinction between them and their cousins, the northern fowl mite. Red mites will only be seen on chickens at night, while other mites will be present on hens throughout the day. This makes them particularly tricky to catch in the act. And, at about 1mm in size, they’re very hard to see.
These mites earn the title of “red” because they turn from gray to crimson after they have had a blood meal. Red mites are most active during the warmer months, preferring a temperature range of 77-95°F. Their reproductive cycle is relatively short, with an adult hatching and maturing from an egg in as little as one week. Once an infestation takes hold, red mites can torment your hens indefinitely, and even survive for up to 10 months without feeding.
PREVENTING RED MITES
An ounce of prevention is worth a pound of cure. But, when it comes to red mites, that can be easier said than done. Wild birds or new chickens can transmit red mites to your flock, which is why it’s important to check your chickens’ health regularly to make sure all flock members are feeling their best.
Change bedding frequently — at least once a week — to help prevent red mites. It’s also a good idea to check for red mites each time you clean your chicken coop. All types of chicken coops can get red mites, but wooden coops tend to experience the most frequent and severe infestations.
Choosing your housing carefully can help prevent red mites before they take hold. Omlet’s Eglu chicken coops are made from smooth plastic, which eliminates hiding places for mites. And in the event that there are red mites present, Eglu coops are quick and easy to clean. A quick blast with a pressure washer will be enough to send the mites packing.
SIGNS AND DIAGNOSIS
Red mites may be present, but may not be in populations high enough to cause symptoms. Once the infestation becomes significant, anemia will occur, your hens won’t be the picture of chicken health. Their wattles and the combs will appear pale and their egg production will drop significantly. Red mites also cause:
Skin irritation
Feather pecking
Weight loss
Restlessness in the flock
Your chickens will also probably be reluctant to go into their coop at night because that’s where the mites are lying in wait.
When checking your chicken coop for red mites, be sure to also check their perches or other chicken coop and run accessories. An easy way to check for red mites is by rubbing a white paper towel underneath the perches at night. If there are red mites, they will be on the underside of the perch after feeding on your chickens – you’ll see red streaks on your paper towel after coming into contact with them.
6 WAYS TO TREAT RED MITES
1. CLEANING
If you find red mites in the coop, it’s time for a deep clean. This type of cleaning will take several hours with a wooden chicken coop, but significantly less time with a plastic chicken coop. Remove all hens from the coop and strip it down as much as possible. Clean each part individually and allow for the coop and parts to dry completely.
2. TREAT THE COOP
Mix a chicken-safe insecticide* that is effective against mites with water using the manufacturer’s or your veterinarian’s guidelines. Apply directly to the coop, ensuring you get it in the cracks and crevices. Concentrate your efforts where there is the highest population of red mites. Leave for 15-20 minutes.
3. HIGH-PRESSURE HOSE
Use a hose (preferably a pressure washer) to hose down the coop and the parts. Try to get in every nook and cranny, as this is where the mites like to hide. Leave for 10-15 minutes to dry. After this, you will most probably see more agitated mites crawling out. Repeat this process until there are very few mites emerging after each wash. If you have an Eglu chicken coop, one pressure wash will be enough to eradicate any existing mite population.
4. UV
Leave the coop to thoroughly dry. It’s ideal to perform coop cleanings on a sunny day where UV rays can help dry the coop and kill remaining mites. Put the coop back together and add bedding. Dispose of the old bedding in a plastic bag in the garbage – red mites will happily find somewhere else to live if given the opportunity.
5. TREAT YOUR CHICKENS
Your chickens will need to be treated in order to break the red mite feeding and reproductive cycle. Many coop treatments can be applied directly to the flock as well, but it’s always a good idea to talk with your veterinarian before applying anything to your chickens. Diatomaceous earth (DE) is commonly seen as a home remedy for red mites, but is often not effective against an active infestation, and can be very irritating to your hens’ (and your) airway if inhaled. Always apply products according to their labeling, and for the full duration of treatment.
*Note: pesticides that are effective against red mites vary by location and have differing levels of efficacy due to building resistance. Contact your chickens’ veterinarian to obtain information for the best red mite treatment for your area.
PREVENTING RED MITES WITH OMLET
Any chicken coop can fall victim to red mites, but with an easy-to-clean plastic chicken coop, you’ll be able to nip infestations in the bud. Our chicken perches can be removed easily for a thorough cleaning, and our plastic Chicken Swing offers a mite-resistant place to find relief. Don’t fall prey to red mites – take control with Omlet’s chicken products.
We have recently started working with the show Coop Dreams, providing them with a new setup of coops and runs for their farm. If you haven’t caught any of the episodes before we highly recommend that you check them out. Great source of knowledge if you’re thinking about keeping chickens and they also demonstrate problems and hurdles they come across in a funny and light hearted way, link is here.
In the meantime, we wanted to find out a bit more about where it all started and so Brad, the founder of Coop Dreams, has taken the time to explain to us, where and how this all began!
Soooooo… We are often asked when and how the TV show Coop Dreams started and that’s a tough question to answer because it has its initial roots way back in 1999 but really blossomed in 2014.
In 1999 I was fortunate to be asked to serve as the national spokesperson for the charity ‘Keep America Beautiful’ and speaking about conservation, recycling and reducing carbon footprints on a daily basis… That set the wheels in motion of recognizing the impact of the way we were living. Lots of changes happened over the next decade but fast forward to 2014 when we bought some land and actually began our homestead.
Not having a solid knowledge of homesteading we started searching for videos, books and blogs to help us learn… Admittedly I am NOT a ‘reader’ (Jackster is) and I do not process information well in that arena… So I began looking for videos and everything I saw had perfectly manicured lawns and flowers and incredible landscaping… Well that was pretty un-relateable and so we created a video series that would document our start for others… Showing the successes as well as the failures so people can connect… One thing led to another and pretty soon we were talking to the Discovery network about making it into a TV show… And here we are in the early parts of shooting season 4.
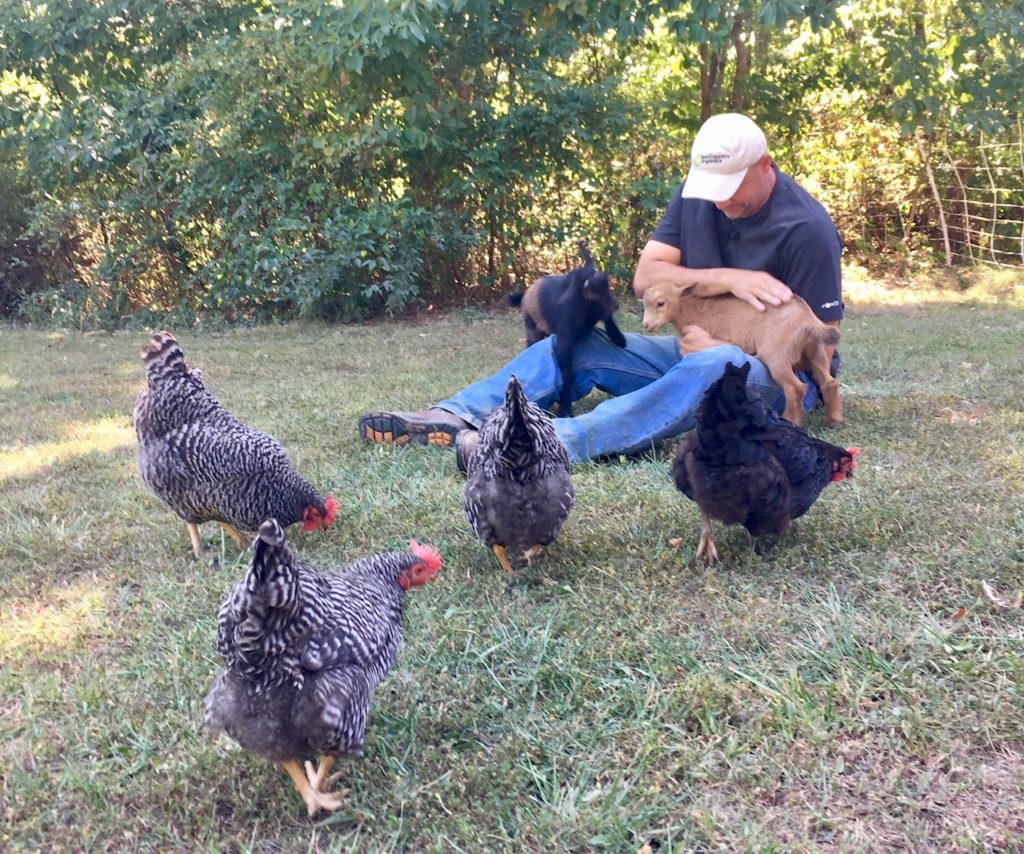
With that we have moved from the city to a 32 acre farm and built a barn and a small house. It has kind of exploded over these 4 years as we now have 3 dogs (2 rescues), 2 cats (That have walked out of the woods and adopted us), 3 horses, 4 goats and 36 chickens… Plus all of the deer, raccoons, foxes and other critters we share the land with.
Homesteading with Coop Dreams – If I was pressed as to why we do this and what we enjoy about it I think it would be the ‘honesty’ of it all. There is something very pure about raising your own food and caring for animals. Additionally there are no games with the animals we share our farm with. We love them and as long as we scratch backs and bring food – they love us. It is pure, honest and very comforting… I do not think I could go back to a life before this farm.
It doesn’t come without its challenges as with almost 50 animals we have to care for, someone is always sick or hurt… Something always need to be fixed or repaired… and there are NO days off. Additionally it is tough to lose an animal, painful to see any suffer and stressful to know when any are not ‘right’.
The other challenges come from being a part of the TV show. In being a true reality show we do not hide, script or cover anything up so our mistakes are out in the open for viewers and followers to judge, criticize and correct. We are grateful that the Coop Dreams community, which continues to grow, has been very understanding and helpful in both our challenging and tough times. I really think it is because it is so easy to see yourselves in us… We are not tv people, we are not perfect and we are certainly not experts… We are just a family that cares about their animals and are trying to live in a more compatible way with the environment.
She’s got the keys and it looks as though Mrs Barbara is ready to move in… 1 more sleep until we can reveal Mr and Mrs Barbara’s new home. Who’s eggcited?! #MovingDay
Mr Barbara has followed the chickies and has managed to send us a clearer image of where they’re headed, he sounds very excited about it and can’t wait for you to see it.
“I can see clearly now”…..well not quite but almost there! Hang on, only 3 more days until the big reveal….
It appears as though our little chickies have seen something intriguing….can you work out what it is? Their camera can’t quite pick out the details from this far away but we hope to bring you some clearer images as they get closer over the next few days.