Stages of Raising Backyard Chickens
Raising chickens is a rewarding experience at every age, whether you are starting from a freshly hatched chick or welcoming adult hens into your backyard. Each stage of a chicken’s life comes with its own care requirements, behavioral changes, and milestones. Learning what to expect at each phase helps you build a healthier, happier relationship with your flock and sets you up for success from the very beginning.
Key takeaway: Chickens pass through several distinct life stages, from hatching and brooding through to laying and retirement. Understanding each stage means you can provide the right care, housing, and nutrition at exactly the right time.
How to Tell the Age of a Chicken
If you are adopting chickens rather than hatching them yourself, knowing their approximate age is useful for planning their care and anticipating when they will start laying. The good news is that you can estimate a chicken’s age fairly accurately by observing their physical development.
Physical Development as an Age Guide
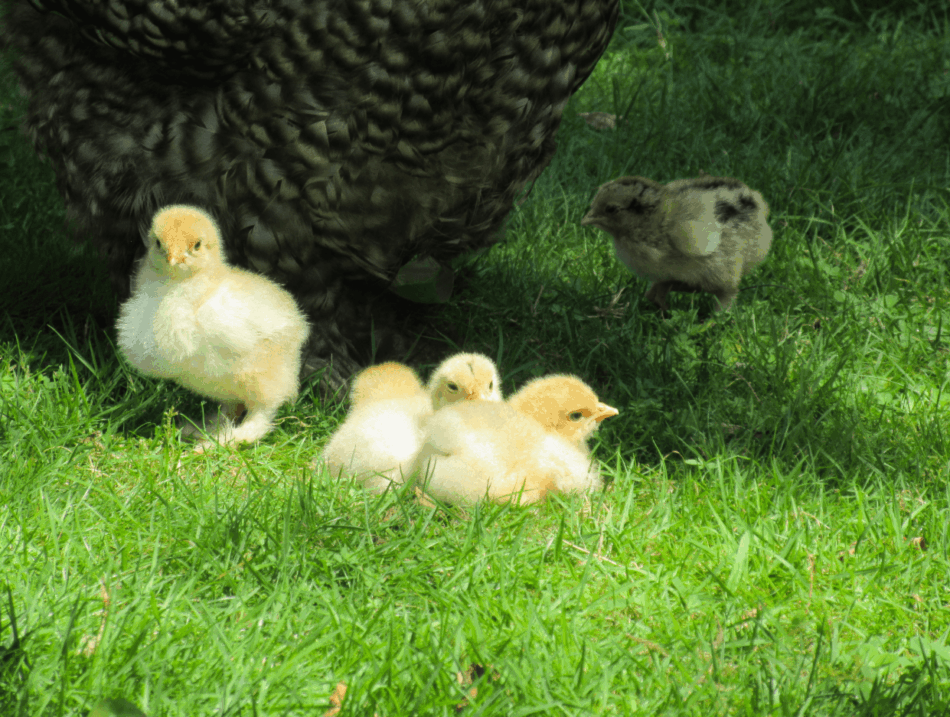
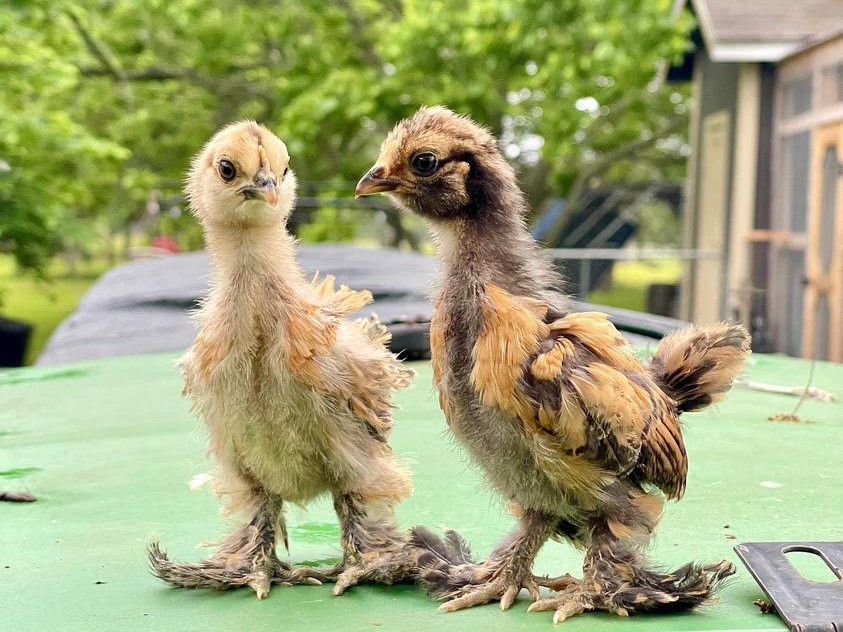
Feathering is the clearest indicator of age in young birds. Here is a quick reference:
- Downy fluff (no adult feathers): Under 5 weeks
- Adult feathers coming in: 6 to 8 weeks
- Fully feathered with adult plumage: Around 8 weeks
- Laying eggs: At least 16 weeks
Beyond feathering, you can also look at the development of the comb and wattles, body size, and general confidence of movement. Older hens often have thicker, rougher foot pads compared to younger birds.
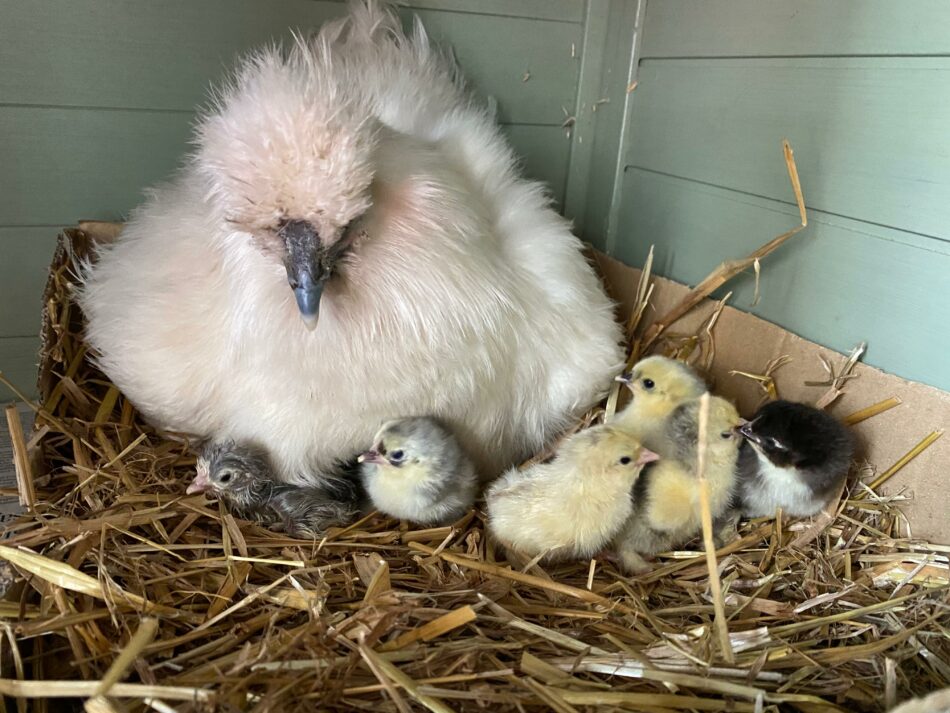
Stage 1: Hatching Chicken Eggs
Hatching your own eggs offers a fascinating hands-on experience for the whole family. With the right tools and a little preparation, it is a straightforward process that even first-time keepers can manage confidently.
Essential Equipment for Hatching
Before you begin, make sure you have everything in place. Trying to source equipment mid-incubation adds unnecessary stress.
- A quality incubator (with or without an automatic egg turner)
- A thermometer and hygrometer to monitor temperature and humidity
- A calendar for tracking incubation days
- Fertilised chicken eggs from a reputable breeder, or collected from your own flock if you have a rooster
Tip: Mark each egg lightly with a pencil on both sides. This helps you confirm that eggs are turning correctly, which is critical for healthy development.
The Incubation Process
Follow your incubator’s instructions closely throughout the 21-day incubation period. Bear in mind that not all eggs will hatch, even under ideal conditions. This is completely normal and not a reflection of anything you have done wrong.
The Final Days Before Hatching
The last two to three days of incubation are the most critical. Here is what to do:
- Increase humidity slightly to prevent the membrane from drying out and sticking to the chick.
- Lower the temperature by a small margin to mimic natural conditions.
- Remove the automatic egg turner and add a non-slip surface to the incubator floor.
- Watch for pipping, which is a small hole or crack in the shell. This is a sign that hatching is imminent.
Some chicks hatch within hours of pipping, while others take up to 24 hours. Resist the urge to assist unless there is a clear medical reason to do so. Patience is the most important tool at this stage.
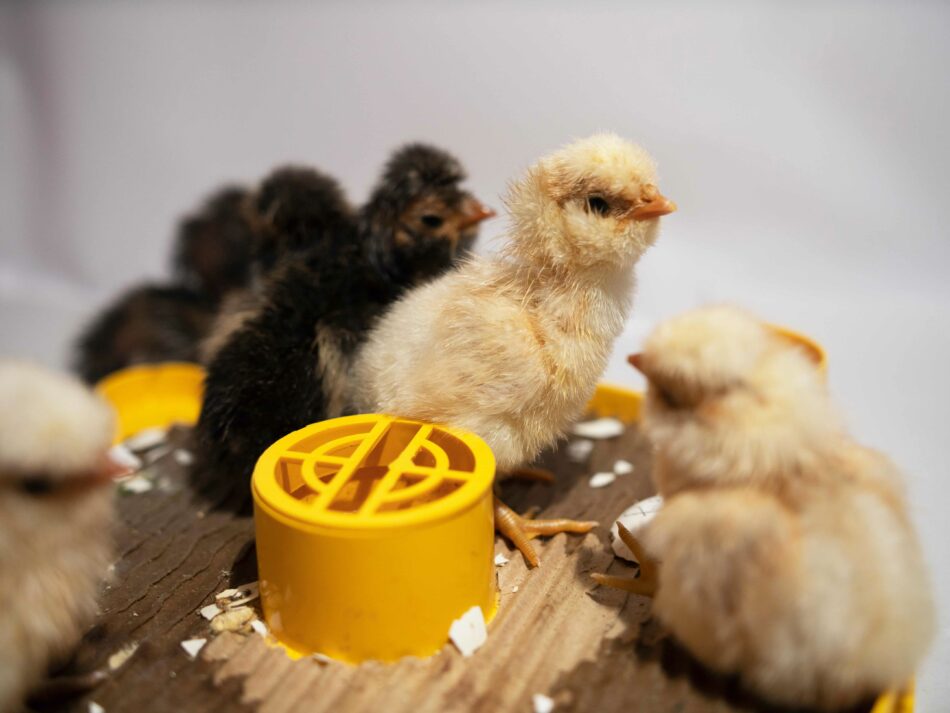
Stage 2: How to Care for Newly Hatched Chicks
Young chicks are fragile and need a warm, safe environment to thrive in their first weeks of life. Before your chicks arrive or hatch, your brooder should already be set up and at the correct temperature. A well-prepared brooder removes a lot of the guesswork.
Brooder Setup Checklist
Use this list to make sure you have everything your chicks need from day one:
- A sturdy enclosure with solid walls and a secure top
- A heat lamp or brooder plate for warmth
- Absorbent bedding such as pine shavings
- Chick crumble feed for balanced nutrition
- A chick-safe waterer (gravity-fed and shallow to prevent drowning)
- Chick grit to aid digestion
- A thermometer to monitor brooder temperature
The brooder temperature should start at around 95°F in the first week and decrease by approximately 5°F each week as chicks feather out.
Feeding and Health in the Brooder
If your chicks have not been vaccinated for coccidiosis, starting them on medicated chick feed for the first two to four weeks is a sensible precaution. Once that period is complete, transition them to non-medicated chick crumble. Always make sure fresh water is available, as chicks can dehydrate quickly.
First Outdoor Visits
By six weeks old, most chicks are fully feathered and ready for supervised outdoor visits. Use chicken fencing to create a safe, contained space and gradually introduce them to their future coop and run. Keep visits short to begin with and always supervise them closely. These early outdoor experiences help chicks build confidence and begin adjusting to their permanent home.
Moving Into the Coop
Chicks should be at least 12 weeks old before moving into a chicken coop outside. Before this age, younger chicks do not always have the coordination to safely navigate ladders and roosting racks. Introducing them too early can lead to falls or injuries, so patience here really does pay off. An Eglu Go chicken coop is a brilliant option at this stage, easy to clean and predator-resistant from day one. Remove the roosting bars from inside the coop at first, until the chicks are big enough to perch and walk across the bars safely, and add plenty of bedding to keep the chicks warm.
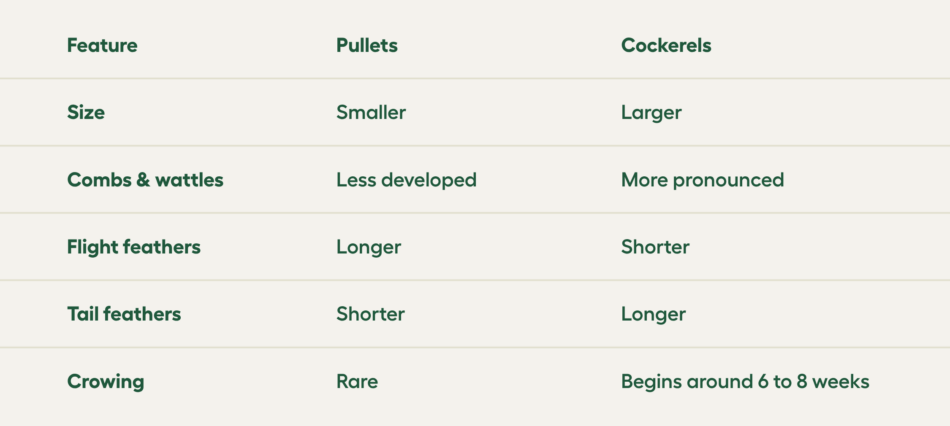
Stage 3: How to Tell Pullets from Cockerels
As your chicks grow, you will start to notice differences between pullets (young hens) and cockerels (young roosters). Being able to identify which is which helps you manage your flock effectively and find homes for your cockerels if you are unable to keep them.
Key Differences Between Pullets and Cockerels
The differences become more apparent from around six weeks onwards. Use this table as a guide:
Diet and Housing for Pullets and Cockerels
Both pullets and cockerels require a balanced diet and safe housing during this stage. Cockerels can eat the same diet as pullets until laying begins.
- Pullets are considered young hens until around 20 weeks old. They may start laying eggs as early as 18 weeks, at which point you should switch them to a layer feed formulated for laying hens.
- Cockerels are males under one year old. They do not require a different diet from pullets at this stage.
Note: If you are keeping cockerels with your pullets, monitor the flock for any signs of stress or bullying, particularly as the males mature. It is generally best to keep only one rooster per flock to prevent fighting.
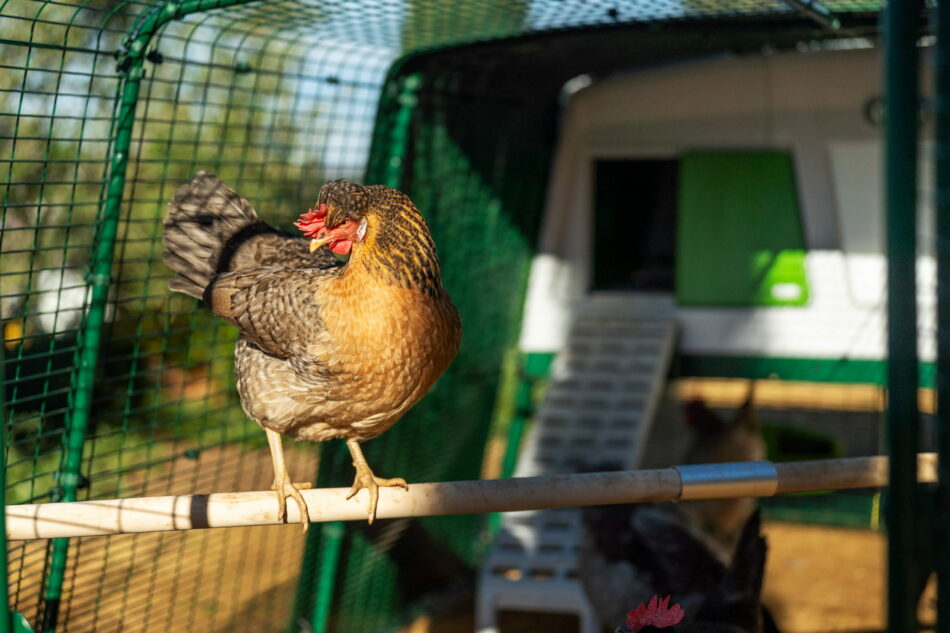
When Are Chickens Fully Grown?
Hens are generally considered fully grown at around four to six months old, while cockerels typically reach full maturity at around one year. Some breeds mature more slowly than others. Silkies, for example, are known to take longer to develop than high-production hybrid breeds.
Differences Between Adult Hens and Roosters
Once fully grown, hens and roosters are easy to distinguish:
- Roosters have more pronounced combs and wattles, longer and more elaborate tail feathers, and may develop spurs on their legs. They crow, often starting early in the morning.
- Hens have smaller combs and wattles, shorter tail feathers, and do not crow.
It is best to keep only one rooster per flock. Multiple roosters in the same space frequently leads to fighting, which can injure birds and disrupt the rest of the flock.
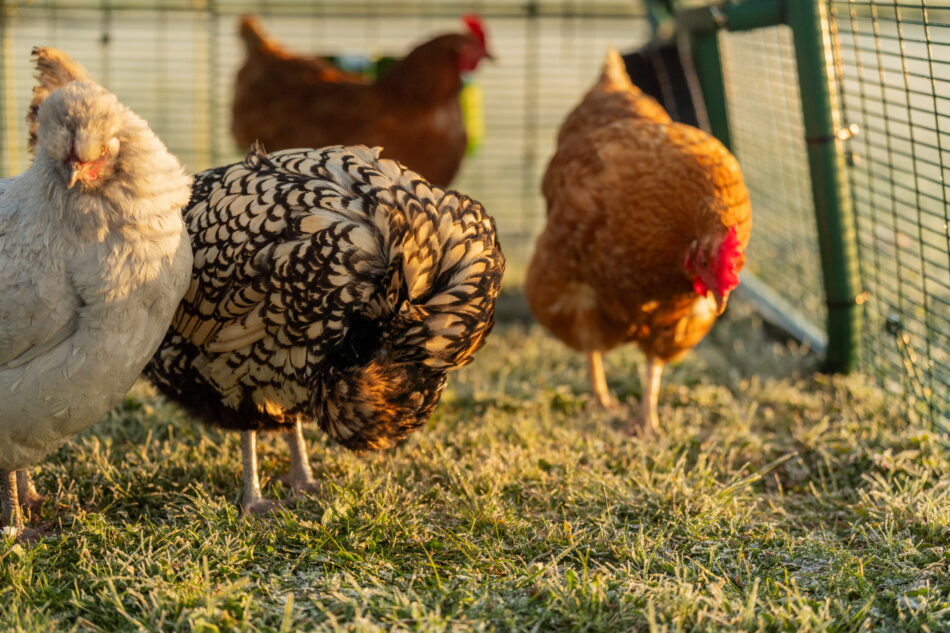
Egg Production in Adult Hens
A rooster is not required for egg production. Hens lay eggs regardless of whether a rooster is present. Most hens lay one egg every one to two days, with high-producing breeds capable of laying over 300 eggs per year.
The right housing makes a real difference. A secure, comfortable hen house with dedicated nest boxes encourages consistent laying. The Eglu Cube large chicken coop is designed with this in mind, offering easy-clean nest boxes and a well-insulated sleeping area that keeps hens comfortable year-round.
What Happens When Hens Retire from Laying?
As hens age, their egg production gradually slows and eventually stops. Most hens stop laying regularly by around five to six years old, though the exact timeline varies by breed and individual bird. The good news is that a well-cared-for hen can remain active and healthy for up to seven years or more.
Signs That a Hen Is Aging
You may notice subtle changes as your hens get older. These are all normal and not necessarily causes for concern:
- Slower or stiffer movement, particularly in the mornings
- Thicker, rougher foot pads
- Fewer eggs, though they may be larger than before
- A lower position in the pecking order as younger birds assert themselves
Hormonal Changes in Older Hens
Some older hens develop physical traits more commonly associated with roosters. This includes occasional crowing, the development of small spurs, or a larger, more prominent comb. This happens because aging ovaries produce less estrogen, and the hormonal balance shifts. It is a natural process and does not indicate illness.
Older hens still contribute to the flock. They maintain the social structure, help younger birds learn flock behaviors, and continue to enjoy foraging and dust bathing. Retirement from laying does not mean retirement from life. Keeping older hens alongside younger ones creates a more settled, balanced flock dynamic.
What Should a First-Time Chicken Keeper Know?
Starting your chicken-keeping journey takes some preparation, but it does not need to be overwhelming. The most important thing to do before getting your first birds is to honestly assess how much time and space you have available. Chickens are low-maintenance compared to many pets, but they do require daily attention.
Chicks or Adult Chickens?
One of the first decisions you will face is whether to start with chicks or adult hens. Both have advantages:
- Chicks require more time and equipment in the early weeks, but raising them from the start builds a strong bond and gives you full visibility of their development.
- Adult hens are a faster route to eggs and require less specialist equipment. They can move straight into a coop and run.
There is no wrong answer. It comes down to your circumstances, your goals, and how hands-on you want to be.
Top Tips for First-Time Keepers
- Research breeds before buying. Consider egg production, temperament, and how well the breed suits your climate. Decide in advance whether you want hens only, or a rooster as well.
- Prepare your equipment before the birds arrive. Whether you are setting up a brooder or a permanent coop, having everything ready reduces stress for both you and your chickens.
- Connect with other keepers. Online communities are full of experienced keepers who are happy to share advice and support, or ask your question in the Omlet subreddit.
- Read up on beginner care. Our How to Raise Chickens as a Beginner Chicken Keeper blog covers the essentials in plain language.
- Approach it with patience. Every keeper makes mistakes in the early days. The learning curve is part of the process, and most challenges have straightforward solutions.
Setting Up the Right Home
The coop you choose will shape your experience as a keeper. Omlet’s range of chicken coops are designed to make daily care simpler, with easy-clean surfaces and modular systems that grow with your flock. For larger flocks, the Eglu Pro offers extra space with the same easy clean, predator-resistant design Omlet is known for.
Summary: Key Takeaways
- You can estimate a chicken’s age by observing physiological traits such as feathering, comb development, and foot pad texture.
- Hatching eggs at home offers a rewarding, hands-on experience.
- Newly hatched chicks need a warm, secure brooder with the correct feed, clean water, and grit from day one.
- Pullets and cockerels can be distinguished by size, feathering patterns, comb development, and crowing behavior from around six weeks onwards.
- Hens are fully grown at four to six months, while roosters reach maturity at around one year. Some breeds, like Silkies, mature more slowly.
- Hens typically stop laying regularly by five to six years old but can remain active, healthy members of the flock for years beyond that.
- Good preparation, the right equipment, and a well-designed coop make every stage of chicken keeping more enjoyable for both keeper and flock.
Omlet and Your Flock
Whatever stage your chickens are at, Omlet has the products and expertise to support you. Our coops are designed to prioritize chicken comfort while making daily care as straightforward as possible. Easy-clean surfaces mean less time scrubbing and more time enjoying your flock.Our modular systems are built to grow with you. Whether you start with a small setup and a few hens or expand into a larger flock over time, Omlet products can be customized and extended to suit your needs at every stage. Browse our full range of chicken keeping supplies to find everything from coops and runs to fencing and feeders.
This entry was posted in Chickens