6 mistakes to avoid when raising chicks

Chickens pretty much take care of themselves from an early age. However, there are certain things you need to avoid if you want your baby chickens to get the very best start in life.
In this article, we present six easily preventable pitfalls.
1. Not having the brooder ready before the chicks arrive
You need to sort out the chicks’ housing – known as a brooder – before the birds arrive. Otherwise, there will be nowhere to put them, and that would be disastrous.
You can buy brooder boxes made specifically to keep chicks in, or you can make a DIY brooder using a cardboard box or plastic bin with holes in the side. Only choose the DIY avenue if you’re 100% confident you know what you’re doing.
The important thing is to keep the birds in a warm and well-ventilated space, but protected from drafts. As a rule of thumb, allow two square feet per chick – this is more than enough space for fluffy newcomers, but remember you will also need to make sure they have enough room when they get bigger – which they will do very quickly!
A chicken wire covering for the top of the brooder is advisable. Chicks can easily ‘fly the nest’ if the sides of the brooder are less than 45cm high. Older chicks need roosting poles for perching when they sleep, and will appreciate the inclusion of these in the brooder.
2. Not getting the temperature right
Too much or too little heat can kill chicks, so this is another life-or-death issue. The chicks need to be kept in a temperature of 35 °C (95 °F) in their first week. The heat should then be reduced slightly every five days or so until you’ve reached room temperature.
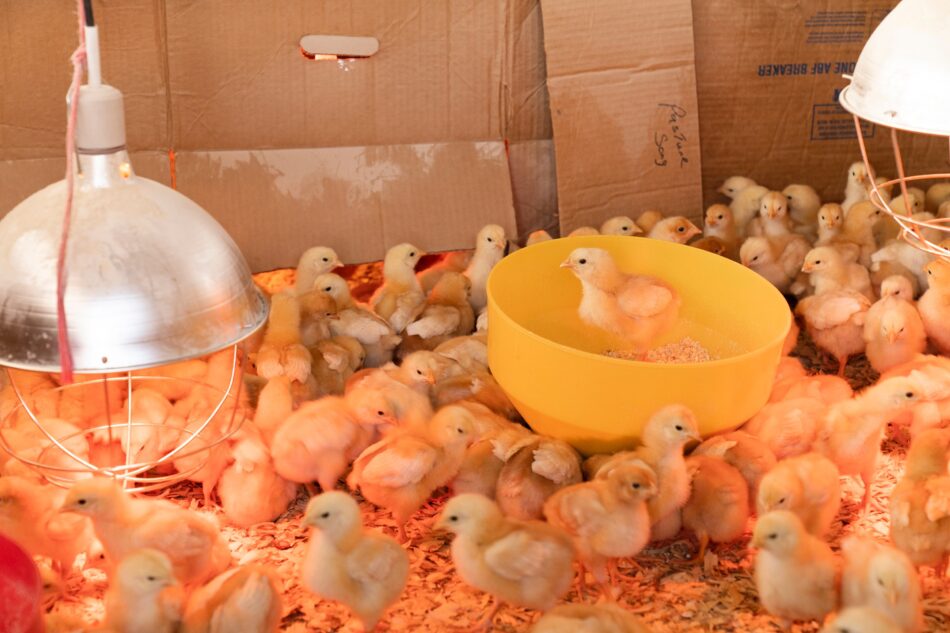
The source of heat is an important detail too. A heater designed explicitly for coops and aviaries is the best option, or a red heat bulb. You should not use a white heat bulb, as these produce glare that keeps chicks awake at night. This will make them irritable, as a result of which they may start pecking each other. Standard light bulbs are not suitable either.
Even the correct type of heater or bulb will need some adjusting in terms of where it hangs, and how high it is from the ground. Watch how the chicks behave in relation to the heat source. If they crowd together directly under the bulb or in front of the heater, it means they’re too cold. Lower the heat source or add an additional one, depending on the situation.
If the chicks cluster away from the heat source, they’re probably too hot. In this case, the heater or bulb will need to be moved further away, or its temperature reduced slightly. The chicks’ behavior may change as they grow larger and the space becomes more crowded, so watch them carefully each day.
3. Using the wrong type of bedding
With chicks, it’s not a case of “any old bedding will do”. Use wood shavings or other non-toxic, absorbent material recommended for baby chickens. Avoid newspaper or shredded magazines, and don’t use aromatic, oily woods such as cedar. A 2.5cm layer of this bedding will be enough. If you omit the bedding, the chicks are in danger of slipping and sliding on the surface, which can lead to an injury called “splayed leg”, which is a life-threatening condition. The bedding should be changed at least once a week to prevent sticky droppings from accumulating.
4. Getting the wrong type of feed
Starter feed – in the form of either ‘crumble’ or ‘mash’ – is the essential basis of a chick’s diet. If your chicks have been vaccinated against coccidiosis, you will need to buy an unmedicated feed. The starter feed will double as a ‘grower’ feed, intended for chicks for up to 16 weeks. Some varieties, however, are for the first four weeks only, after which you can switch to a ‘grower’ feed.
Chicks will also enjoy a bit of fresh food as a treat, either vegetables or worms and bugs. These should never replace the starter feed mix, however. Chicks only eat as much as they need, and there’s no danger of them over-eating. So all you have to do is make sure the feeders are topped up at all times.
Like adult birds, chicks require grit to grind up their food. It needs to be sand grain-sized rather than the small pebbles and shell fragments that grown birds require.
The chicks will need food and water dispensers. Buy custom-made ones rather than improvising with dishes and trays: these inevitably end up fouled and/or spilt. Very young chicks will need to have their water changed at least twice a day, as they very quickly dirty it.
5. Forgetting to perform daily health checks
A chick health check is a simple case of looking at the young birds and making sure they look as lively and alert as usual. A chick that sits alone and looks lethargic or fluffed up when the others are active may be unwell. An ill chick will deteriorate very quickly and die.
The most frequent health issue encountered in young chicks is ‘pasting up’. This is when their droppings become encrusted on their bodies, preventing them from pooping. An affected bird can be cured by wetting the pasted-up area with warm water and wiping it clean. You may occasionally have to use tweezers to remove a plug of poo from the vent. The chick will need holding securely during this rather delicate and undignified procedure. If left blocked, a pasted-up chick could quickly die.
Note: if there is a thin dark strand hanging from a chick’s rear end, this is NOT pasting up. It’s the dried up umbilical cord that attaches the bird to its yolk inside the egg. It will fall off in a few days.
6. Moving chicks outdoors too quickly
Chicks can spend up to three hours a day outdoors once they’ve reached two weeks, as long as there is someone to supervise them. A large wire cage or portable run will do the job. The birds should only be placed outside if it’s at least 18 °C (65 °F), dry and not too windy. They will need food, water and shade.
Note: If you take the chicks outdoors before two weeks old, or if you leave them for more than three hours, they may catch a chill or sunstroke (depending on the prevailing weather). These shocks to the system can kill a small bird.
By 12 weeks, the young hens are old enough to move into an Eglu chicken coop and run. They will still be too small to negotiate the roosting bars, so these should be removed until the chicks are big enough to perch and walk across them safely. If you have an Eglu Cube Chicken Coop, the chicks may have to be lifted in and out of the roosting and laying area, as they often struggle with the ladder. This can be converted into a ramp during these early weeks, to make things easier for the hens.
The roosting area of the Eglu – or any other walk-in coop and run set up – should have lots of chicken bedding to ensure the hens stay warm at night. The bedding should also be replaced at least twice a week.
Chicks soon pick up the dos and don’ts of life from your other birds. A lot of their behavior, remember, is based on instinct, so as long as you give them the right environment, nature will take care of the rest.
This entry was posted in Chickens