Waiting until winter is over to start a flock? The warmer weather typically fans the flame of future flock-raisers, and understandably so — there are several reasons why spring is the perfect time to get chickens. The longer days and awakening earth make for ideal conditions for hens and chicks alike. Find out how to get started with chickens this spring, and what to expect through the rest of the year.
When should I buy my chickens?
The term “spring chicken” originated in the 1700s, when farmers realized that chickens hatched in the spring were being bought at a better price than those who had already been through their first winter. Most breeders now begin hatching eggs in December, which has pullets reaching laying age by spring.
Most laying breeds of chickens begin laying eggs between 16-22 weeks of age. If you purchase chickens that were hatched in December, you can expect to start seeing eggs around April. You’ll likely see just a few eggs to start with, but their production will increase as your pullets mature through their first year.
If you start out with chicks in the spring, they should begin laying eggs toward the end of summer. But you also run the risk of chicks being hatched too late in the spring to begin laying before their annual fall molt, which will push egg production into the winter or even the following spring.
How long will spring chickens produce eggs?
Chickens will continue to lay eggs throughout their lives, with their peak production age being around 30 weeks of age. After they’ve turned their first year, hens will begin to slowly produce less eggs over time, decreasing around 10% each year. Most hens will have stopped laying eggs by the time they’re 6 years old, but some breeds or individual hens may continue to lay infrequent eggs for the duration of their lives.
Feeding your chickens a quality diet of layer pellets or crumbles containing at least 16-18% protein will help them in their egg production efforts. Fresh fruits and vegetables, dried insects, and foraging will also help your hens meet their nutritional needs. Make sure your flock always has access to fresh water, and keep crushed oyster shells or another calcium supplement out free-choice in their chicken run to help fortify eggshells.
You can expect your hens to lay fewer eggs, or none at all, during their annual chicken molt. This occurs during late fall, when the daylight hours begin to shorten, triggering the process of chickens shedding their feathers to grow fresh plumage for the winter. Once your hens have donned their winter coats, egg production will resume as usual. The molting process can take anywhere from 4-12 weeks, but on average you can expect to see fewer eggs for about 6 weeks.
Why is spring the best time for chickens?
Spring has everything that chickens love: mild weather, fresh vegetation, plenty of insects, and longer days to spend foraging. And as a chicken keeper, you get to enjoy these natural buoys to make your workload a little lighter and your days more joyful. There’s nothing like watching your flock scratch the ground while you relax on a calm spring afternoon.
Spring consideration: parasites
The earth isn’t the only thing waking up during the spring — parasites will also be making their comeback. For chickens, the main parasites to be wary of are red mites. Their presence drops off during the colder months, but as the weather warms back up, they’ll be ready for their yearly debut.
Watch your flock closely for signs of a red mite infestation. These include:
- Reluctance to roost, as mites lie in wait for chickens overnight
- Lethargy
- Sensitive skin or feathers, or persistent scratching
- Pale combs or wattles, as this can be a sign of anemia
- Irritation on the skin of the legs
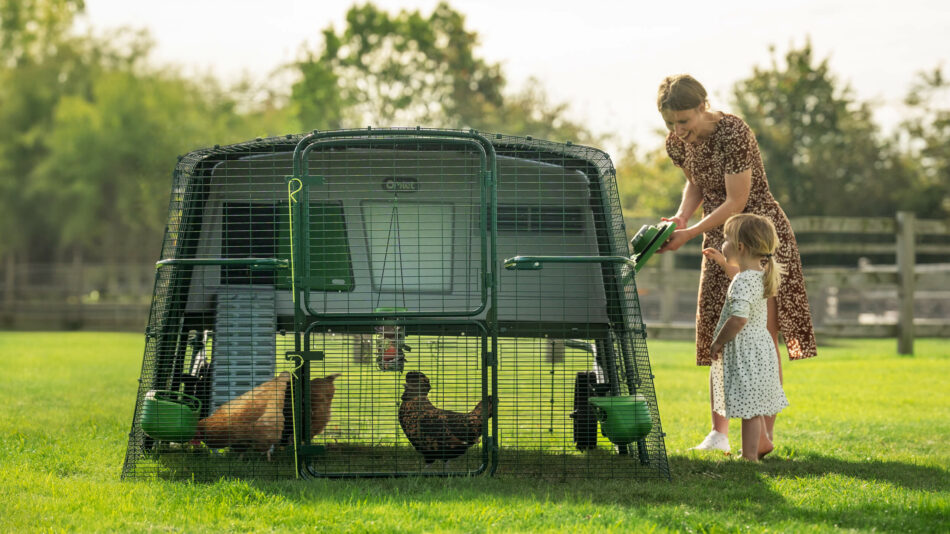
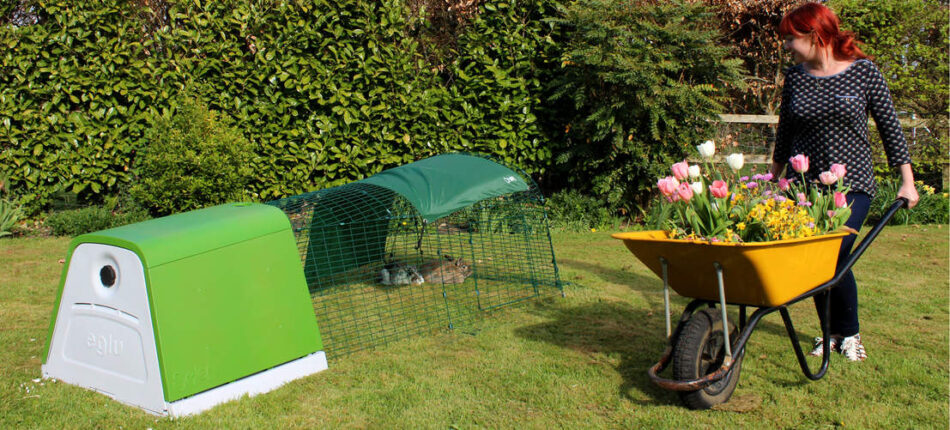
Red mites hide in the crevices of wood, and are very hard to eradicate once they’ve infiltrated a coop. Treating your flock and their coop is tedious, and many treatments have to be administered repeatedly. Preventing red mites is the best line of defense against these opportunistic pests. Eglu plastic chicken coops prevent red mites from hiding, and can be pressure washed easily to eliminate any parasites that may be present.
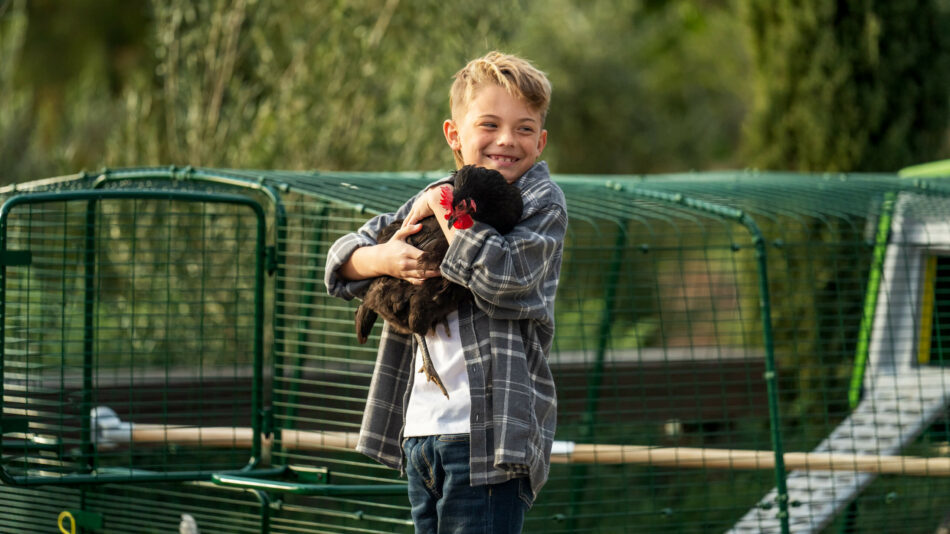
Chicks in the spring
Spring is a very popular season for chicks. Most farm supply and feed stores stock chicks during the spring, and hatcheries are hard at work hatching higher volumes. This is largely due to the mild weather that spring brings, which makes transitioning chicks from a brooder to their outdoor run easier when the time comes. If you’re looking to raise chicks, starting them in the spring will allow you to move them to their permanent setup during the summer, which will ensure they’re warm enough. Some chicken keepers wait to raise chicks in the fall so that they’re ready to lay the following spring.
Whichever season you choose, you can expect to keep your chicks in a special setup called a brooder for the first 6-12 weeks of their lives. Chicks need a heat source until they are fully feathered, a milestone they usually reach by 6 weeks of age. Chicks younger than 12 weeks should not be expected to navigate a coop on their own, and should stay in their brooder until they are coordinated enough to head to their roost at night. Once they’ve reached 12 weeks of age, you can transition your chicks to their coop.
Prepare for the rest of the year
If you’ve decided to get chickens this spring, it’s a good idea to make a plan for the rest of your chicken-keeping year. Invest in chicken run covers to keep spring showers and summer storms from turning their run into a mud pit, and later to prevent snow and ice from freezing their feet. Outfit their area with some chicken toys and perches for year-round entertainment and enrichment, and install an automatic chicken coop door to simplify your schedule. These accessories are the perfect addition to further simplify spring chicken keeping, and will lend support in every season.
Omlet and your flock
Getting new chickens is exciting — no matter what time of the year it is. Outfit your flock with chicken keeping products that support their behaviors and your lifestyle. When you choose an Eglu Chicken Coop, Walk In Chicken Run and Chicken Run Covers, you’ll equip your flock with everything they need to stay safe and comfortable all year long.

This entry was posted in Chickens on March 31st, 2021 by alisa.deluca
-The Best Things In Life Are Sweet-
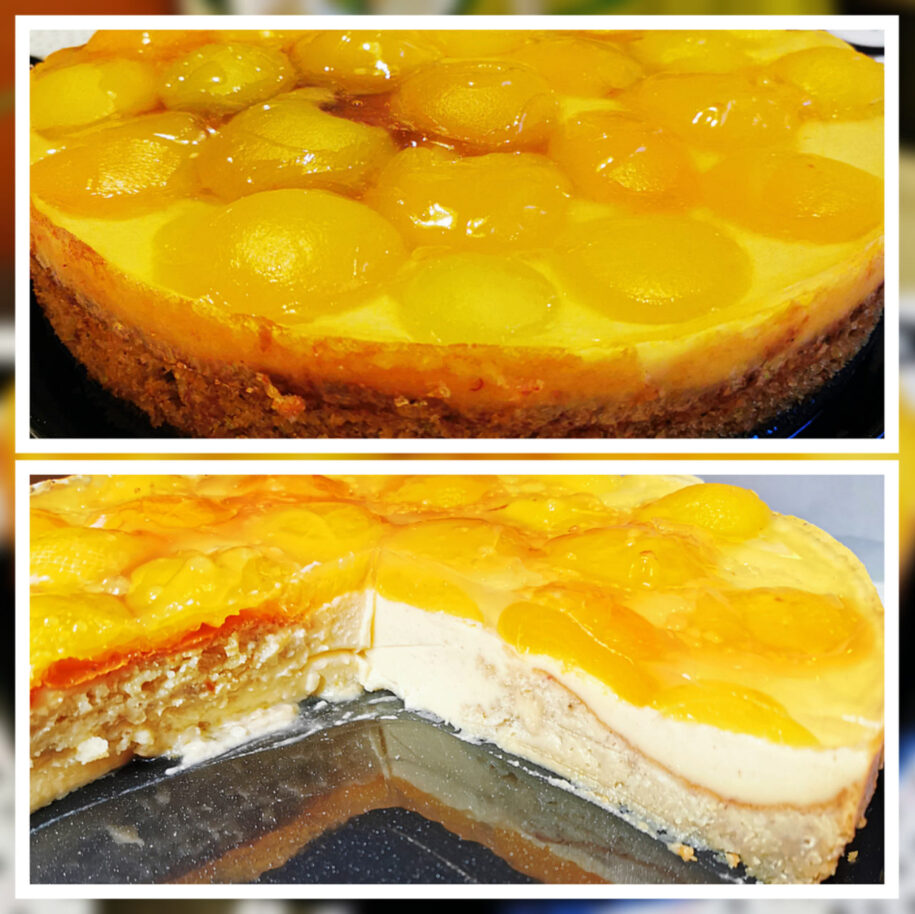
The OMLET (Omelette) Cake
 Ingredients for the cake batter (for a 9 inch round cake tin):
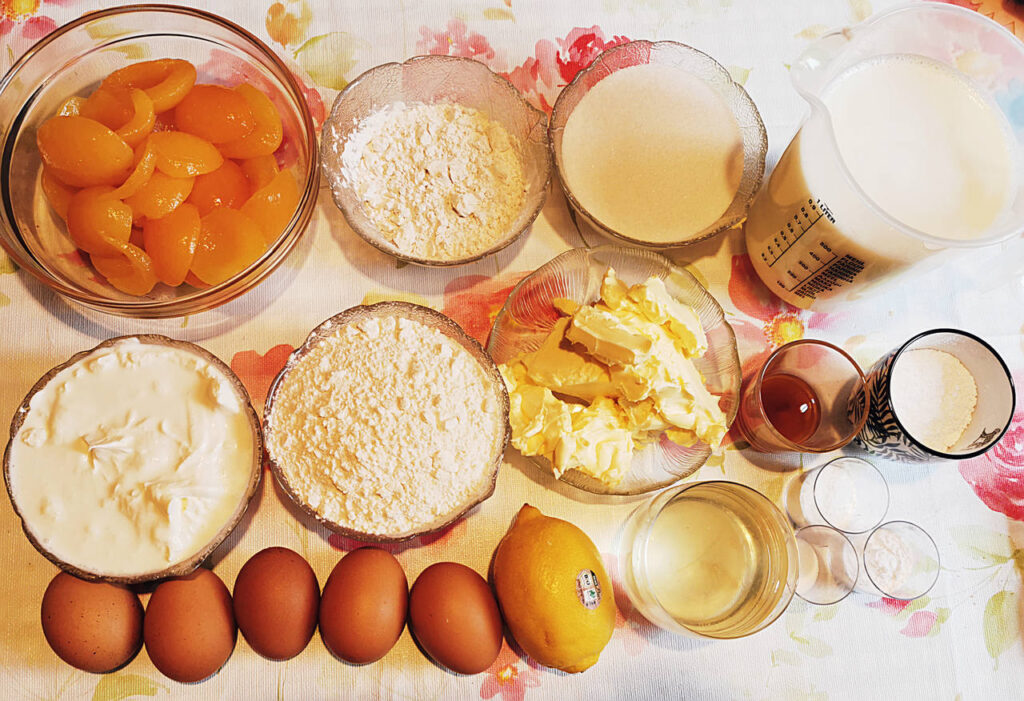
- 900 ml milk*
- 250 g sugar
- 250 g butter/margarine
- 4 tbsp lemon juice
- 5 eggs*
- 250 g flour
- 1 packet baking powder
- a pinch of salt
- 1 package of clear cake glaze*
- 1 can apricots halves (850 g drained net weight)
- 1 can apricots halves (425 g drained net weight)
Ingredients for pudding cream:
- 100 ml milk*
- 2 packets vanilla pudding powder
- 80 g sugar
- 1 packet vanilla sugar
- 2 cups sour cream*
*For a plant-based or vegan option:
As a milk substitute you can use any non-dairy milk (e.g. almond or oat milk). As 1 egg substitute use 1/2 mashed banana (5 eggs = 2.5 bananas) or 70 g apple puree (5 eggs = 350 g). You can buy vegan sour cream or soy yogurt. Instead of the clear cake glaze you can use agar-agar powder.
Instructions
- Grease a cake tin (9 in). Preheat oven to 340 degrees Fahrenheit (convection oven).
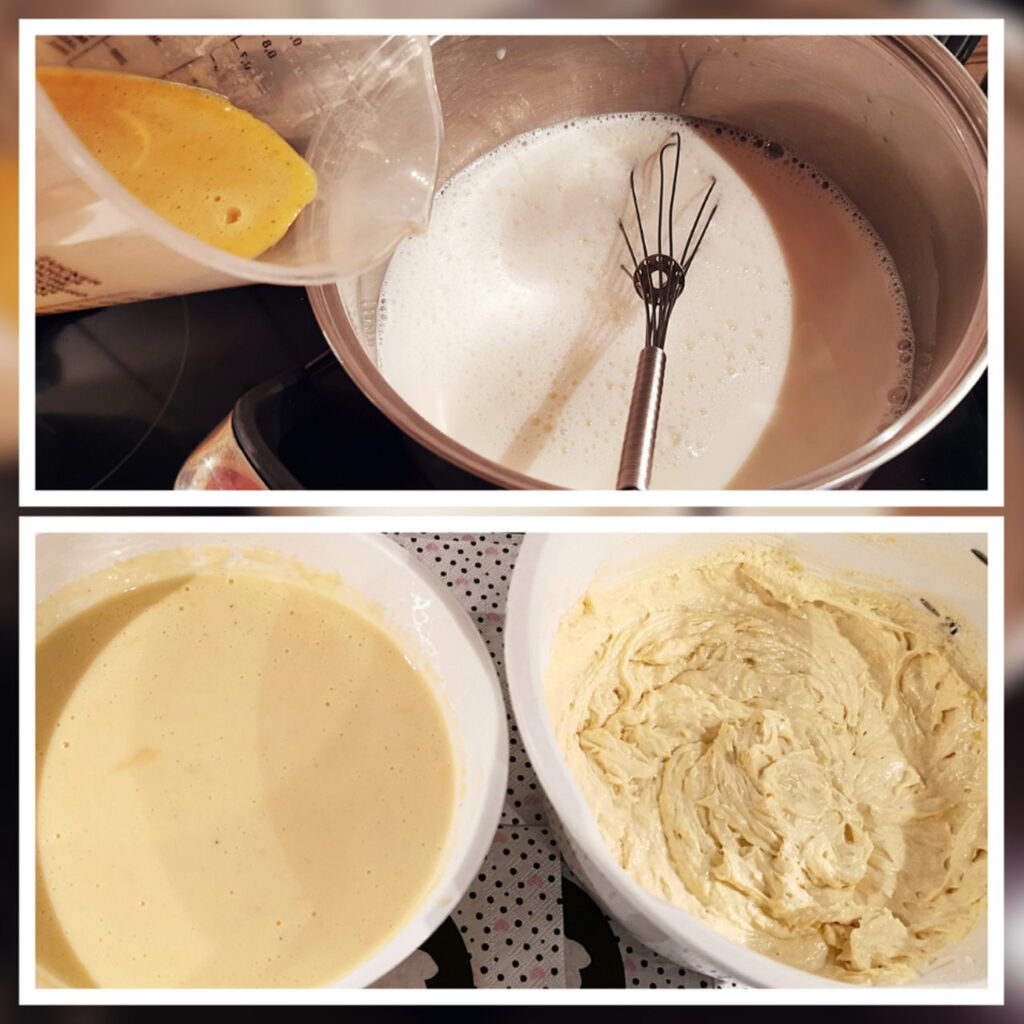
- Boil 900 ml milk in a saucepan. Mix in a bowl the remaining milk, 80 g sugar and vanilla pudding powder until smooth, stir into the boiling milk and cook well for 1 minute while stirring. Pour into a bowl and let cool, stirring several times.
- Mix butter/margarine, 200 g sugar, 1 pinch of salt with the mixer until you reach a creamy texture. Mix in eggs one at a time. Mix flour and baking powder and stir in 2 tsp of lemon juice. Put the batter in a greased cake tin and bake on the middle shelf for 20 minutes.
- In the meantime, drain the apricots well and collect the juice. Stir the pudding again, and now stir in the sour cream with a whisk. After the 20 minutes baking time, spread the pudding cream evenly on the batter. Cover the cake with apricots and bake for another 20-30 minutes. Let cool down.
- Mix the icing powder, remaining sugar, 1/4 liter of apricot juice and remaining 2 tsp of lemon juice in a saucepan and bring to the boil while stirring. Now spread the glaze with a tablespoon over the apricot halves so that it looks like egg white. Allow to become firm.

*You can use peaches instead of apricots as well.
If you want to bake the ultimate “Omlet”-cake with a 4 inch cake tin, use 1/2 of the ingredients and only one apricot halve on top of it.
If you prefer a more traditional Easter cake, here is a super delicious yet easy recipe:
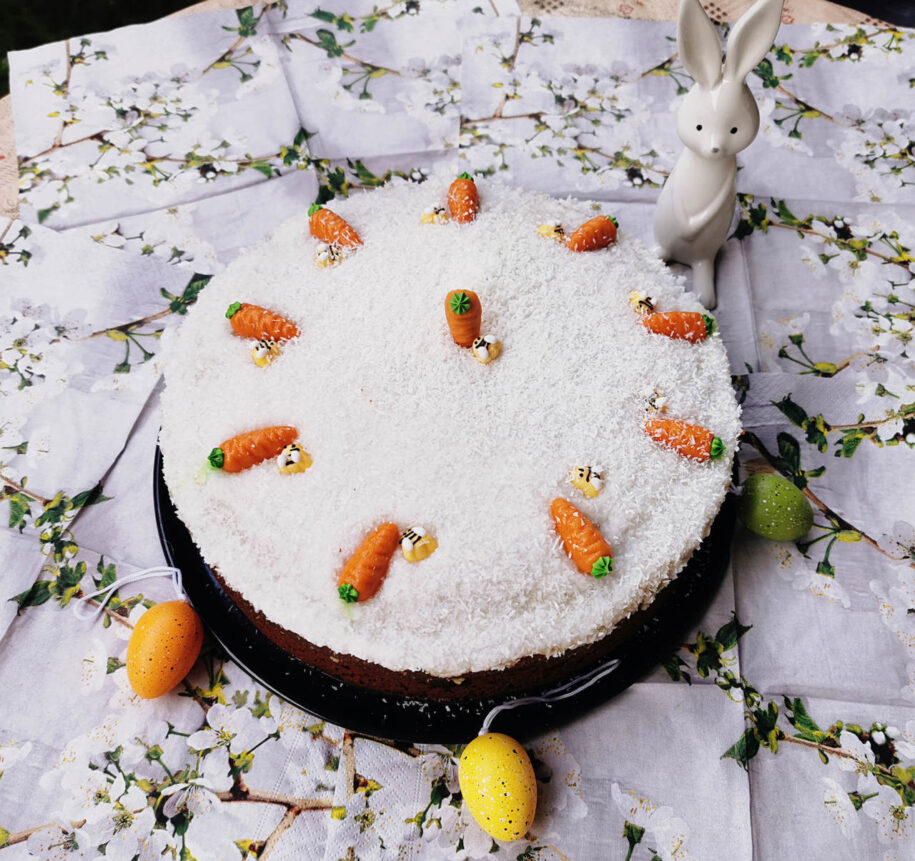
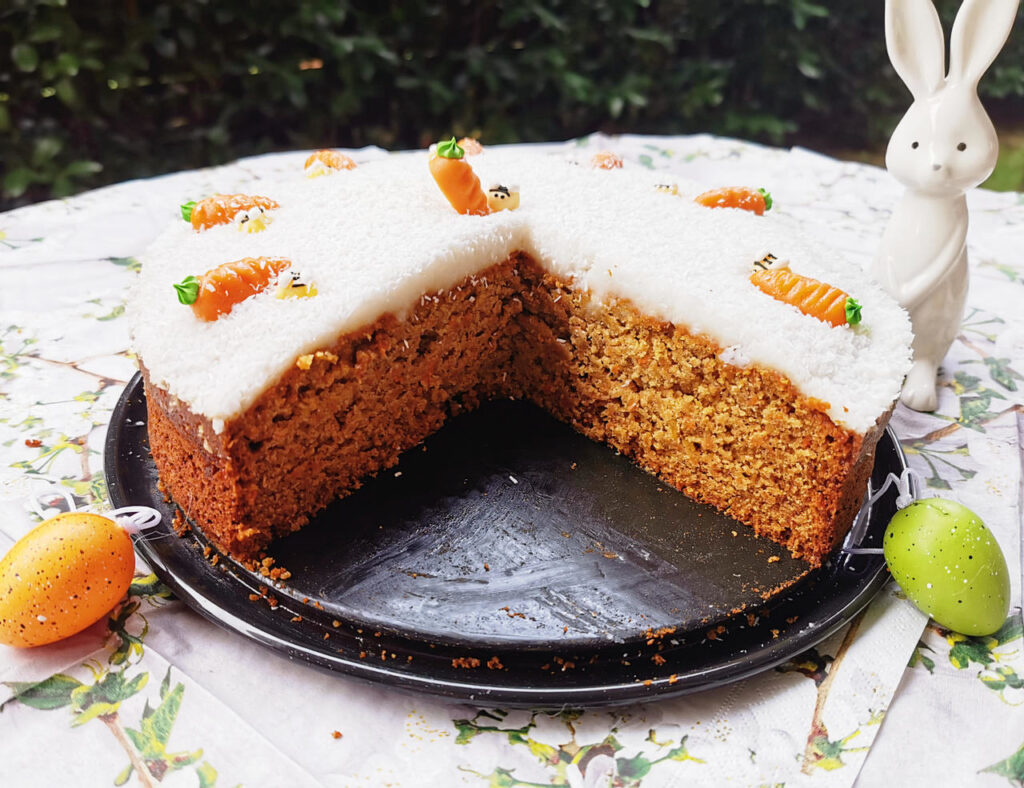
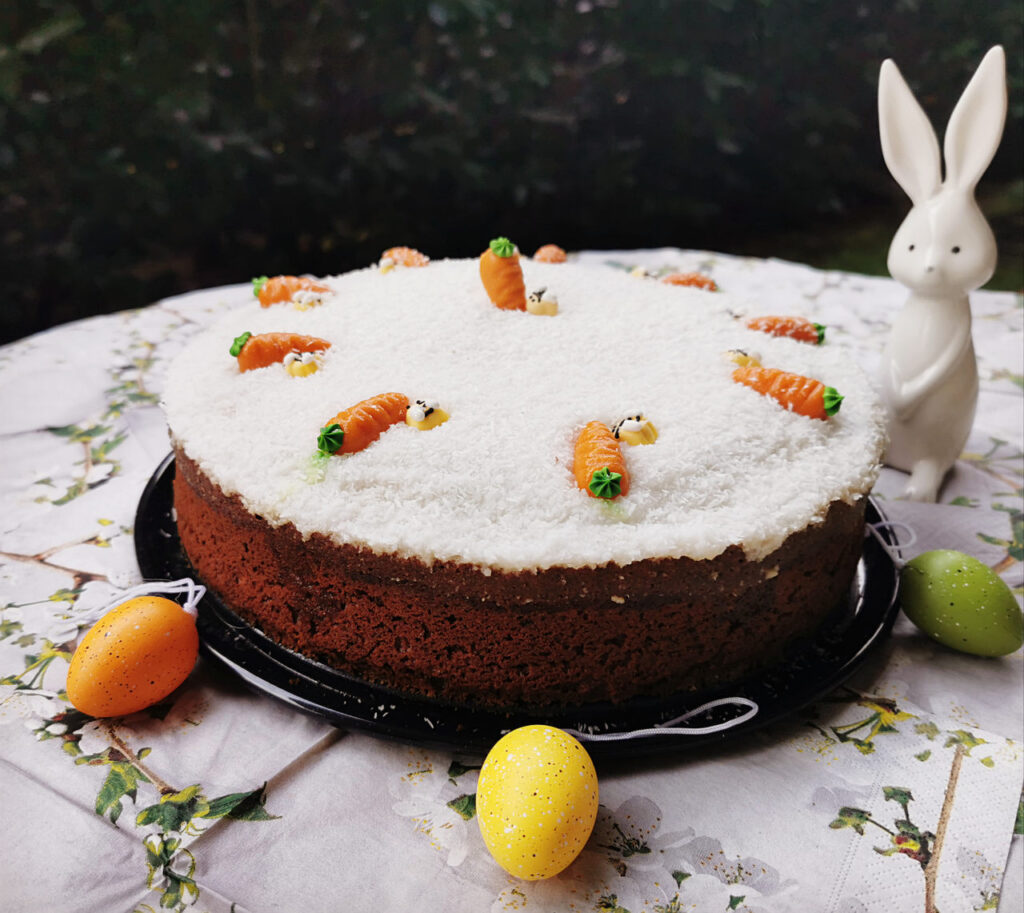
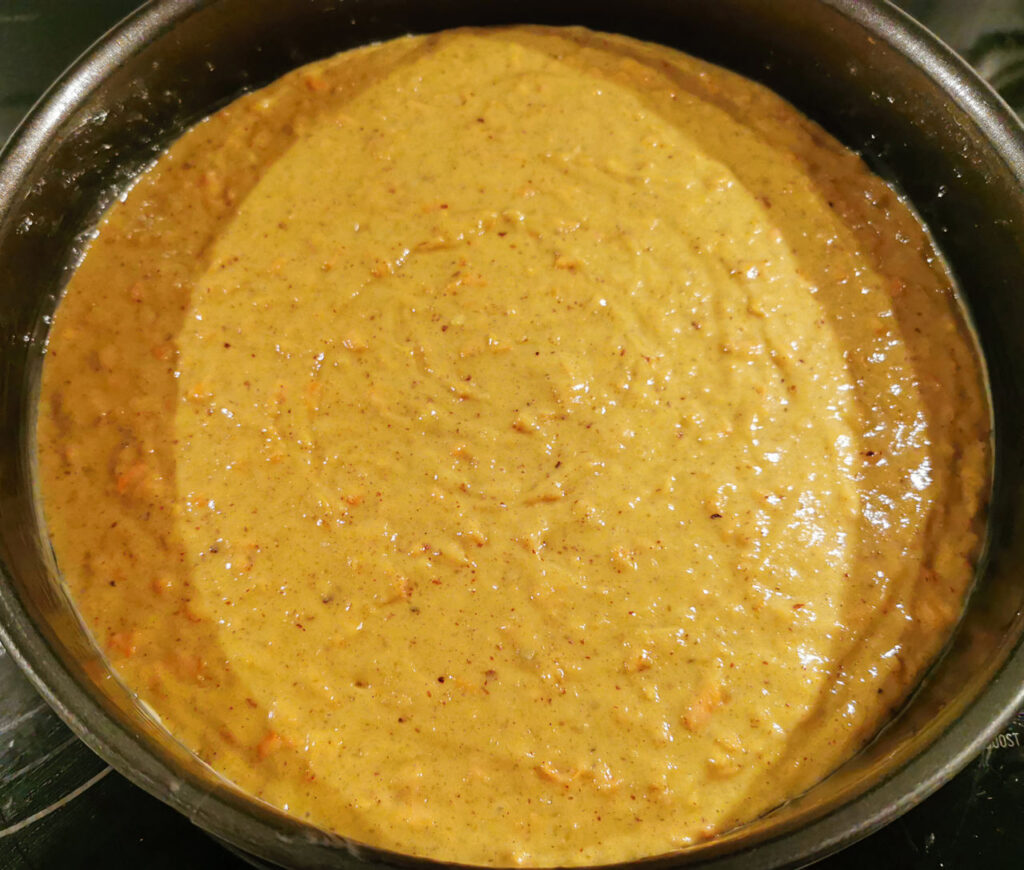
Carrot-Marzipan-Cake
Ingredients for the cake batter:
- 350 g wheat or spelt flour
- 4 eggs*
- 400 g carrots
- 100 g ground hazelnuts
- 100 g ground almonds
- 200 g sugar
- 1 packet vanilla sugar
- 1/4 tsp vanilla extract
- 1 vanilla pod
- 1 tsp cinnamon
- 1 packet baking powder
- 1 tsp baking soda
- 200g marzipan
- 200 ml rapeseed or sunflower oil
- 200 ml milk*
- juice of 1/2 lemon
- extra portion love
Frosting:
- 70 g icing sugar
- 200 g coconut yogurt
- 30 g coconut paste
- shot of lemon juice
optional: food coloring, e.g. green color
Decoration: e.g. Marzipan carrots, chopped pistachios, dried flowers, grated coconut
*For a plant-based or vegan option:
Use 2 tsp baking soda and 2 tsp cider vinegar or alternatively banana/apple puree as egg substitute (1/2 mashed banana per egg; 70 g apple puree per egg).
As a milk substitute you can use e.g. almond milk or oat milk, or any other non-dairy milk you prefer.
Instructions
1. Grease a cake tin (about 9 in) or use baking paper. Preheat oven to 350 degrees fahrenheit (convection oven).
2. Mix dry ingredients (flour, hazelnuts/almonds, sugar, baking powder, baking soda, cinnamon) and the eggs in a bowl with a mixer. In a separate bowl, peel and grate carrots and mix them with the wet ingredients (vanilla extract, oil, milk, lemon juice).
3. Now slowly heat the marzipan in a saucepan, stirring repeatedly until it becomes a liquid mass. Mix the dry and wet ingredients together and gradually add the marzipan to the batter, mix well.
4. Pour the batter into the cake tin, smoothen it and bake it for about 50 minutes (use the tooth-pick test to make sure it is fully cooked).
5. Let the cake cool down and prepare the frosting in the meantime. Mix the sifted icing sugar with yogurt and coconut puree and season with more icing sugar and a shot of lemon juice. You can add food coloring to the frosting if you wish. Now spread the frosting on the cooled cake and decorate as desired, e.g. with marzipan carrots, chopped pistachios or dried flowers.
Enjoy!
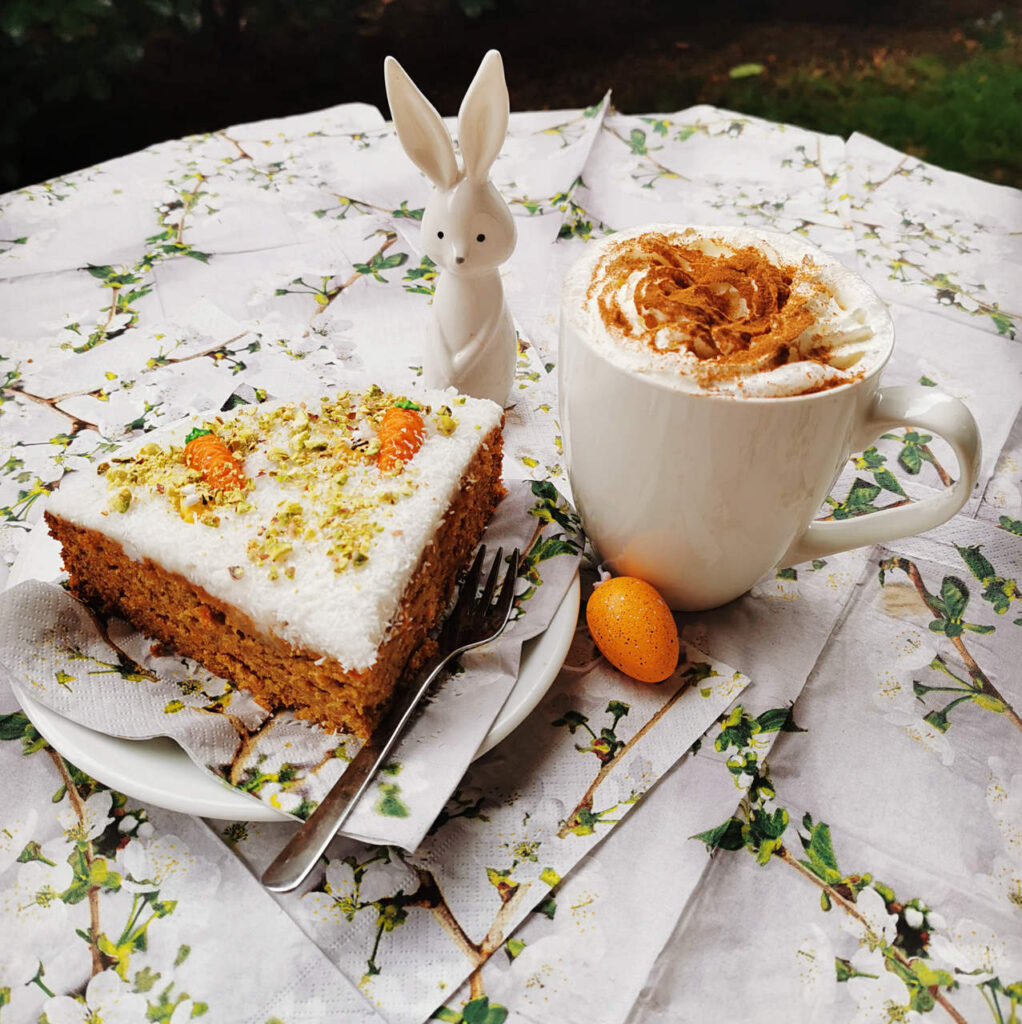
Bon Appétit
&
Happy Easter from the Omlet Team!
Tag us on social media (Instagram: @omletusa) with an image of your cake!
This entry was posted in Food on March 31st, 2021 by alisa.deluca
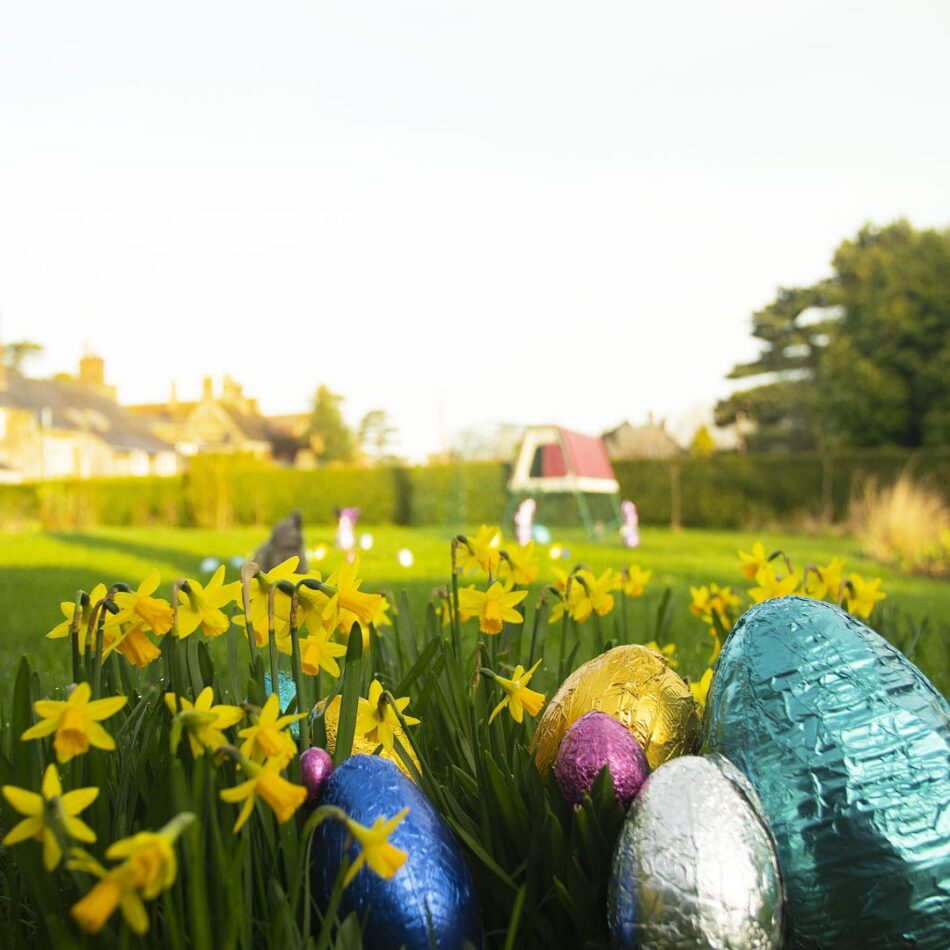
Are you eggcited about Easter? Easter is the second biggest family gathering of the year, so let’s celebrate it with some extra “hoppy” Easter games! This year, Easter will be celebrated in a small circle, but this doesn’t mean you have to miss out on all the great fun. Here are 5 festive Easter games that will keep the whole family entertained!
1- Easter Tic-Tac-Toe
This is mostly played by young children but makes a great strategy game for adults too! To make this game extra “hoppy” for Easter, you could paint real or plastic eggs in different colours or decorate them to distinguish each player.
Players then take it in turns placing their egg on the spaces in a 3◊3 grid. The player who succeeds in placing three of their eggs in a diagonal, horizontal, or vertical row is the winner!
2- Hula Hoop Aim
This is a great game for families or groups, where everyone will be entertained – and it’s super easy. Set up five hula hoops on the floor and assign a point value to each (example: the closest hoop is 10 points, the second closest 20,…, and the furthest hoop is 50 points). Give each player five plastic eggs. Have them toss the eggs into the hoops to see who can rack up the most points!
You can decorate the eggs together with your children by painting them in individual colors, so that each player has their own colored egg. Let the fun begin!
3- Bunny Hop Sack Race
Old but gold: the hoppiest game in our top picks! Since bunnies hop, having a good old-fashioned sack race is a great fit for Easter, your children will love racing you!
Set up each player with a burlap sack – decked out with a bunny tail – and have them race to the finish line. Make sure you’re on a soft ground. Just don’t forget to whip up some yummy Easter treats for the grand prize winner!
4- Pin Rabbit Tails
This game is for the whole family! Get pom poms and attach double-sided sticky tape to each of them. The players then have to stick the rabbit tails (pom poms) to one another…whoever ends up with most tails on them after 5 minutes of playing loses the game!
Once the game is finished, your children can get creative and do some Easter crafts. The possibilities are endless!
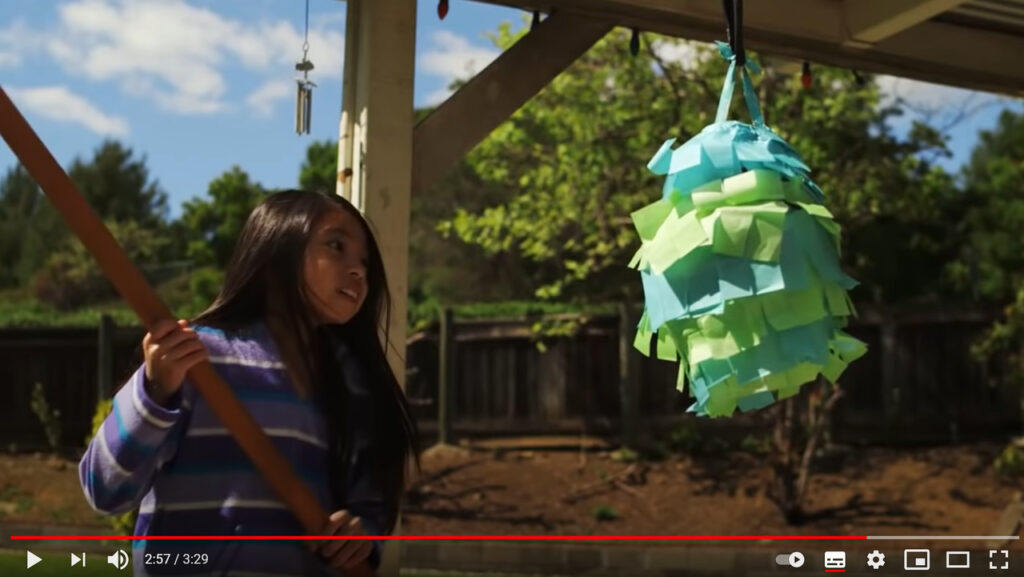
5- Easter Egg Piñata
Piñatas are great for any celebration but they’re also fun to make! Kids will have a blast making these as much as they will enjoy tearing them down.
You’ll need the following suppliers:
balloons (small, middle and/or big)
- craft glue
- 2 cups water
- tissue paper and/or crepe paper streamers
- 1 cup flour
- decoration
- newspaper
- craft knife
- wire, string, ribbon or rope (to hang the piñata)
- piñata bat (e.g. baseball bat)
Step 1: Blow up the balloon, tie it closed and tear or cut newspaper into strips.
Step 2: Mix water with flour to create paste. Dip the newspaper strips in the paste and apply the moistened strips to the balloon. Repeat this until the balloon is completely covered – three layers will help make the piñata strong. Make sure not to cover the knot. This is where you’re going to put the treats later. This part is messy but the kids will love getting their hands dirty. To hold the balloon in place while applying the newspaper strips, place it on top of a plastic container that will act as a stable base.
Step 3: Let the piñata dry for at least 24 hours, making sure to rotate it so all sides dry.
Step 4: After it’s completely dry, cut different colored tissue papers in strips and give the kids freedom to choose their colors and start adding stripes with craft glue to cover the base layer. Decorate as you wish. Now pop the knot with a craft knife and pull out the balloon. Punch two small holes around the main hole. Tie a string or ribbon to the holes to create a loop.
Step 5: Now fill your piñata with some delicious treats, like mini chocolate eggs, jelly beans, marshmallows or any other sweets… whatever you prefer!
Step 6: Glue down some crepe paper on top of the hole, or use masking tape. The goal is to prevent the filling of the piñata from falling out before you’ve actually hit it. Tie another piece of string, ribbon, or rope to the loop you’ve already made and use this to attach the piñata to whatever you’d like to hang it from.
Here is a video about how to make a piñata and who explains it better than kids itself?
BONUS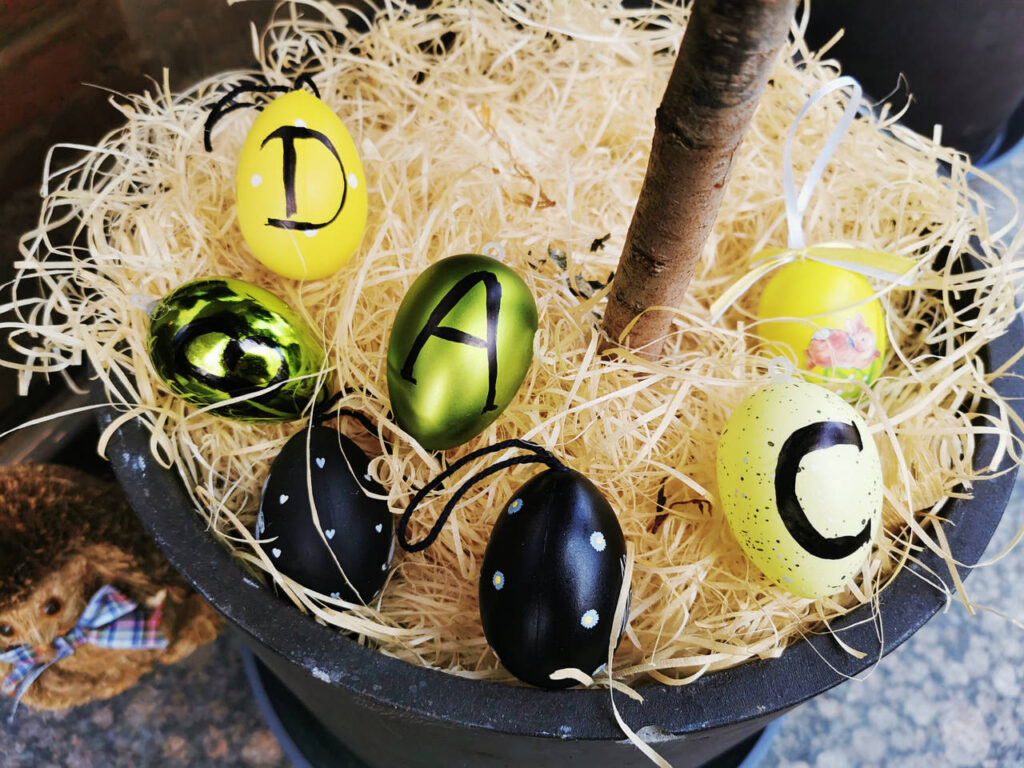
Here comes an eggstra game! Everything’s a bit more fun with a little mystery. Check out this super cool secret Easter egg hunt!
Let the children – and adults – hunt for the eggs but this time, write a letter on each egg. In the end, when all eggs are collected together, they have to decode the message and they’ll get the clue where the Easter gift is actually hidden. Example: if you hide the gift in the garage, place the letters “G”, “A”, “R”, “A”, “G”, “E” individually on each egg. If they put the letters together, they know where to go for a successful egg hunt! – You can also use Kinder eggs and put individual messages inside.
Omlet wishes you Happy Easter
This entry was posted in Crafting on March 31st, 2021 by alisa.deluca