The Omlet Blog Category Archives: Summer

Top tips when taking your dog to the beach

Many of us would agree that there are few things nicer on a hot summer’s day than a trip to the beach, and as long as you come prepared there is no reason to leave your dog at home. There are however a few things you need to do before you leave, and some things that are good to know when it comes to dogs and the beach. Whether your furry friend is a seasoned beachgoer or it’s their first time dipping their paws in the surf, here are our top tips to ensure a safe, fun, and stress-free adventure at the beach.

dog on holiday digging a hole in the sand at a sunny beach

Find a dog-friendly beach

Finding the perfect dog-friendly beach can feel like striking gold for pet owners eager to share the joy of the seaside with their furry companions. The first step is to do some research. Not all beaches welcome dogs, and those that do often have specific rules regarding dog leash requirements, times of day dogs are allowed, and areas where they can roam freely. Websites and apps dedicated to pet-friendly travel can be invaluable resources, providing up-to-date information on beaches in your area or at your travel destination. Additionally, local pet owner groups and social media communities can offer first-hand insights and recommendations, helping you uncover hidden gems that might not be widely advertised.

Once you’ve identified a potential spot, it’s crucial to plan your visit to ensure a smooth and enjoyable experience. Check the beach’s amenities – look for fresh water sources, shaded areas, and designated dog zones. Knowing the tide schedule can also be beneficial, as low tide often reveals more space for your dog to explore and play. Reach out to the local authorities or the beach’s official website to confirm the latest rules and regulations, as policies can change with the seasons. By doing your homework and preparing in advance, you and your pup can look forward to a fantastic day of sun, surf, and sand, making memories that will last a lifetime.

Keep an eye on your dog

Keeping a watchful eye on your dog at the beach is crucial to ensure their safety and well-being. The open spaces and the exciting new environment can be overwhelming for your furry friend, leading them to wander off or get into trouble. It’s easy for dogs to get lost in the crowd or distracted by other animals, so maintaining visual contact at all times is essential. Consider using a brightly colored dog collar and leash to make spotting them easier amidst the sea of sunbathers and beachgoers. If your dog is particularly adventurous or prone to wandering, investing in a GPS tracker can provide peace of mind, allowing you to keep tabs on their location in real-time.

While it’s tempting to relax and soak up the sun, staying vigilant about your dog’s activities can prevent accidents and mishaps. Watch out for hazards like sharp shells, hot sand, and strong currents that can pose a risk to their safety. Keep an eye on how much time they spend in the water to avoid overexertion or ingesting too much saltwater, which can lead to dehydration and other health issues. Be sure you bring an extra dog bowl and fresh water for them to stay hydrated. By staying alert and proactive, you can ensure your beach day remains a delightful experience for both you and your four-legged friend.

Teach your dog to swim

Many believe that all dogs know how to swim, but that simply is not the case. So while teaching your dog to swim is an exciting adventure, it does require patience, encouragement, and a bit of preparation. Start by choosing a calm, shallow area where your dog can gradually get used to the water. Equip them with a doggy life jacket, especially if they’re new to swimming or belong to a breed that’s not typically known for aquatic prowess. Slowly wade into the water with your dog, using a cheerful voice and plenty of treats to reassure them. It’s essential to let them set the pace—some dogs might dive in with enthusiasm, while others may need more time to feel comfortable. Remember, this is a new experience for them, and your calm, positive reinforcement will help build their confidence.

Once your dog is comfortable with wading, you can gently encourage them to paddle by supporting their belly and guiding them further into the water. Most dogs will instinctively start to paddle once they feel the buoyancy. Keep your sessions short and always end on a positive note with plenty of praise, a favorite treat or toy, and the ability to rest on their favorite travel dog bed. Gradually increase the swimming time as your dog becomes more confident and skilled in the water. It’s also important to monitor their energy levels and ensure they don’t overexert themselves, especially in the excitement of a beach day. With patience and encouragement, your dog will soon be splashing around joyfully, making your beach outings even more delightful.

Come prepared

Make sure you pack everything you need for a day at the beach. Dogs will need plenty of fresh water, so get enough for the whole family. It’s a good idea to have a sturdy dog bowl so you don’t have to make your dog drink straight from the bottle. This way you can also keep track of how much water the dog has actually had. Bring interactive dog toys that will entertain your dog throughout the day. If you’re able to throw balls or other toys down the beach, that is a perfect activity that will entertain your dogs, and give it a good amount of exercise. Just make sure the toys float if they end up in the water.

If you’re staying at the beach for a few hours, or maybe even the whole day, it’s important to make sure the dog can get some shade. If you’re not sure whether there are shaded areas where you’re going or not, bring a beach umbrella or a small beach tent where the dog can relax during the hottest hours of the day. And don’t forget to pack an easy-to-travel dog bed so they can rest in comfort after a hard day’s play in the sand and surf.

Before you leave

As the sun begins to set and your beach day winds down, it’s essential to clean up before you and your dog head home. Start by giving your dog a thorough rinse with fresh water. This helps remove sand, salt, and any potential irritants from their fur and skin, preventing itchiness and discomfort later. If there’s no rinse station available, bring a portable pet shower or even a large bottle of water to do the job. Don’t forget to check between their paw pads for small stones or shells that could cause irritation. A gentle brush can help detangle any sand or seaweed caught in their fur, making sure your car stays cleaner and your dog feels more comfortable on the ride home.

Next, take a moment to ensure you’ve gathered all your belongings and picked up after your dog. Beach litter not only spoils the natural beauty but can also harm wildlife. Dispose of any waste in designated bins and pack up all your gear, double-checking that you’ve left nothing behind. It’s also a good idea to bring a towel specifically for drying your dog before they hop into the car. This helps keep your seats dry and sand-free. By taking these simple steps, you show respect for the environment and fellow beachgoers while ensuring a pleasant end to your delightful day by the sea.

Omlet and your dog

At Omlet, we believe in staying curious about all pets, constantly asking the questions that inspire innovative creations designed to enhance the bond between you and your furry friend. From our easy-to-travel dog beds that simplify beach trips to our stylish, personalized dog collars and leashes, every product we create is crafted with love and attention to detail. We understand that your adventures together, whether by the sea or in the city, should be enjoyable and hassle-free. That’s why we celebrate the special connection between pet and person with thoughtfully designed products that make every moment spent together more joyful. With Omlet, you and your dog can enjoy more time together, exploring and making memories, no matter where your adventures take you.

Woman holding handle and moving the Omlet Cushion bed

1 comment - Leave a comment

This entry was posted in Dogs


How to prevent and treat red mites

Children giving a part of the Omlet Eglu Cube Chicken Coop a clean

A familiar problem for both backyard chicken keepers and commercial farms lies in how to prevent and treat infestations of the birds’ environment with red (poultry) mites – also known as dermanyssus gallinae. Compared to other poultry parasites such as fowl ticks, lice and flies – mites are by far the most common, destructive and difficult to remove. Red mites are nocturnal parasites and hide themselves in gaps and cracks during the day, laying wait to wreak havoc on your flock at night. 

Signs and diagnosis

Red mites are up to 1mm in size. The title “red” has been given to these mites because they turn from gray to red after they have had a blood meal. Infected hens will not be the picture of chicken health. Once the infestation becomes significant, your chickens will become anemic. Their wattles and the combs will appear pale and their egg production will drop significantly. Red mites also cause:

  • Skin irritation 
  • Feather pecking
  • Weight loss
  • Restlessness in the flock

Your chickens will also probably be reluctant to go into their coop at night because that’s where the mites are lying in wait. 

When checking your chicken coop for red mites, be sure to also check their perches or other chicken coop and run accessories. An easy way to check for red mites is by rubbing a white paper towel underneath the perches at night. If there are red mites, they will be on the underside of the perch after feeding on your chickens – you’ll see red streaks on your paper towel after coming into contact with them. 

Prevention

An ounce of prevention is worth a pound of cure. But, when it comes to red mites, that’s sometimes easier said than done. Wild birds or new chickens can transmit red mites to your flock. Check your chickens’ health regularly to make sure all flock members are feeling their best. 
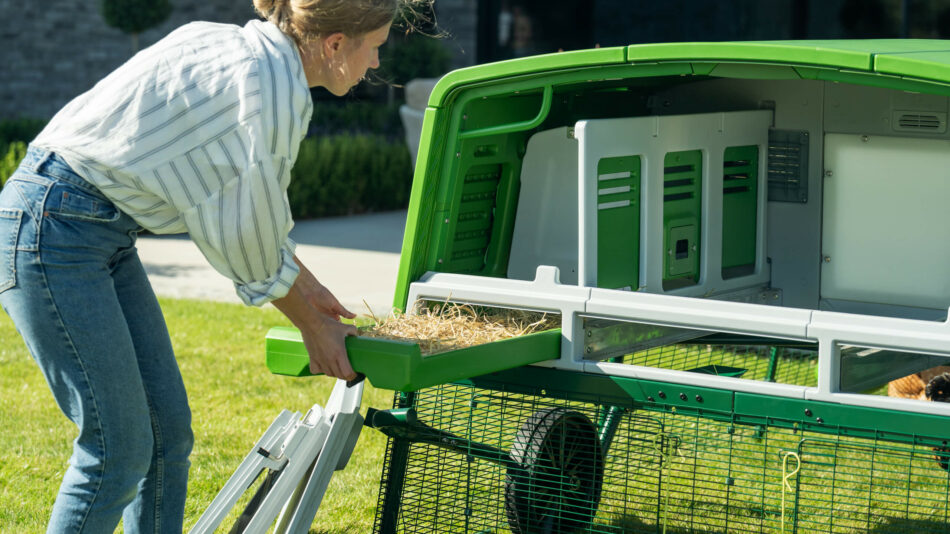
It’s also a good idea to check for red mites routinely when you clean your chicken coop and use some preventative measures. Diatomaceous earth as part of the weekly clean is helpful in preventing and killing mites (DE is a 100% natural powder which dehydrates parasites it comes into contact with). All types of chicken coops can get red mites – however wooden coops tend to experience the most infestations. 

Unfortunately, red mites can survive for up to 10 months in an empty hen house, so leaving a coop empty for a while doesn’t usually fix the problem. Choosing your housing carefully can help prevent infestations Omlet’s Eglu chicken coops are made from plastic which makes it very difficult for red mites to make a home. And in the event that there is a red mite infestation, they are quick and easy to clean. A quick blast with a pressure washer will be enough to send the mites packing. 

6 Ways to treat red mites 

1. Cleaning

If you find lots of red mites in the coop, it’s time for a deep clean. This type of cleaning will take several hours with a wooden chicken coop, but significantly less time with a plastic chicken coop. Remove all hens from the coop and strip it down as much as possible. Clean each part individually and allow for the coop and parts to dry completely. 

2. Mite disinfectant detergent

Mix a mite disinfectant detergent (such as Smite Professional Disinfectant 1L Concentrate or Barrier Red Mite X 500ml Concentrate) with water (using the manufacturer’s guidelines). Apply this to the coop, ensuring you get it in the cracks and crevices. Omlet’s Eglu chicken coops don’t have these awkward and accommodating spaces, making red mites much easier to control. Concentrate your efforts where there is the highest population of red mites. Leave for 15-20 minutes.
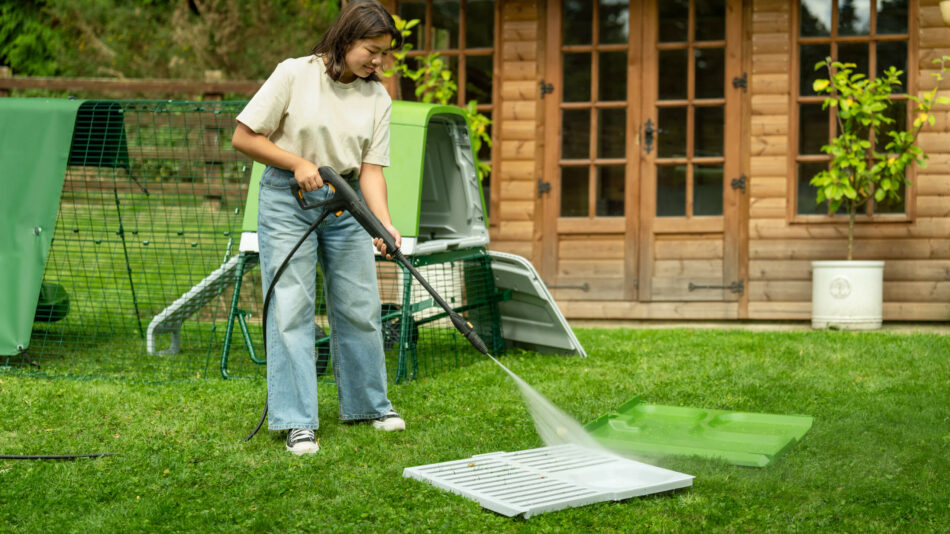
3.  High-pressure hose

Use a hose (preferably a pressure washer) to hose down the coop and the parts. Try to get in every nook and cranny, as this is where the mites like to hide. Leave for 10-15 minutes to dry. After this, you will most probably see more agitated mites crawling out. Repeat this process until there are very few mites emerging after each wash. Eglu chicken coops are made of heavy-duty plastic and are designed to be pressure washed with ease. One pressure wash will be enough to eradicate any existing mite population. 

4. UV

Leave the coop to thoroughly dry. It’s ideal to perform coop cleanings on a sunny day where UV rays can kill some of the bacteria. Put the coop back together and add bedding. Dispose of the old bedding in a plastic bag in the garbage – red mites will happily find somewhere else to live if given the opportunity. 

5. Red mite powder

Sprinkle your entire coop and your chickens with a red mite powder. Ensure you rub the powder onto the perches so that any remaining mites will have to crawl through it to reach your chickens. 

6. Repeat red mite powder treatment

Re-apply the red mite powder every couple of days or when it has rubbed off. Red mites are primarily active during mild weather, making peak seasons the spring and fall. They will lie dormant throughout the rest of the year, waiting for their next opportunity to emerge. 

Preventing red mites with Omlet 

Any chicken coop can fall victim to red mites, but with any easy-to-clean plastic chicken coop, you’ll be able to nip infestations in the bud. Our chicken perches can be removed easily for a thorough cleaning, and our plastic Chicken Swing offers a mite-resistant place to find relief. Don’t fall prey to red mites – take control with Omlet’s chicken products. 

Woman cleaning Eglu Go Up Raised Chicken Coop

No comments yet - Leave a comment

This entry was posted in Chickens


4th July Pet Prep #FireworkSafety

4th-july-infographic-v16

No comments yet - Leave a comment

This entry was posted in Dogs