How to prevent and treat red mite
A familiar problem for both backyard chicken keepers and commercial farms lies in how to prevent and treat red mite infestations. Compared to other poultry parasites such as fowl ticks, lice and flies – mites are by far the most common, destructive and difficult to remove. So why are these pests dreaded by chicken keepers? Learn more about these parasites and how to keep your flock protected.
WHAT ARE RED MITES?
Red mites, also known as Dermanyssus gallinae, are nocturnal parasites that hide themselves in gaps and cracks during the day, laying wait to wreak havoc on your flock at night. In fact, their feeding schedule is the main distinction between them and their cousins, the northern fowl mite. Red mites will only be seen on chickens at night, while other mites will be present on hens throughout the day. This makes them particularly tricky to catch in the act. And, at about 1mm in size, they’re very hard to see.
These mites earn the title of “red” because they turn from gray to crimson after they have had a blood meal. Red mites are most active during the warmer months, preferring a temperature range of 77-95°F. Their reproductive cycle is relatively short, with an adult hatching and maturing from an egg in as little as one week. Once an infestation takes hold, red mites can torment your hens indefinitely, and even survive for up to 10 months without feeding.
PREVENTING RED MITES
An ounce of prevention is worth a pound of cure. But, when it comes to red mites, that can be easier said than done. Wild birds or new chickens can transmit red mites to your flock, which is why it’s important to check your chickens’ health regularly to make sure all flock members are feeling their best.
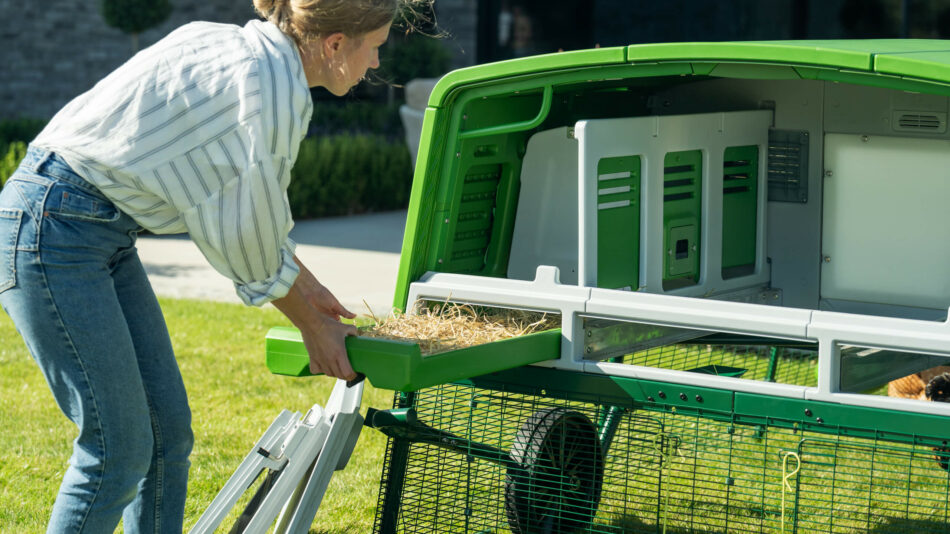
Change bedding frequently — at least once a week — to help prevent red mites. It’s also a good idea to check for red mites each time you clean your chicken coop. All types of chicken coops can get red mites, but wooden coops tend to experience the most frequent and severe infestations.
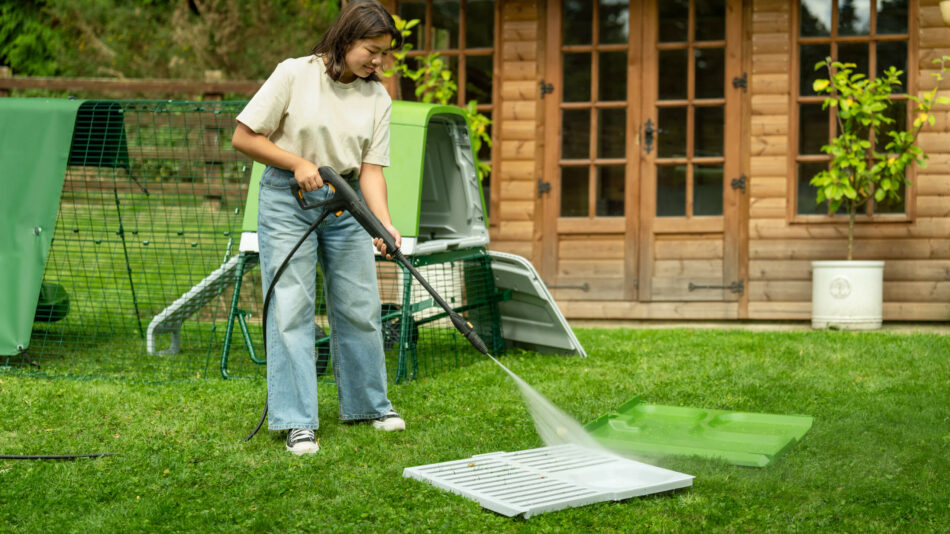
Choosing your housing carefully can help prevent red mites before they take hold. Omlet’s Eglu chicken coops are made from smooth plastic, which eliminates hiding places for mites. And in the event that there are red mites present, Eglu coops are quick and easy to clean. A quick blast with a pressure washer will be enough to send the mites packing.
SIGNS AND DIAGNOSIS
Red mites may be present, but may not be in populations high enough to cause symptoms. Once the infestation becomes significant, anemia will occur, your hens won’t be the picture of chicken health. Their wattles and the combs will appear pale and their egg production will drop significantly. Red mites also cause:
- Skin irritation
- Feather pecking
- Weight loss
- Restlessness in the flock
Your chickens will also probably be reluctant to go into their coop at night because that’s where the mites are lying in wait.
When checking your chicken coop for red mites, be sure to also check their perches or other chicken coop and run accessories. An easy way to check for red mites is by rubbing a white paper towel underneath the perches at night. If there are red mites, they will be on the underside of the perch after feeding on your chickens – you’ll see red streaks on your paper towel after coming into contact with them.
6 WAYS TO TREAT RED MITES
1. CLEANING
If you find red mites in the coop, it’s time for a deep clean. This type of cleaning will take several hours with a wooden chicken coop, but significantly less time with a plastic chicken coop. Remove all hens from the coop and strip it down as much as possible. Clean each part individually and allow for the coop and parts to dry completely.
2. TREAT THE COOP
Mix a chicken-safe insecticide* that is effective against mites with water using the manufacturer’s or your veterinarian’s guidelines. Apply directly to the coop, ensuring you get it in the cracks and crevices. Concentrate your efforts where there is the highest population of red mites. Leave for 15-20 minutes.
3. HIGH-PRESSURE HOSE
Use a hose (preferably a pressure washer) to hose down the coop and the parts. Try to get in every nook and cranny, as this is where the mites like to hide. Leave for 10-15 minutes to dry. After this, you will most probably see more agitated mites crawling out. Repeat this process until there are very few mites emerging after each wash. If you have an Eglu chicken coop, one pressure wash will be enough to eradicate any existing mite population.
4. UV
Leave the coop to thoroughly dry. It’s ideal to perform coop cleanings on a sunny day where UV rays can help dry the coop and kill remaining mites. Put the coop back together and add bedding. Dispose of the old bedding in a plastic bag in the garbage – red mites will happily find somewhere else to live if given the opportunity.
5. TREAT YOUR CHICKENS
Your chickens will need to be treated in order to break the red mite feeding and reproductive cycle. Many coop treatments can be applied directly to the flock as well, but it’s always a good idea to talk with your veterinarian before applying anything to your chickens. Diatomaceous earth (DE) is commonly seen as a home remedy for red mites, but is often not effective against an active infestation, and can be very irritating to your hens’ (and your) airway if inhaled. Always apply products according to their labeling, and for the full duration of treatment.
*Note: pesticides that are effective against red mites vary by location and have differing levels of efficacy due to building resistance. Contact your chickens’ veterinarian to obtain information for the best red mite treatment for your area.
PREVENTING RED MITES WITH OMLET
Any chicken coop can fall victim to red mites, but with an easy-to-clean plastic chicken coop, you’ll be able to nip infestations in the bud. Our chicken perches can be removed easily for a thorough cleaning, and our plastic Chicken Swing offers a mite-resistant place to find relief. Don’t fall prey to red mites – take control with Omlet’s chicken products.
This entry was posted in Chickens


