 FREE shipping on orders over $100
 20% off Black Friday
 180-day guarantee
How to Winterize a Chicken Coop: The Complete Fall Prep Guide
Winter is the most demanding season for backyard chicken keeping. Shorter days trigger molting and a sharp drop in egg production, water freezes before you’ve had your morning coffee, and predators grow bolder as natural prey becomes scarce. Most chicken keepers underestimate just how many things need attention before the temperatures really drop, and by the time the first hard frost arrives, it’s too late to deal with them comfortably. The good news is that a well-prepared coop makes winter manageable, and your flock will come through it in great shape. Work through this guide now, and get ready for winter.
Does a Chicken Coop Need to Be Heated in Winter?
The short answer is: probably not. Chickens are naturally cold-hardy animals, and a healthy adult flock roosting together generates significant body heat. Most breeds tolerate temperatures down to 20°F (-6°C) without any supplemental heat at all.
The real danger in winter isn’t cold, it’s damp and drafts. A dry, draft-free coop at 15°F is genuinely safer for your flock than a wet, poorly ventilated one at 35°F. Moisture and ammonia from droppings are what cause frostbite and respiratory problems, not the cold itself.
That said, there are exceptions. Cold-sensitive breeds like Silkies or Frizzles, as well as elderly or unwell birds, may need a little extra warmth. If you do need to add heat to a wooden coop, use a flat panel radiant heater mounted securely on the wall. Heat lamps are the leading cause of coop fires and should be avoided.
Why a Heated Coop Can Work Against You
There’s another reason to think twice before reaching for a heater. A warm coop can become so appealing that your chickens refuse to go outside, which means they’re not eating, drinking, or getting the natural light they need. This is because the temperature contrast between inside and outside becomes more extreme, making every trip out a shock to their system.
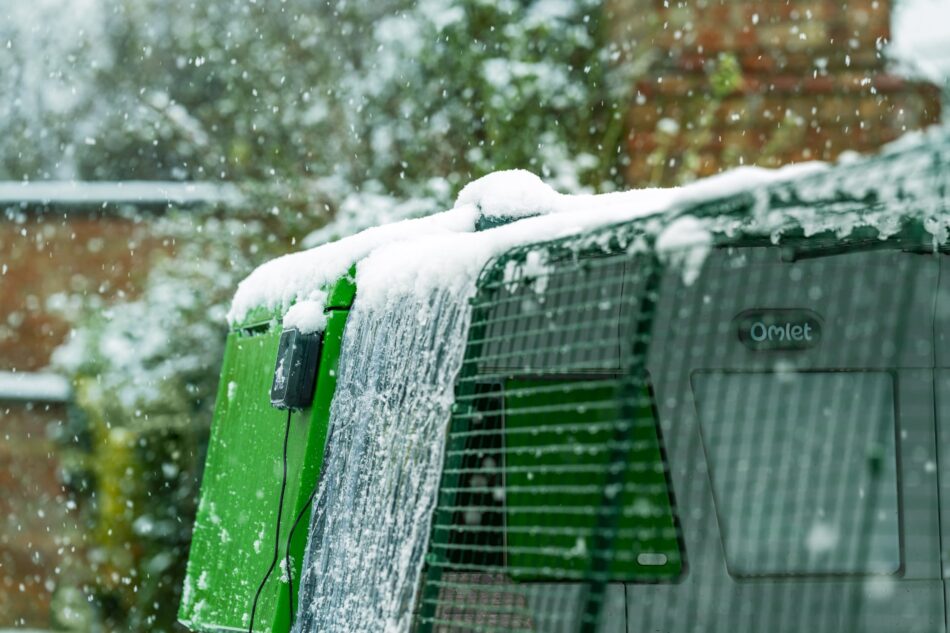
Eglu chicken coops use twin-wall insulation that traps your flock’s own body heat effectively inside the coop, keeping the interior comfortable through winter without any supplemental heating required. It’s a smarter solution than adding heat to a structure that wasn’t designed to retain it.
Ventilation: The Most Important Thing to Get Right
When the weather turns cold, the instinct is to seal everything up and keep the warmth in. This is the single biggest mistake you can make. A tightly sealed coop allows ammonia from droppings and moisture from your flock’s breath to build up rapidly, and this combination is far more damaging to your chickens’ health than cold air.
Good ventilation doesn’t mean your chickens are sitting in a draft. It means fresh air is moving through the coop at a level above where your flock roosts. Ventilation openings should be positioned high on the walls or angled up at the roof so cold air doesn’t blow directly onto sleeping birds.
Signs Your Coop Isn’t Ventilating Properly
Watch for these warning signs, especially in the first cold weeks of the season:
- Condensation forming on the interior walls
- A strong ammonia smell when you open the coop door
- Frost forming on the inside of the coop
- Respiratory sounds or watery eyes in your flock
If you notice any of these, increase airflow immediately, even if that means briefly tolerating a slightly colder interior temperature. Poor ventilation causes more harm, faster, than cold air alone.
The Eglu Pro features adjustable vents that let you fine-tune airflow without creating cold drafts at roost level, giving you precise climate control through even the harshest winter weather.
The Fall Deep Clean: How to Do It Properly
Before winter sets in, your coop needs a thorough deep clean. This isn’t just good hygiene; it removes the red mite hiding spots, bacteria, and damp bedding that become serious problems once you’re in the cold months and the coop is closed up more often.
Step-by-Step Deep Clean
Work through this in order for the best results:
- Strip everything out. Remove all bedding, feeders, drinkers, perches, and nest box liners completely.
- Scrub all surfaces. Use a stiff brush and hot water, paying close attention to corners and joints. In wooden coops, these are the spots where red mites burrow in and overwinter.
- Disinfect. Apply a poultry-safe disinfectant after scrubbing. Don’t skip this step even if the coop looks clean.
- Dry completely. This is critical. Allow the coop to dry fully before adding fresh bedding. Damp bedding in winter is a recipe for respiratory issues. Try to do your deep clean on a sunny day so a wooden coop has every chance to dry out properly.
- Inspect for damage. Check for cracks, gaps, and any damaged hardware cloth that could let predators in or cold drafts through. Complete any repairs before temperatures drop.
For wooden coop owners: deep cleaning properly takes well over an hour, and the rough surfaces mean you can never be fully confident you’ve removed every mite. Consider upgrading to a plastic coop now for an easier winter. Eglu coops have smooth, wipe-clean surfaces that take 10 minutes to deep clean, and require no maintenance to stay weatherproof and secure through winter.
Bedding for Winter: What Works and What Doesn’t
The right bedding choice makes a real difference in winter. You want something that insulates well, stays dry, and doesn’t create a mold problem if it gets a little damp.
The Best Options
Large-flake wood shavings are the most reliable all-round choice. They trap air pockets that retain warmth, dry out faster than straw, and are easy to spot-clean. Switch to these if you’re using a finer material in warmer months.
Straw works well as a secondary layer, particularly for lining nest boxes in winter. It provides excellent insulation, which matters when you’re trying to prevent eggs from freezing before you collect them.
The deep litter method is worth considering if you have a larger coop. Build up layers of carbon-rich bedding to 6 to 12 inches deep and allow it to compost slowly. The composting process generates gentle warmth from below, which is a natural and effective way to take the edge off the cold.
What to Avoid
- Hay as primary bedding. It molds quickly when it gets damp, and damp bedding in a cold coop is one of the fastest routes to respiratory illness.
- Thin or sparse bedding. Aim for a minimum of 4 inches across the coop floor in winter.
Whatever you’re using, spot-clean daily and replace fully every 2 to 4 weeks depending on your flock size. Keeping bedding dry is more important in winter than at any other time of year.
One more winter bedding tip: line your nest boxes with extra straw and collect eggs at least twice a day when temperatures drop below freezing. Eggs left in the nest box overnight in a hard frost will crack.

Keeping Water From Freezing
Dehydration is a serious risk for chickens year-round, and it becomes even more pressing in winter when water sources freeze. A chicken that can’t access water will stop eating, stop laying, and become vulnerable to illness quickly. Checking and managing your waterers is one of the most important daily winter tasks.
Practical Steps for Freeze-Free Water
- Fill waterers with warm water in the morning to slow the rate of freezing.
- Place waterers in the sunniest part of the run during the day to take advantage of any solar warmth.
- Bring waterers inside overnight if temperatures are forecast to drop below freezing.
- Check waterers first thing every morning, every single day, and again throughout the day if temperatures are below freezing.
Never add salt to drinking water to prevent freezing. Even small amounts are toxic to chickens.
The Smarter Solution
The Omlet Insulated Chicken Waterer keeps water fluid down to 10°F for up to 10 hours, which covers you for a whole day in freezing conditions without multiple checks and ice interventions. It’s one of the most practical upgrades you can make before winter. Without an insulated waterer, you’ll need to swap out frozen water multiple times a day during cold snaps, and the gaps in between are when dehydration becomes a real risk.
Managing the Run in Fall and Winter
A muddy run is one of the most underestimated hazards of the colder months. Mud harbors bacteria, strips the insulating oils from your chickens’ feathers, and creates the conditions for bumblefoot, a painful foot infection that’s common in flocks spending time on wet ground. Keeping the run dry and usable through fall and winter takes a little planning but pays off enormously.
Covering the Run
Fitting a weatherproof cover over the roof and at least part of the sides of your run is one of the most impactful changes you can make. It maintains a dry area where your chickens can scratch, move around, and behave normally even during wet weather.
Choose a transparent cover where possible. Chickens are reluctant to go outside in dim conditions, and a solid cover that blocks light will keep your flock huddled inside rather than out in the fresh air. Transparent run covers let daylight through while blocking rain and snow, which encourages normal activity levels. Browse Omlet’s chicken run covers for options designed to fit Eglu runs precisely.
Run Floor Management
Even with a cover overhead, the run floor needs attention. Add a thick layer of wood chips, sand, or straw to improve drainage and give your chickens something dry to stand on. Refresh this layer regularly through the wet months to keep conditions underfoot clean and comfortable.
Molting: What’s Normal and How to Support Your Flock
Just as you’re preparing for cold weather, your chickens are going through one of the most physically demanding processes of their year. Molting typically begins in September or October as daylight hours shorten, and it lasts anywhere from 8 to 12 weeks. During this time, your hens divert all their protein resources into regrowing feathers, and egg production stops almost entirely. This is completely normal.
A molting hen can look alarming if you haven’t seen it before. Patchy feathers, bare skin around the neck and back, and a generally bedraggled appearance are all typical. Resist the urge to intervene beyond the basics below.
How to Support a Molting Flock
- Increase protein intake. Bump your flock’s diet from the standard 16-18% protein up to 20-22% during the molt. High-protein treats like mealworms, sunflower seeds, or a purpose-made molt feed can help.
- Handle birds as little as possible. New pin feathers are filled with blood vessels and are extremely sensitive. Handling a molting hen causes real discomfort, so keep interactions minimal.
- Don’t introduce new birds. Adding new flock members during a molt puts extra stress on everyone. The combination of integration stress and molting can suppress immune function. Wait until the molt is complete.
- Keep the coop extra dry. Bare skin is more vulnerable to cold and damp than feathered skin, so good bedding and ventilation matter even more than usual during this period.
Predator-Proofing for Winter
Predator pressure increases significantly in winter. As natural prey becomes scarce, foxes, raccoons, and hawks all become more desperate and more determined. A setup that was secure enough in summer may not hold up when a hungry predator is really trying.
Checking Your Perimeter
Before the cold weather settles in, inspect the entire perimeter of your run carefully:
- Look for gaps, lifted edges, or any damaged mesh. Raccoons can squeeze their paws through surprisingly small holes, so be thorough.
- Check that hardware cloth is intact. Hardware cloth is far more secure than chicken wire, which foxes can tear through with their teeth and jaws. If you’re still using chicken wire in any part of your run, this winter is the time to upgrade.
- Examine the base of the run for any signs of digging attempts or weakened edges.
- Upgrade to a heavy duty steel mesh run now so you know your hens are safe and secure even when you’re not around.
Checking Your Automatic Door
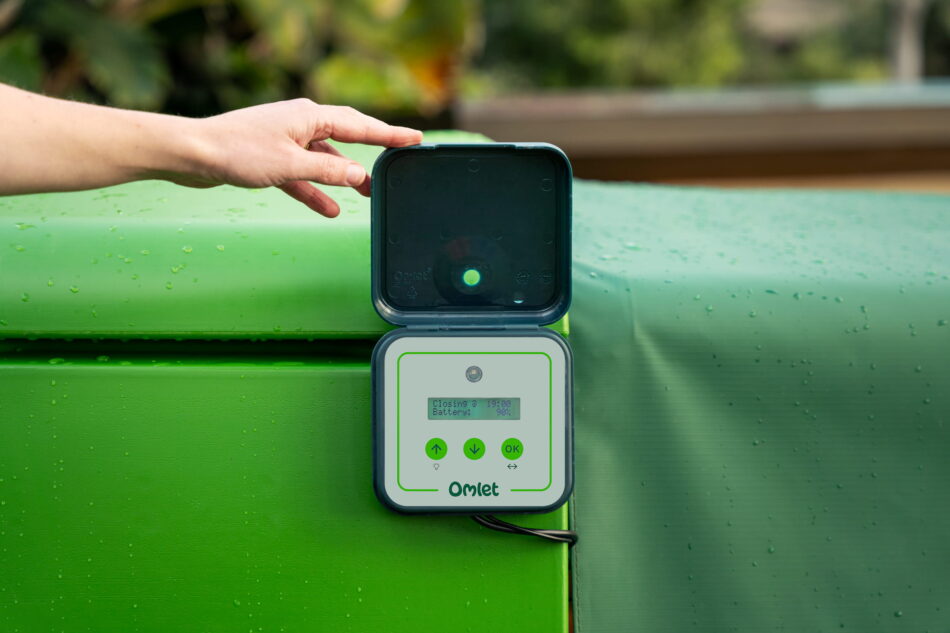
Your Omlet Smart Automatic Chicken Coop Door is one of your most important pieces of winter security equipment. Check the battery status, clean away any debris from around the door mechanism, and make sure the safety sensor is clear and functioning correctly.
One important seasonal adjustment: shorter winter days mean your flock goes to roost earlier. If your autodoor is set to close on a timer rather than a light sensor, update the closing schedule now to match the earlier dusk. Chickens locked out in the dark are vulnerable. If you’re using the light sensor setting, this adjustment happens automatically over the course of the season, which is one of the best reasons to use it.
Your Winter-Ready Coop Checklist
Work through this before the first hard frost and you’ll have covered everything that matters:
- Deep clean completed and coop fully dry before adding fresh bedding
- Ventilation openings clear and positioned above roost height
- Hardware cloth and all entry points checked for gaps
- Bedding switched to large-flake wood shavings or straw, minimum 4 inches deep
- Run covered with a weatherproof, transparent cover
- Insulated waterer in place to keep water fluid through the freeze
- Autodoor schedule adjusted for shorter days, or light sensor confirmed active
- Protein-rich feed or supplements on hand for molt support
- Egg collection schedule increased to at least twice daily to prevent freezing
Omlet and Your Flock This Winter
Every product Omlet makes is designed to remove the friction points that make winter chicken keeping stressful. The result is a setup that largely takes care of itself, even on the coldest mornings.
- The Eglu’s twin-wall insulation traps your flock’s body heat effectively, meaning no supplemental heat is required and no fire risk from heat lamps.
- The Omlet Smart Automatic Chicken Coop Door can be set to open and close on a light sensor, so it adjusts automatically as the days get shorter without you needing to update a timer.
- The Omlet Insulated Chicken Waterer keeps water fluid down to 10°F for 10 hours, so you’re not breaking ice multiple times a day.
- Smooth Eglu surfaces mean no maintenance and no red mite hiding spots, and the whole coop takes minutes to clean rather than hours.
Winter chicken keeping doesn’t have to be a chore. Get the setup right now, and your flock will thrive through even the toughest months.
This entry was posted in Chickens